Unknown's avatar

About skibootsinthekitchen

I love to cook, eat, travel, & drink wine. I enjoy mountain activities of all kind. Come have a bite with me! www.skibootsinthekitchen.com

Russian Borscht

IMG_1199RB
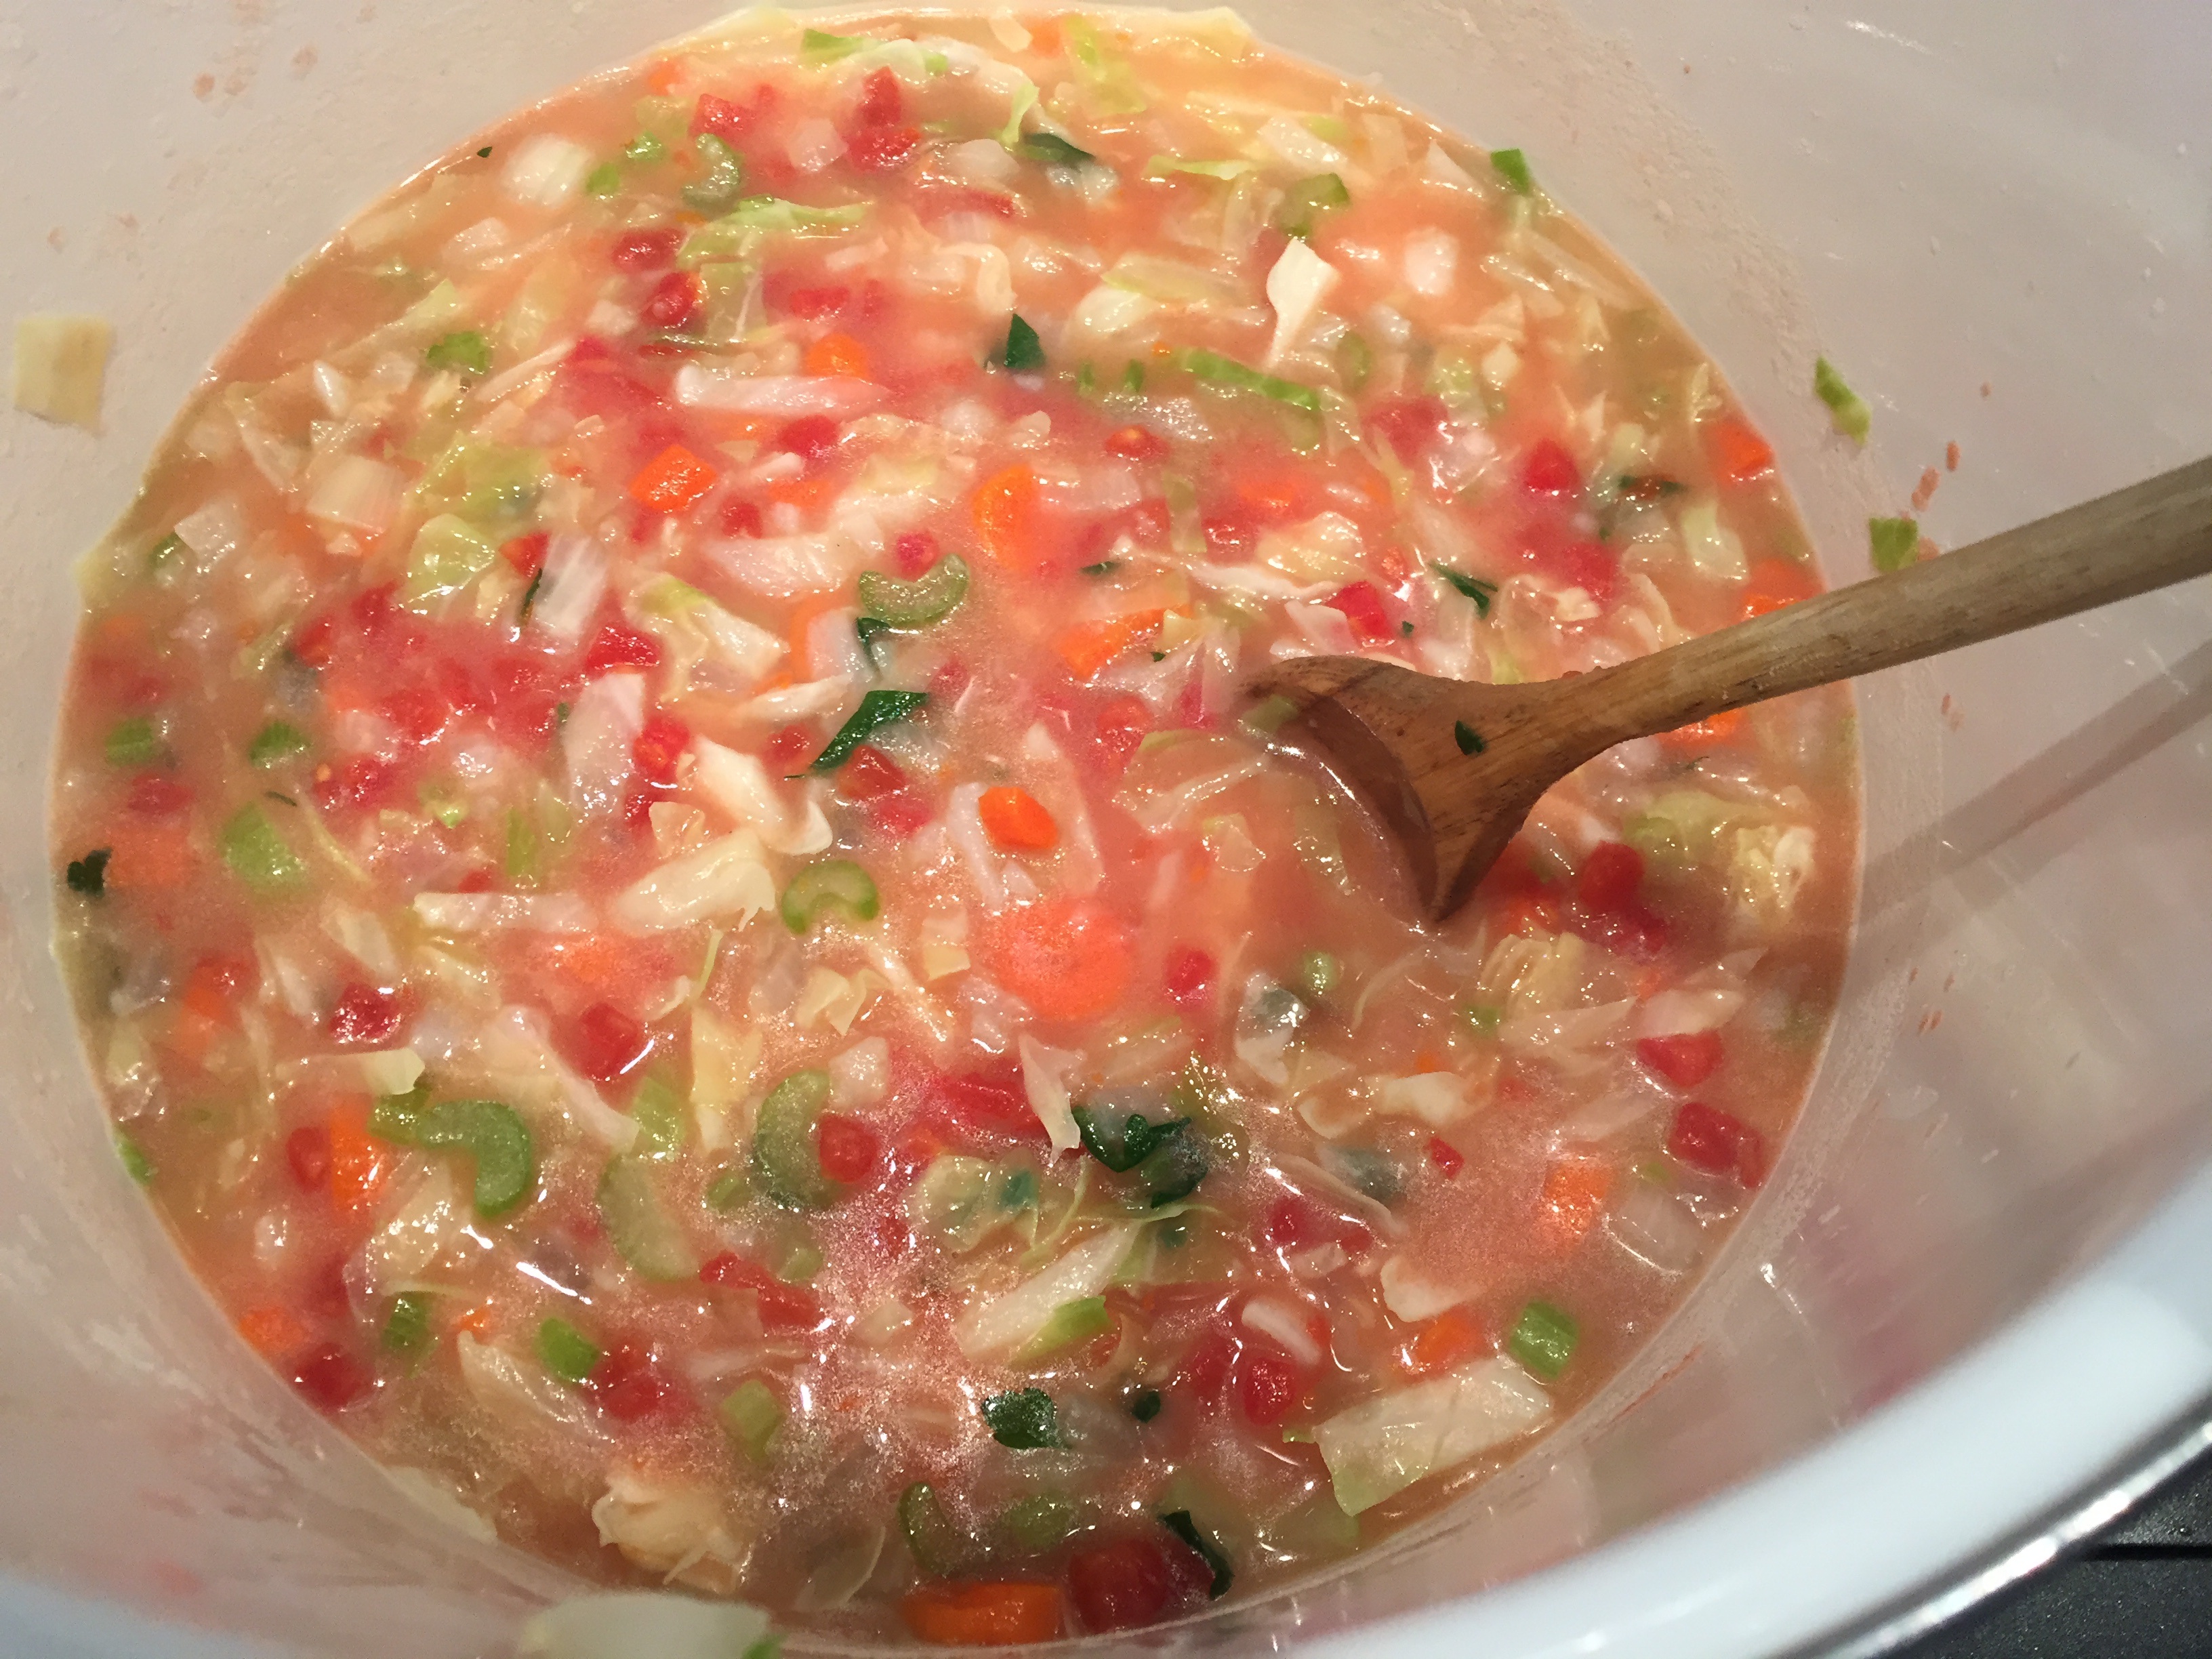
While the east coast was getting slammed with snow and cold weather over the last few weeks, we have been enjoying spring in Park City… Until Sunday! All of the sudden the cold weather and snow came roaring back and winter is here once again. Most people think of classic borscht as the bright red beet borscht however this recipe is a quite different. IMG_1195This borscht is still packed with lots of delicious vegetables but has a rich buttery flavor instead of the more vinegary base of beet borscht. Extra bonus… this recipe wont stain your clothing and pots like beet borscht! Don’t be fooled by this seemly light vegetable soup, it is very very filling! The base of the soup is potato and carrots which makes it a little more substantial then you’d think! Enjoy! IMG_2083Ingredients:

  • 5 large potatoes, peeled and cut into 1′ pieces
  • 5 large carrots, peeled and chopped
  • 3/4 cup butter
  • 1 large sweet onion
  • 1 small green cabbage, coarsely chopped
  • 5 celery stalks, sliced
  • 4 garlic cloves, sliced
  • 1/3 bunch of parsley, chopped
  • 2 14.5oz cans petite diced tomatoes
  • 3 cups of chicken broth (or vegetable broth)
  • 1 teaspoon salt and pepper (plus more to taste)
  • Sour cream for garnish (optional)

Directions:

  1. Add potatoes and carrots to a large stock pot and add enough water to cover the vegetables completely. Bring to a boil, stirring occasionally, until the potatoes and carrots are very tender.
  2. Using a hand held potato masher, mash the carrots and potato into small pieces creating thicker potato based water.
  3. Meanwhile in another large pot melt the butter. Saute the onion, cabbage, celery, garlic, and parsley until the cabbage has wilted and the vegetables are tender.
  4. Add the cabbage mixture to the pot with the potatoes and carrots, then add the chicken stock and petite diced tomatoes.
  5. Bring to a boil and then reduce the heat and simmer for 30minutes.
  6. Season to taste with salt and pepper. Serve with a dollop of sour cream and crusty bread!

Chicken Gyros with Tzatziki and Cucumber Salsa

IMG_2087Wow! its been a while since I’ve posted a new recipe! I’m so sorry but I have to admit life has been a little busy here in Utah! First there was the craziness of Sundance (it was a blast and I saw some amazing films!) Then my husband and I bought a house! Wouldn’t you know that the perfect place would come on the market at our busiest time of year! but is there really ever a good time to move? It really is a huge pain in the ass. Packing and boxing everything up and having no idea where anything is, it’s so frustrating!! I was without a kitchen for almost a week. IMG_2030But then I was greeted with a beautiful kitchen! My favorite part of it all… It has a gas stove!! I grew up cooking on a gas stove and I’ve been spoiled with how awesome it is, so I was beyond excited about that aspect. IMG_1998Here is a picture of my family enjoying our first meal in the new house, it was a really wonderful night. So after all that moving I’ve been a little tired and not really feeling like I want to cook. I’ve been looking for some easy recipes that are done in under 30minutes so I can get back to unpacking and setting up the new house. Back to my favorite staple, the rotisserie chicken… but seriously, is there anything better than rotisserie chicken? the meat is so tender and delicious plus it is SO easy. Adding rotisserie chicken to these chicken gyros make them irresistible, espically when you top it all off with some home made tzatziki and cucumber salsa. So if you’re ready to get your Greek on… here we go! Enjoy.

Chicken Gyros with Tzatziki and Cucumber Salsa (Serves 4)

Ingredients:

  • 1 Cucumber, peeled and diced
  • 1 teaspoon lemon juice
  • 2 garlic cloves, minced
  • 1 pint grape tomatoes, quartered
  • 1/2 small red onion, diced
  • 1/3 cup flat leaf parsley, chopped
  • salt and pepper to taste
  • 2 tablespoons olive oil
  • 1 teaspoon dried oregano
  • 1 teaspoon dried rosemary crumbled
  • 1 rotisserie chicken, meat removed and shredded
  • 1 bag (4 or more) of pocketless pita rounds or naan

Directions:

  1. Make the Tzatziki dip and chill for 1-2 hours (directions and ingredients below. this can be made up to 24 hours in advance) You don’t have to chill the dip for 2 hours but I think the flavors are better when it sits for longer
  2. Preheat oven to 300 degrees
  3. Combine the diced cucumber, onion, tomatoes, parsley, 1 teaspoon of lemon juice and 1/2 teaspoon of salt and pepper in a medium bowl and toss to combine. set aside.
  4. In a medium skillet, combine olive oil, garlic, rosemary and oregano until garlic becomes fragrant about 1-2 minutes. Meanwhile place the pita pockets in the oven to head. Add shredded chicken to the pan and toss to coat with garlic oil for about 30 seconds. Remove from heat.
  5. Place the cooked chicken, tzatziki and cucumber salsa on a warm pita pocket, serve immediately. Enjoy!

Tzatziki Dip

Ingredients:

  • 3 Tablespoons Olive Oil
  • 1 Tablespoon white wine or champagne vinegar
  • 2 gloves garlic, minced or pressed using a garlic press
  • 1/2 lemon, juiced
  • 1/2 teaspoon salt (more to taste)
  • 4-5 turns of fresh pepper
  • 1 cup Greek yogurt
  • 1 cup sour cream
  • 2 cucumbers, peeled, seeded and diced (smaller is better)
  • 1 1/2 teaspoons chopped fresh dill (I use freeze dried sometimes too)

Directions:

  1. In a small bowl, combine olive oil, vinegar, lemon juice, garlic, salt and pepper. Mix to combine, set aside.
  2. Peel cucumbers and slice them lengthwise. Using a spoon, scoop the seeds from the flesh and discard them. Diced the cucumber into small bite size cubes.
  3. In another medium bowl, use a whisk to blend yogurt with sour cream.
  4. Add the olive oil mixture to the yogurt mixture and stir until none of the oil remains.
  5. Fold in cucumber and dill until fully incorporated. Chill for 1-2 hours before serving.


Park City Peanut Chicken and Rice

IMG_0993Howdy Ski Boots followers! I am sorry for the lack in posts lately, life has been a little busy! More on that later! I was just recovering from the craziness of the holidays and now Sundance has descended on Park City! It’s going to be 10 wild days of films, parties and lots of celebrity sitings! Last year I got to meet my cooking idol Giada! I’ll keep you posted on all the fun people I get to meet this year! When life gets busy, no one has a lot of time to spend on dinner and cooking.

This recipe for peanut chicken is so delicious plus its easy and quick! Everything you’ve always wanted from a meal. The recipe is originally one of Rachael Ray’s but her version was called Park City Cashew Chicken. I’ve made a few tweaks and since I am allergic to cashews, I decided to used peanuts instead. Happy Sundancing everyone and bon appetit!

Park City Peanut Chicken (Serves 4)

Ingredients:

  • 3 tablespoons vegetable oil
  • 1 tablespoon unsalted butter
  • 1 large onion, divided, 1/4 finely chopped, 3/4 thinly sliced
  • 1 1/2 cups Botan Calrose Rice (Japanese sticky rice)
  • 3 cups chicken stock or low-sodium chicken broth
  • 2 pounds chicken meat (tenders; skinless, boneless breasts; skinless, boneless thighs), cut into 2-inch pieces
  • 2 tablespoons grill seasoning blend, such as McCormick Montreal Steak Seasoning
  • 2 – 3 tablespoons dark soy sauce, such as tamari
  • 4 garlic cloves, chopped
  • 1 red bell pepper, seeded and thinly sliced
  • 3 tablespoons canned chipotle chiles in adobo sauce, finely chopped
  • 1 tablespoon ground cumin
  • 2 tablespoons honey
  • 1/4 cup pure maple syrup
  • 2 – 3 tablespoons cilantro leaves, chopped
  • 1 cup raw peanuts

Directions:

  1. In a medium saucepan over medium heat, combine 1 tablespoon of the vegetable oil and the butter. When the butter melts into the oil, add the 1/4 chopped onion and cook for 2 minutes, then add the rice and cook for 3 minutes more. Add the chicken stock and cover the pot. Raise the heat and bring the stock to a rapid boil. Once the stock boils, reduce the heat to low and cook, stirring occasionally, until the rice is tender, about 18 minutes.
  2. While the rice cooks, make the chicken. Heat a large skillet over high heat. Season the chicken with the grill seasoning. Add the remaining 2 tablespoons of vegetable oil and then the chicken. Brown the chicken on both sides, season with the soy sauce, then move the chicken to 1 side of the pan. Add remaining sliced onion, garlic and bell pepper. Cook for 2 to 3 minutes, then mix the vegetables and chicken together and add the chipotle chiles and cumin. Toss to coat. Glaze the chicken mixture with the honey and maple syrup and turn off the heat. Add the chopped cilantro and the peanuts.
  3. Spoon the rice into bowls, top with the peanut chicken and serve.

Creamy Black Bean Soup

IMG_0423Happy New Year! I hope everyone had a safe and FUN holiday! I know I did! Even though it was super cold over Christmas (I’m talking Northern New England kind of cold) it was beautiful and the skiing was great! Now that the holiday rush is over… everyone is SICK! Turns out that flu shot you got this year was the wrong strain of flu and now you’re screwed (and sick as a dog). So between the cold weather and all my friends being sick, I thought it would be nice to make some feel better soup!!

This black bean soup recipe is one of my favorites. It’s so easy and its ready in no time. A few other bonuses… its vegan (shhhh don’t tell anyone because they won’t be able to tell, its so delicious!!!) it’s dairy free (if you’re crazy enough to leave off the dollop of sour cream) its gluten free and its filling! Seriously, this soup is a meal on its own! So if you’re feeling a little under the weather, throw on a pot of this soup, you’ll be enjoying it in no time!! Cheers to 2015!

Creamy Black Bean Soup (Serves 8-10)

Ingredients:

  • 1/4 cup olive oil
  • 1 large onion, chopped
  • 1 red bell pepper, chopped
  • 2 garlic cloves, chopped
  • 1 14.5oz can diced tomatoes and their juices
  • 1 4oz can diced green chilies
  • 1 tablespoon dried thyme, crumbled
  • 4 16oz cans black beans, drained and rinsed
  • 2 cups (or more) canned low salt vegetable or chicken broth (if you don’t want it to be vegan/vegetarian)
  • Sour cream, sliced green onions and diced avocado for garnish

Directions:

  1. Heat oil in a large heavy stock pot over medium heat. Add onion, bell pepper and garlic and saute until onion is translucent, about 10 minutes.
  2. Mix in tomatoes with their juices, chilies, and thyme.
  3. Reduce heat to low and simmer until vegetables are very soft, about 10 minutes more. Add beans and 2 cups of broth.
  4. Puree soup in batches or using an immersion blender, blend until smooth. Return soup to pot and bring to a simmer.
  5. Thin with additional broth if necessary until soup reaches desired consistency. Season to taste with salt and freshly ground pepper.
  6. Garnish with sour cream, green onions and avocado.

Chocolate Peppermint Bark

IMG_1159Happy Monday! Hope you had a wonderful weekend and got all your Christmas shopping done… because Christmas is a week from Thursday, Oh My! Trying to find the perfect gift for co-workers, friends or neighbors is difficult, which is why I think food is always a safe bet! Delicious, homemade, baked with love, treats! I mean seriously, who doesn’t love a gift they can eat? Its better than an ugly pair of socks or an awkward Christmas tree ornament you’ll feel obligated to hang on your tree for the next 10 years.

After reading this hilarious article, 2014 Hater’s Guide to The Williams-Sonoma Catalog, I learned just how expensive chocolate peppermint bark is when you purchase it from the designer brand Williams Sonoma… $30 per tin!!! That’s right, I can almost fill my car with gas for the same price. Unless their bark has flecks of gold in it or it was literally made by elves in the North Pole, there is NO reason you should pay that much for candy.IMG_1147 I took it as a challenge to make an equally delicious, wait no, an even BETTER bark than WS, and I’m pretty sure this recipe takes the cake. Creamy, rich, chocolate ganache sandwiched between two layers of silky white chocolate and topped with crunchy peppermint candy. Are you drooling yet? Forget the cookies, Santa wants peppermint bark this year! Enjoy! IMG_1163

Chocolate Peppermint Bark (Makes 30-35 pieces)

Ingredients:

  • 20 ounces good white chocolate, coarsely chopped, divided
  • 15 peppermint candy canes, crushed, divided
  • 12 ounces good dark chocolate, coarsely chopped
  • 6 tablespoons heavy cream
  • 1 teaspoon peppermint extract

Directions:

  1. Turn a 9×12 inch baking sheet bottom side up. Cover securely with foil.
  2. Melt half of the white chocolate (I used Ghirardelli) in the top of a double boiler over just barely simmering water, stirring frequently. If you do not have a double boiler you can use a Pyrex bowl over a pot of boiling water, see picture above.
  3. Spread the white chocolate evenly on to the prepared pan. Sprinkle with 1/4-1/3 of the crushed peppermints evenly over the white chocolate. Chill until firm, about 15 minutes.
  4. Meanwhile, melt dark chocolate, heavy cream and peppermint extract together in the top of a double boiler like you did with the white chocolate. Quickly pour the dark chocolate over the chilled white chocolate layer; spread evenly. Chill until firm about 20 minutes.
  5. Finally, melt the remaining white chocolate in the double boiler, stirring frequently. Spread white chocolate over the layers of chocolate. Sprinkle with remaining peppermint pieces; chill until very firm about 1 hour. Cut or break into small pieces and serve!

Zucchini “Latkes”

FullSizeRender-3It’s starting to feel a lot like the holidays around Park City. Every night I notice a new house lit up with festive twinkly lights. You know it’s almost Christmas when you spend your whole weekend dodging cars on the highway with Christmas trees loosely tied to the roof. If only we had a few inches of snow to blanket the ground, it would really feel like winter. For those people celebrating Christmas, there are still have two weeks to deck the halls and plan menus. Hanukkah, however, starts Dec. 16, and in the words of Adam Sandler, “Instead of one day of presents, we have eight crazy nights.” That also means eight nights of food… Yikes! Time to get planning on that menu of yours! One of the most classic Hanukkah dishes is potato latkes, delicious little potato pancakes topped with sour cream or other yummy toppings of your choice.

IMG_1085This year, I wanted to put a fresh twist on this classic dish and lighten it up with a fewer carbs and calories. Growing up my mother used to make zucchini fritters in the summer with fresh zucchini from our CSA. She would top them with plain Greek yogurt and applesauce. I took her recipe for fritters and added my own twist by incorporating leeks and green onions for a little something extra.

IMG_1075One thing I refuse to change is topping them with yogurt and applesauce. So, if you’re looking to mix it up a little this year and wow your family, substitute these fritters for your traditional latkes, just be sure to make a double batch, because everyone will be asking for more. From my mountain kitchen to yours, happy holidays to all!

For more recipes from Ski Boots in the Kitchen click Here or like me on Facebook and Instagram.
Originally posted by Ski Boots in the Kitchen on Dishing PC

Zucchini Fritters (Makes 10 fritters)

Ingredients:

  • 2 medium zucchini, shredded
  • 1 teaspoon coarse or Kosher salt, plus extra to taste
  • 2 scallions, split lengthwise and sliced thin
  • 1/2 cup thinly sliced leek (split lengthwise and sliced thin)
  • 1 large egg, lightly beaten
  • Freshly ground black pepper
  • 1/2 cup all-purpose flour
  • 1/2 teaspoon baking powder
  • Olive or another oil of your choice, for frying
  • Non-Fat Greek yogurt & apple sauce for serving

Directions:

  1. Preheat the oven to 200 degrees to keep fritters warm.
  2. Trim ends off zucchini and grate them either on the large holes of a box grater or, if you have one, using the shredding blade of a food processor.
  3. In a large bowl toss the shredded zucchini with 1 teaspoon coarse salt and a set aside for 10 minutes. Wring out the zucchini by pressing it against the holes of a colander with a wooden spoon to remove some of the water. This is an important step as it will keep the fritters from getting soggy.
  4. Return the shredded zucchini to the bowl. stir in scallions, leeks and egg. season with salt and pepper. In another dish mix together flour and baking powder. Sprinkle flour mixture over zucchini and mix well.
  5. Heat 2 tablespoons of oil in a large skillet. Drop a spoonful of the zucchini mixture into the skillet, (don’t over crowd the pan with too many fritters) using the back of a spatula flatten the fritter slightly. Cook them over medium-high heat until the edges of the fritter are golden brown, about 3-4 minutes. Flip and fry on the other side for the same amount of time until golden brown.
  6. Transfer to a baking sheet and keep warm in the oven while you finish the rest of the batter.
  7. Top with a dollop of yogurt and apple sauce, enjoy!

White Chicken Chili

IMG_0408I am very excited to share that I am now writing a weekly column for a new magazine and food blog in Park City called Dishing PC. They are a food-lovers guide to great dining around Park City and the Wasatch front. If you are looking for fun food related activities, recipes or happenings around town, check out there website! This recipe for white chicken chili is my first post for them! I hope you enjoy!

Winter puts me into a soup and chili frenzy, I could literally eat the stuff for every meal! Especially on those super cold days, there is nothing better than warming up with a big bowl of chili after a long day skiing or riding on the mountain, right? In my eyes, a key component to enjoy that bowl of chili… is keeping the cooking a prep time to a minimum! I want more time cruising around the mountain or enjoying an apres drink with friends, not cooking in the kitchen! Fear not, this creamy chicken chili recipe is quick, easy and super delicious, so you can get that last run on the mountain or linger for one last apres drink! This chili gets part of its creaminess from pureeing some of the beans with the chicken stock which gives it a thicker and healthier base. In under an hour you have a yummy dish that will feed and please a crowd! Happy eating!

White Chicken Chili (Serves 6-8)

Prep & Cook Time: 50 minutes

What You’ll Need:

  • 1 pound boneless skinless chicken breasts, cut into 1/2- inch cubes
  • 1 medium onion, chopped
  • 1 1/2 teaspoons garlic powder
  • 1 tablespoon canola oil
  • 3 15.5oz cans great northern beans, rinsed and drained (keep 1 can separate)
  • 1 can 14.5oz chicken broth
  • 2 cans, 4oz each, chopped green chilies
  • 1/2 pound mushrooms, sliced
  • 1 teaspoon salt
  • 1 teaspoon ground cumin
  • 1 teaspoon dried oregano
  • 1 teaspoon pepper
  • 1/4 teaspoon cayenne pepper
  • 1 cup sour cream
  • 1/2 cup heavy whipping cream
  • shredded cheese for serving

What You’ll Do:

  1. In a large saucepan, saute chicken, onion and garlic powder in oil until chicken is no longer pink. Meanwhile, in a blender, blend 1 can of beans and 1 can of chicken broth until smooth, add to chicken and onion mixture. Add the two remaining cans of beans, mushrooms, chilies and seasonings to the pot and bring to boil. Reduce heat; Simmer uncovered for 30-40 minutes.
  2. Remove from heat and stir in sour cream and cream. Be sure to do this after you have removed the chili from the heat or it will curdle.  Top with shredded cheese and more sour cream if you desire. Enjoy!

For more delicious recipes check out Ski Boots in the Kitchen blog at www.skibootsinthekitchen.com or follow me on Facebook and Instagram

Paleo Cornbread Minus the Corn

IMG_0513Good Morning! It’s another chili morning here in Park City- I was all ready to post another soup recipe because that is basically what I have been living off the last two weeks. Soup and more soup. Don’t worry I have an awesome black bean soup coming your way soon.. but first I thought you’d enjoy a little something to go along with your soup, chili or stew… and what better than “cornbread”?

Ok, so I was pretty skeptical about this recipe, how can you make CORNbread, you know… without the corn? Well turns out its possible and its also pretty delicious! The first time my friend Kim made this recipe for me I had no idea it didn’t have any corn in it. 10 minutes later I had successfully eaten half the plate and asked for the recipe to make some more! There’s really only one way for you to understand just how epic these muffins are – you must make them for yourself! Almond flour can be found at your local natural food store or Whole Foods- make sure the ingredients say “blanched almonds” it really does make a difference!  IMG_0511Paleo Cornbread Minus the Corn (Serves 4-6)

Recipe from Our Paleo Life

Ingredients:

  • ½ cup Almond Flour
  • ¼ cup Coconut Flour
  • ½ tsp Sea Salt
  • ½ tsp Baking Soda
  • 3 eggs
  • 2 Tbsp Ghee, melted (clarified butter- can be found in the baking section at Whole Foods or other specialty stores)
  • 2 Tbsp Coconut Oil, melted
  • 2 Tbsp Honey
  • ½ cup Unsweetened Vanilla Almond Milk

Directions:

  1. Preheat the oven to 325F
  2. Grease a muffin tin or baking pan (8×8) for a baking pan lining it with parchment paper or other non-stick covering is easiest.
  3. Blend all the dry ingredients in a bowl.
  4. Using a hand whisk, add all the wet ingredients to the dry ingredients and blend well.
  5. Using a spoon fill muffin tins 3/4 full or pour the batter into the prepared baking pan and bake for 20-25 minutes for muffins or 25-30 minutes for baking pan, or until a toothpick inserted in the center of the bread comes out clean.
  6. If you used parchment to line the pan, grab the flaps and lift the bread out of the pan. Cool and slice.

Sausage, Apple & Pecan Stuffing

photo-450

First, let me just say that stuffing might be my favorite part of Thanksgiving- that and cranberry sauce. I could probably eat stuffing and cranberry relish alone for dinner for a month and be happy- I would also be very fat. Second, let me say that stuffing is NOT a very pretty item to photograph. Its down right gross looking and I’m sorry. But I promise this recipe for stuffing is not gross and will become your favorite, guaranteed! I have made this dish two years in a row for our annual Friendsgiving and I always get so many complements on it! The combination of the maple breakfast sausage, the crisp apples and crunchy nuts make it super delish! If you have guests with nut allergies no worries- the recipe is equally as delicious with out the nuts! Happy cooking!

Sausage, Apple & Pecan Stuffing (serves 8-10)

Ingredients:

  • 1 12oz bag of Pepperidge Farm Cubed Herb Stuffing Mix
  • 5 tablespoons butter
  • 1 cup chopped onion
  • 1 cup chopped celery
  • 1 teaspoon chopped fresh sage
  • 1 teaspoon chopped fresh thyme
  • 2 tablespoons chopped parsley
  • 2 cups chicken broth
  • 1 12oz package maple breakfast sausage, casing removed
  • 3/4 cup shredded Parmesan cheese
  • 1 large granny smith or fuji apple pealed and cubed
  • 1/2 cup chopped pecans (optional)
Directions:
  1. Remove sausage from its casing and cook in a medium skillet, using a wooden spoon to break it into small pieces, set aside. Grease a 9×11 baking dish and set aside.
  2. In a large pot, melt butter over medium-high heat. Add onions and celery, and cook 5 minutes. Add sage, thyme and parsley and cook another 2-3 minutes. Remove from heat.
  3. Add dry stuffing, sausage, Parmesan, apple and chopped pecans and mix lightly to combined. Add chicken broth and mix again being careful not to over mix or make the stuffing soggy.
  4. Spread stuffing into greased baking dish cover with foil until you are ready to heat and serve. Before serving bake in a 350 degree oven for 15-20 minutes or until heated all the way through.

Sausage and Kale Soup

IMG_0398We have had some unusually warm weather the last few weeks- sunny and 60 degrees. It makes for wonderful hiking and golfing weather but not so great for the mountains trying to make snow. Then, last Saturday morning I woke up to this….IMG_0303I’m like… are you freakin’ kidding me? I don’t have clue where my winter boots and warm jackets are! I was just walking around in shorts and a T-shirt yesterday- now I have to deal with this? Don’t get me wrong, I am pretty excited for ski season and winter to get here but can’t there be some kind of gradual transition? All or nothing seems a little harsh. Anywho! With the cold weather and snow I decided it was time to pull out the soup recipes.

I love me some warm soup on a cold day- for lunch or for dinner its a great way to warm up without having to spend too much time cooking. Throw it all in the pot, et voila- dinner is done! Kale is one of my favorite greens to make salads with in the summer months, its so crisp and full of vitamins. Adding some fresh kale gives the soup a delicious flavor and brings some color into the mix. A little spicy Italian sausage and tender potatoes all topped off with creamy Parmesan cheese- yup, we’ve got a winner!! Oh and did I mention its gluten free? Even better! Serve it up with some crispy bread (not gluten free.. but delicious) and enjoy!

IMG_0399Sausage and Kale Soup (Click for printer friendly version)

(Serves 6-8)

Ingredients:

  • 1 Tablespoon olive oil
  • 1 large onion, diced
  • 3 garlic cloves, minced
  • 1 pound mild Italian sausage
  • 1 pound small new potatoes, sliced into thin circles
  • 1 bunch of kale, trimmed and chopped (ribs removed)
  • 1 8oz container Baby Bella mushrooms, sliced
  • 8 cups (64oz) chicken stock
  • 1 cup dry white wine
  • 1/2 teaspoon crushed red pepper (or more depending on your spice tolerance)
  • 1/2 cup heavy cream
  • 3/4 cup shredded Parmesan cheese, plus more for garnish
  • salt and pepper to taste

Directions:

  1. Heat a large saucepot over medium heat and add the oil, onions and garlic. Saute for 3-4 minutes, then add the sausage to the pot. Brown the sausage and break it apart with a wooden spoon into small pieces until it is cooked through.
  2. Once the sausage is brown, add the potato slices, chopped kale, mushrooms, chicken stock, wine, and crushed red pepper. Bring to a boil, reduce heat, and simmer for 20-25 minutes. Once the potatoes are tender it’s ready.
  3. When ready to serve, stir in the cream and Parmesan cheese (if you do this step too early the cream will curdle) Then taste and season with salt and pepper as needed. Serve in bowls garnished with extra Parmesan cheese and fresh bread. Enjoy!

Recipe adapted from A Spicy Perspective