 I am sitting in the airport waiting for my flight home to spend Christmas with my family for the first time in 4 years and coming from a family that loves to eat, I couldn’t be more excited! My sister-in-law and I have been planning Christmas dinner for the last week, picking the perfect sides, appetizers and drinks for our first Christmas on the Island.
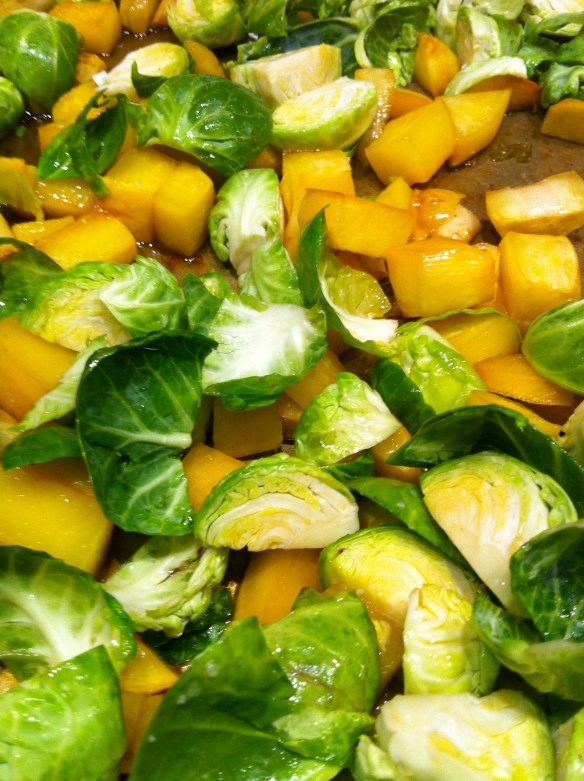
I love brussel sprouts and root vegetables, they are the perfect winter dish, which is why I was automatically drawn to this recipe. I’ve done roasted root veggies before with olive oil and some S & P… but the flavor of the maple syrup and hazelnuts make this dish amazing. 
Its a perfect side for chicken, turkey or beef (we are doing it with a stuffed beef tenderloin…recipe to come). This has become one of my favorite new brussel sprout recipes- last time I tweaked it and added 1 pound of parsnips (pealed and diced). You could add just about any root vegetable to this recipe and it would be fantastic! Enjoy!
Maple-Roasted Brussel Sprouts with Rutabaga and Hazelnuts (Click for printer friendly version)
What you’ll need:
- 1/2 cup pure maple syrup
- 2 1/2 tablespoons extra-virgin olive oil
- 1 tablespoon fresh lemon juice
- Coarse salt and freshly ground black pepper
- 2 pounds rutabaga, skin removed and cut into 1 1/2-inch pieces (5 cups)
- 3/4 pound brussels sprouts, trimmed and halved lengthwise
- 1 ounce toasted hazelnuts, chopped (1/3 cup) (optional)
What to do:
- Preheat oven to 400 degrees. Whisk together maple syrup, oil, lemon juice, and 1/4 teaspoon salt in a large bowl. Add rutabaga, and toss.
- Transfer rutabaga and all but 2 tablespoons glaze to a rimmed baking sheet (leave remaining glaze in bowl). Spread rutabaga in a single layer, sprinkle with 1/4 teaspoon salt, and roast for 35 minutes, tossing halfway through and making sure rutabaga is spread toward the edges of pan.
- Raise oven temperature to 450 degrees. Toss brussels sprouts with remaining glaze in bowl and 1/4 teaspoon salt. Remove sheet from oven, and add sprouts. Toss, and spread in a single layer. Roast vegetables, tossing every 5 minutes, until glaze is very thick and vegetables are deep golden brown, about 20 minutes. Season with pepper and sprinkle with hazelnuts.
 Recipe from Whole Living

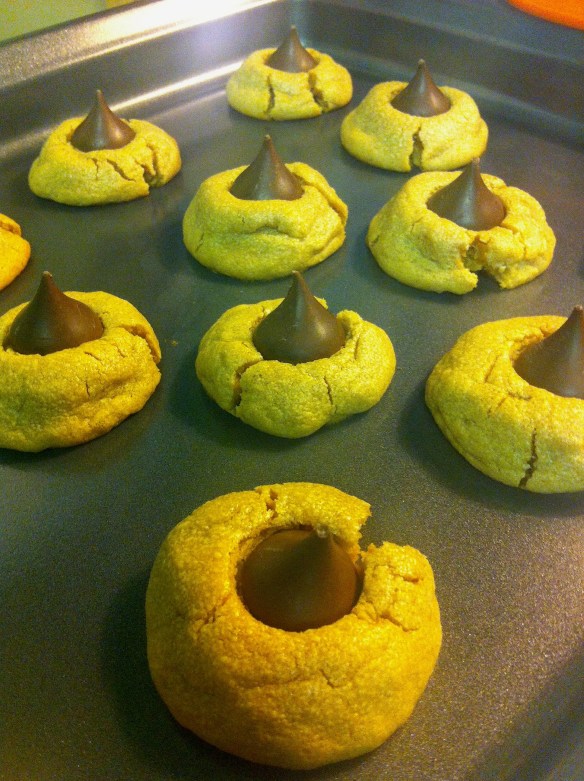 Christmas = peanut butter blossoms (to me). I am a huge fan of peanut butter and chocolate any way you serve it, but these cookies are always the best! I found this easy recipe a long time ago online and since then I’ve tweaked it to make it better. These are gluten free and only require 6 ingredients that you probably already have laying around in your kitchen! Whats better than not having to go to the store? I always manage to go in to the grocery store only needing bananas and almond milk and I some how end up with $60 worth of crap in my cart (even when I use the small one!) needless to say saving a trip to the store is good for my bank account! Here’s what you’ll need..
 Instructions-
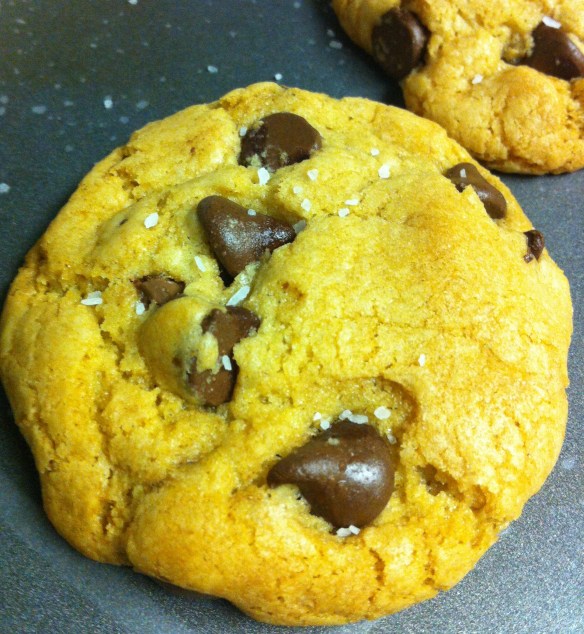

 Three different kinds chocolate chips (dark, milk and semi-sweet) combine for awesomely chocolatey cookies.

 Bake the cookies 9-13 minutes or until the edges of the cookies begin to turn golden brown. They will look a bit underdone in the middle, but will continue to cook once out of the oven. Cool the cookies on the sheets at least 2 minutes. Sprinkle with a little sea salt. Remove the cooled cookies from the baking sheets after a few minutes and transfer to a wire rack to cool completely.
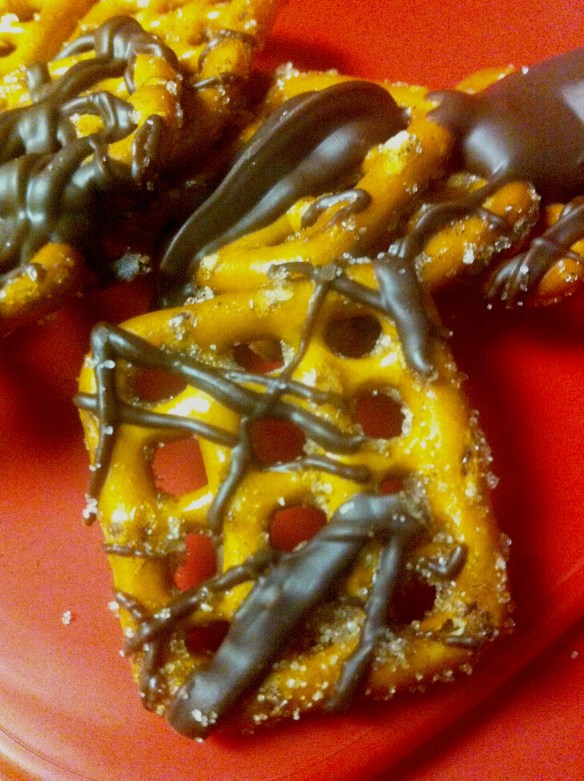
 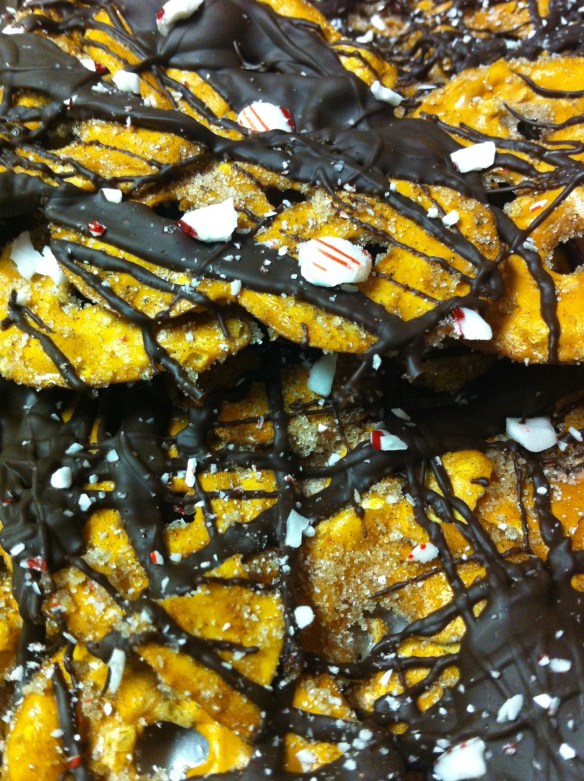 I continued my holiday baking with an updated version of the chocolate cinnamon pretzels I blogged on before. This time I used pretzel thins which catch even more cinnamon, sugar and chocolate! I crushed up some candy canes and sprinkled them on top! Its a great combination!
  I’ve packaged up all my holiday goodies! Happy Holidays everyone!
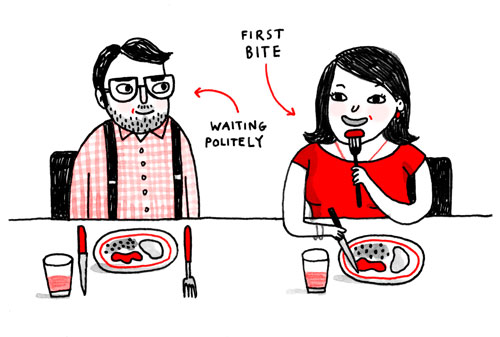
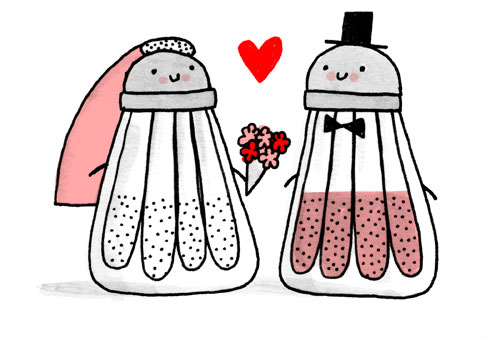
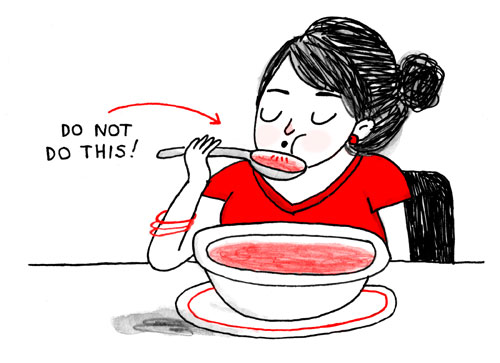
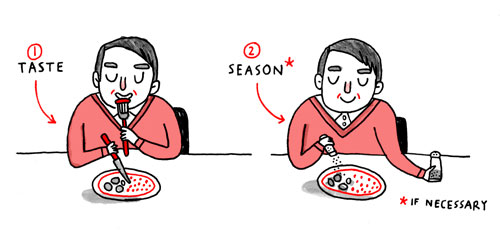
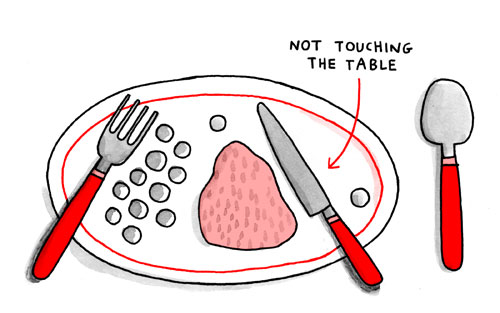
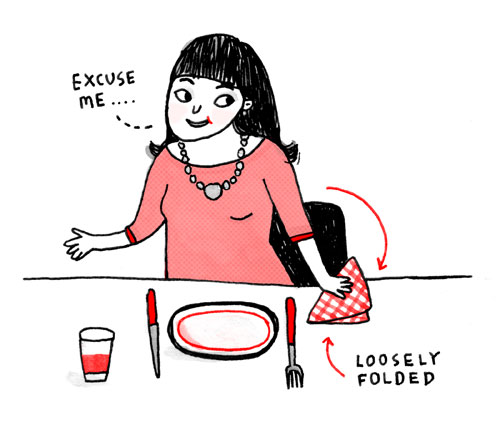
 Christmas is right around the corner and you know what that means (NO, not lots of presents!) your bound to being eating a holiday meal at someone else table, whether it’s at your grandparents house or maybe even your new boyfriend’s family, you don’t want to be caught with bad manors at the table! I feel sometimes my generation missed a step along the way, etiquette schools no longer exist (do they?) and while I had a set of grandparents that wanted to make sure I knew the proper way ladies should sit at the table and how to set one, I probably never would have learned had it not been for them (and you mom!). Even though our world has become pretty informal (I wear jeans to work everyday and when I have to dress up I feel like a alien has taken over my body) but heavens to Betsy your future mother-in-law asks you to set the table and you put the forks and knives on the wrong sides… you’ve gone from husband material to eating at the kids table in a matter of seconds (which would probably be more fun anyways…). I found this cute “Dinner Etiquette” guide with some illustrations (for those of you who are more visual learners) on one of my favorite new blogs,


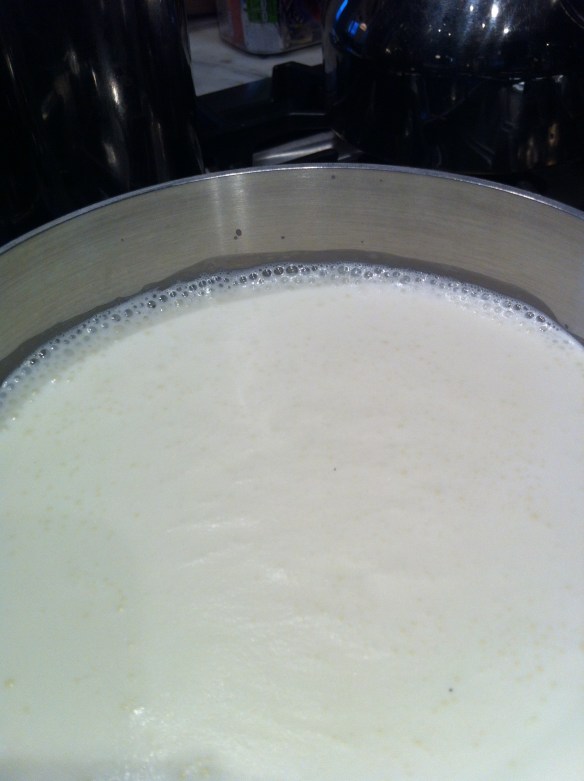
 This holiday treat is totally addicting (you will see why I call it crack once you’ve made it) and a huge crowd pleaser. The delicious recipe is courtesy of my friend Jacki’s mom, Rose, who always has this graham cracker bark around the house during the holiday’s. The best part about it…it’s a snap to make and you can tweak the toppings to your liking! The classic recipe calls for slivered almonds, but we also added dried cherries to one and dark chocolate chunks to other (we doubled the recipe). Next time I’d love to try this recipe with some chopped pretzels or popcorn or a little Fleur de Sel sprinkled on top. Bring this to your next holiday party and you’re sure to be the most popular guest! Thanks Jacki and Rose for sharing! Enjoy! 🙂
 In a medium sauce pan, melt butter on medium heat until completely melted. Slowly add brown sugar to the melted butter and stir. Allow to the butter and sugar mixture to boil and thicken for about 4 minutes, stirring constantly make sure it doesn’t burn.
 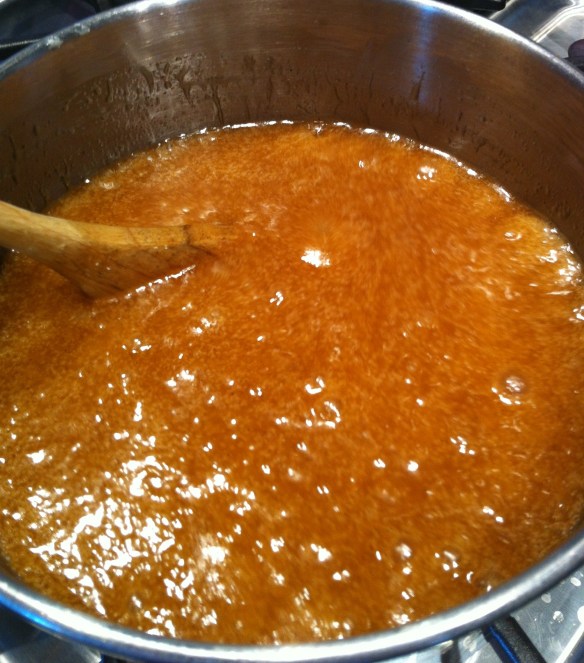 Remove sugar from heat and pour sugar mixture over graham crackers, spreading evenly.
  Sprinkle graham crackers with slivered almonds, cherries or chocolate (or both!). Bake at 350 for 8 minutes. Remove cookie sheet from the oven and allow it to cool completely (this is the hardest step as you will want to eat it right away!) before breaking bark into smaller pieces.
 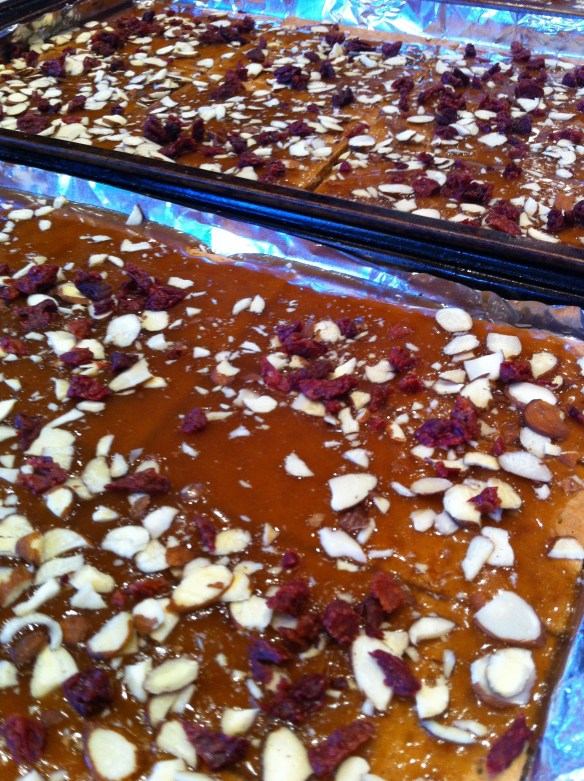 To store, line tupperware or tin with wax paper, separating each layer of bark with another sheet of wax paper. Enjoy!

 Being careful not to rip a hole in the dough, pull dough around the cheese tucking the corners into each other. Some people try and make this look fancy- I just fold the dough so there are no gaps or exposed cheese- the candied pecans will distract anyone from noticing you attempted to etched Rudolph on to the top of your brie wheel. If the end of the world really is less than two weeks away, do you really want to spend your last moments on Rudolph? I didn’t think so.
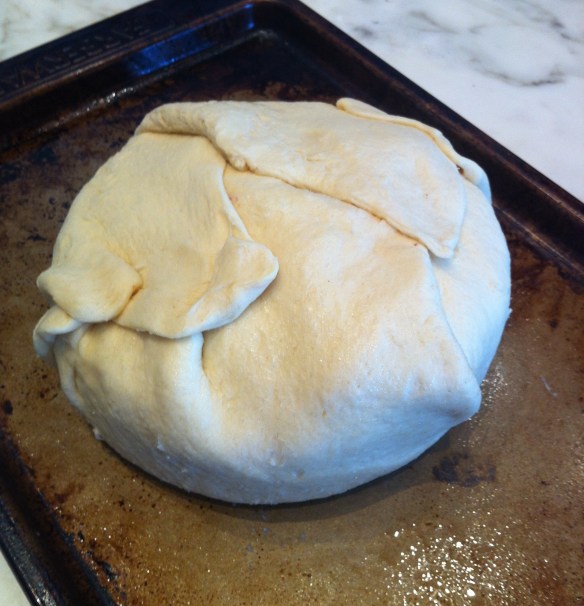
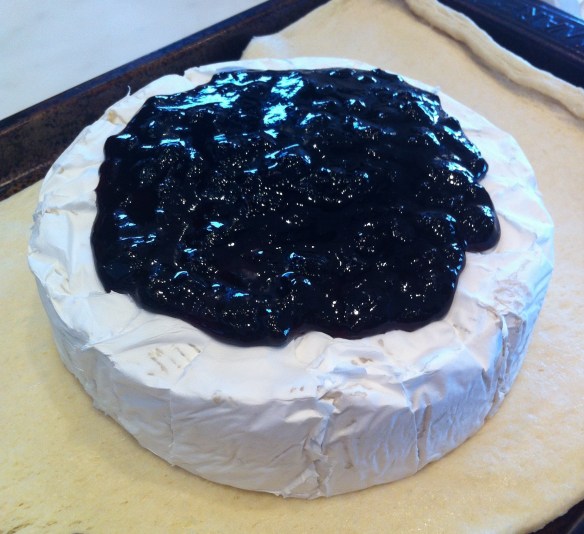
 This is my favorite preserves to use for this recipe but any whole berry preserves will work!