Spicy Campfire Corn

IMG_7709With the 4th of July this weekend I bet a lot of you are pulling out the grills, dusting off the camping stuff from Memorial Day and getting ready to enjoy a long weekend with family and friends. IMG_7707Here in Park City it has been hotter than the surface of the sun for two weeks straight- a cool 90+ every day! I can’t stand the thought of turning on the stove inside my house so we have been doing a lot of grilling outside. I have a few fans going all the time in the house and I feel like it is doing nothing! If you’re reading this post and you’re near the ocean, please stop what you’re doing and go swimming for me. right. now. thanks. This recipe is great for camping or at home on your grill. Feel free to switch up the hot sauce for your favorite variety. But most of all have a wonderful holiday weekend! Enjoy!

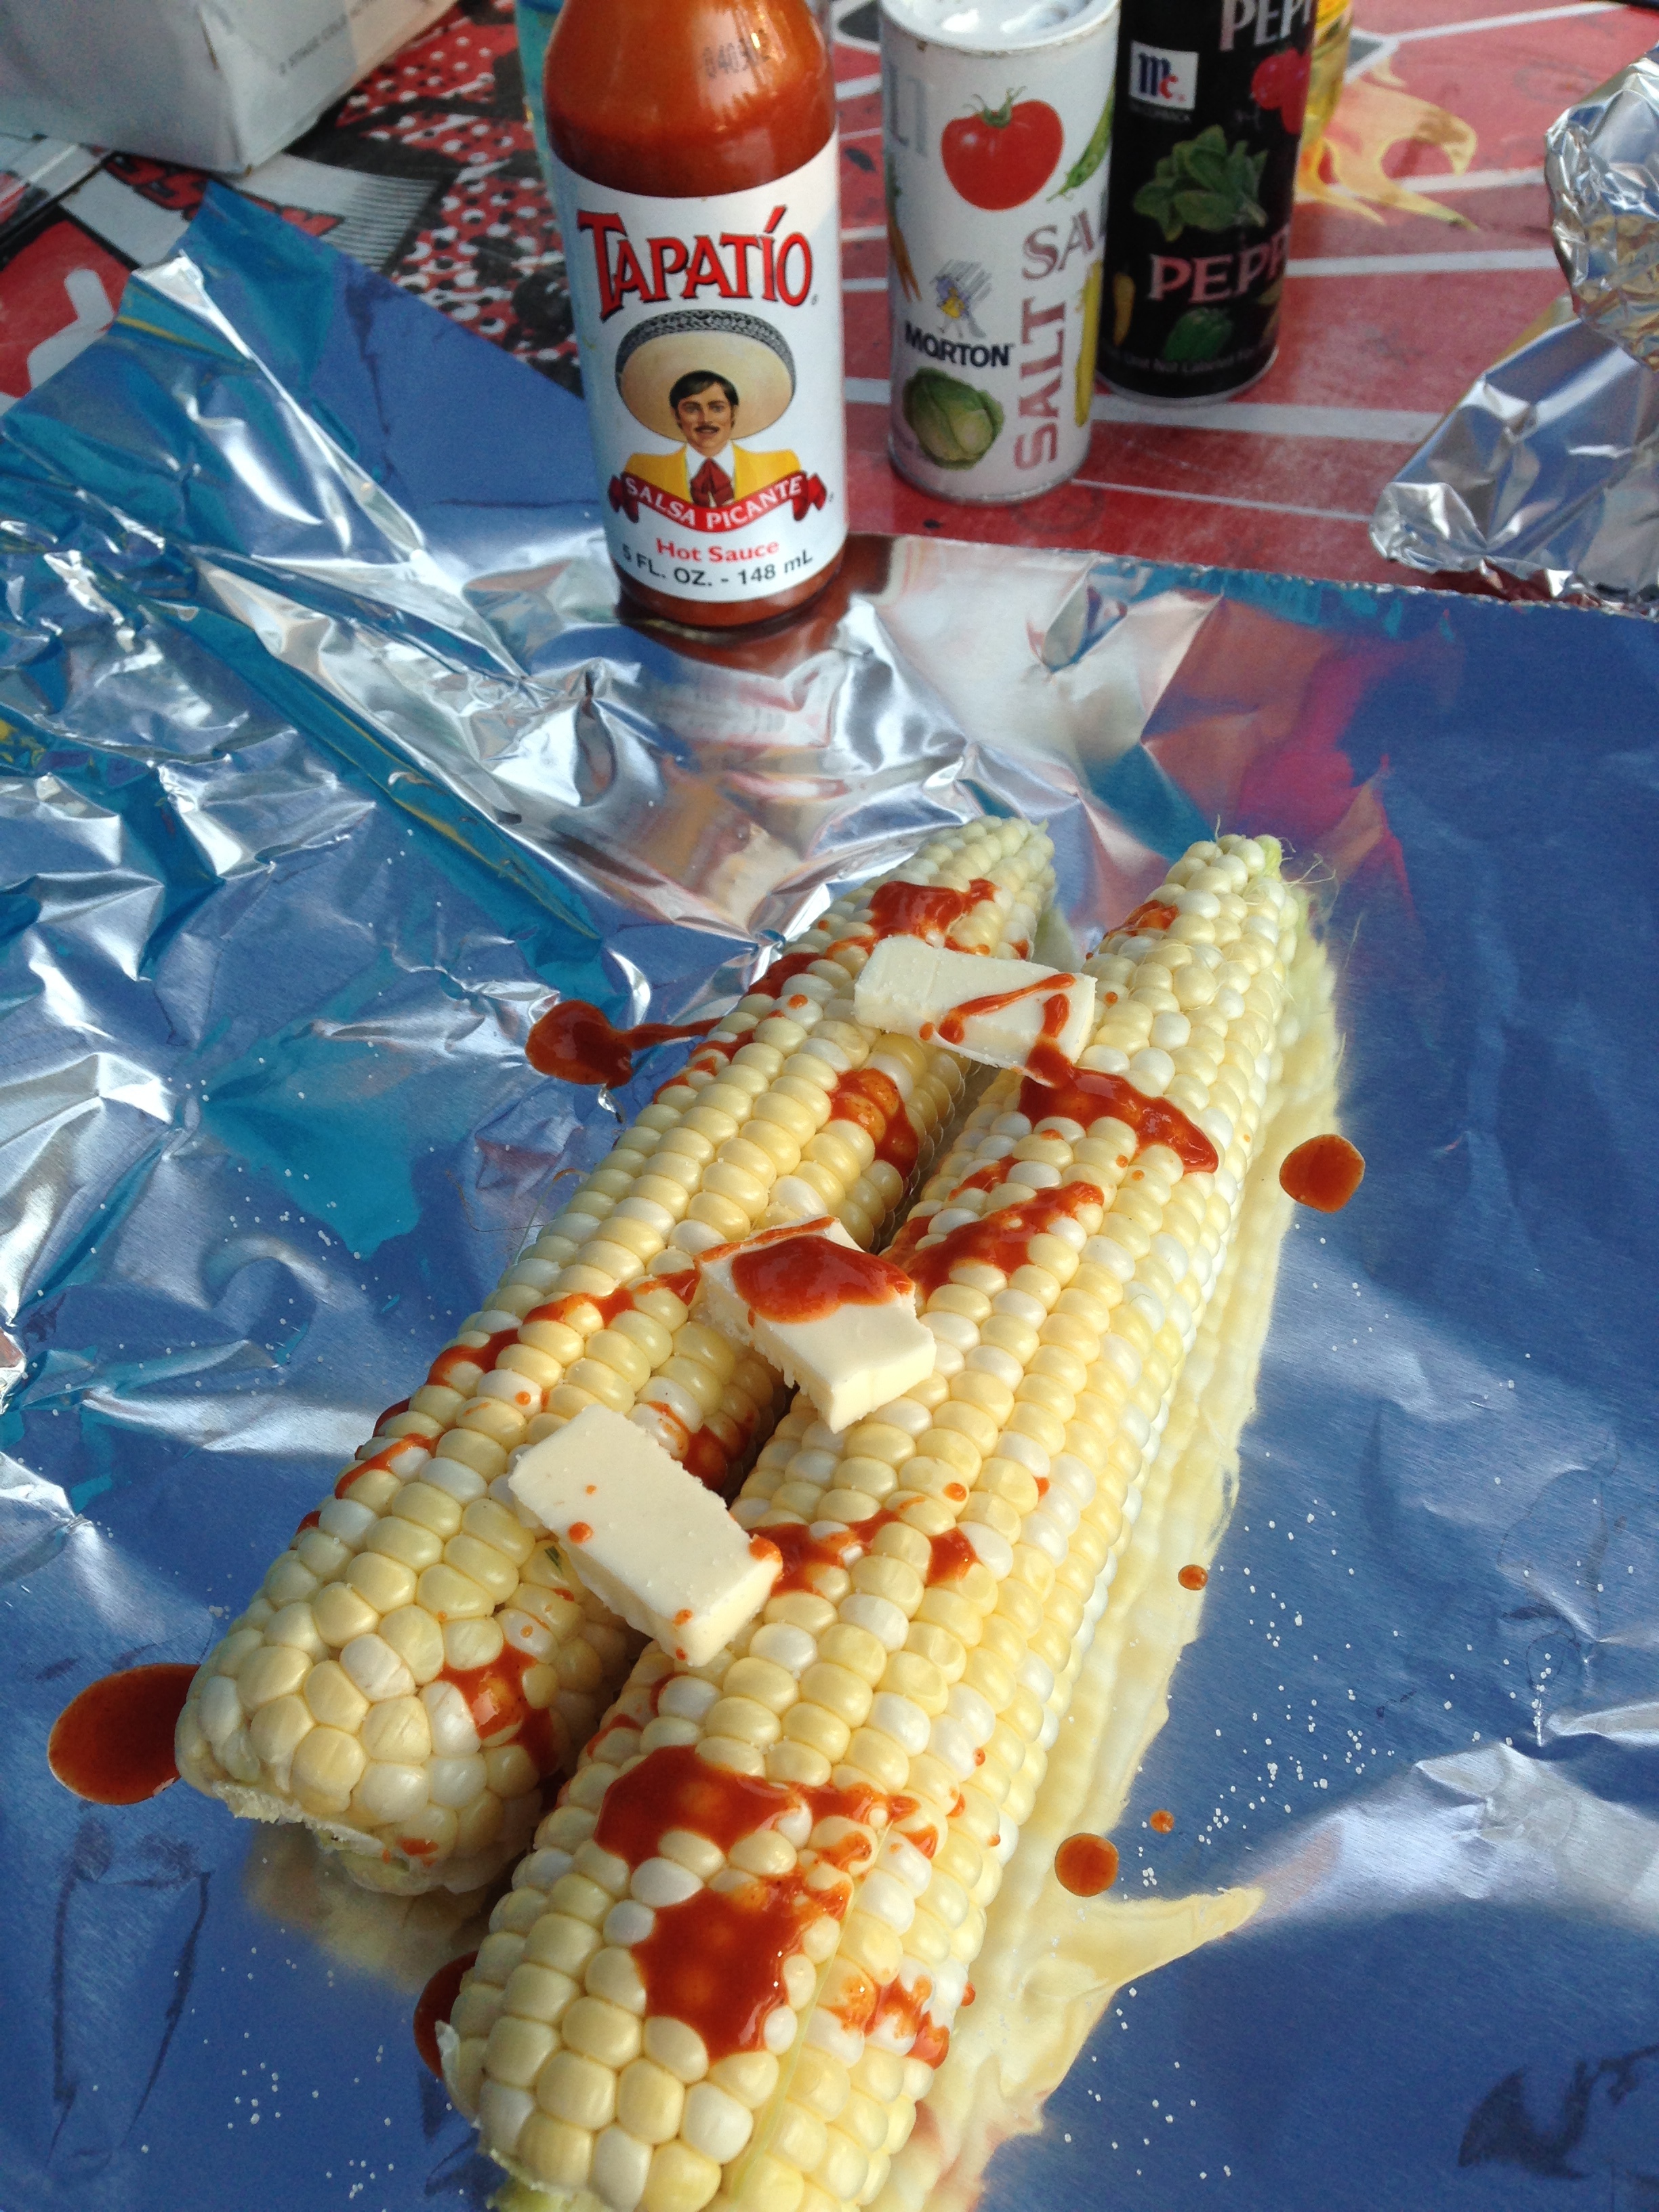
Spicy Campfire Corn (Serves 4 people)

Ingredients:

  • 4 ears of corn, shucked
  • 2 tablespoons butter
  • 2 or more tablespoons hot sauce such as Tapatio, Cholula or Tabasco
  • Salt and Pepper to taste
  • Tinfoil

Directions:

  1. Place two pieces of corn side by side on a piece of tinfoil. Place 1 Tablespoon of butter evenly across the two pieces of corn. Drizzle 1 tablespoon hot sauce and season with salt and pepper. Repeat with the other two ears of corn.
  2. Bring the tinfoil sides together and roll down to make a pocket. Place on the grill or campfire for 7-10 minutes. Flip and cook another 5-7 minutes. Carefully check the pocket to see if corn is tender/golden brown. If you hear the corn starting to pop, flip the packet or turn down the heat.
  3. Remove the corn pocket from the heat and allow it to sit closed for 5 minutes. This will allow the corn to steam a little longer and trap in all the flavor. When ready to serve remove the corn from the foil and enjoy!
Advertisement

Bacon & Spinach Mini Quiches (Gluten Free)

IMG_3240Happy summer solstice! A few days late but who is keeping track, right? Especially when the weather has been so beautiful, warm and sunny! I love this time of year when it stays late out until 10pm, it makes me feel really productive, like I have a few extra hours in the day! Even though summer has officially started and school is out for the year, us adults still have to work (big bummer) Oh to be a kid again! The morning “rush” is as usually in our house hold through the summer and I’m not one to skip a meal! And lets be honest, skipping breakfast because you’re in a hurry is a recipe for disaster!

These quiches are great for a quick breakfast, lunch or snack, especially when time is of the essence. Make them ahead of time and pop them in the freezer for later, they are easy to reheat in the microwave and off you go! They are also great for school lunches and after school snacks but don’t let your kids know I’m already talking about back to school… (even though you moms out there are probably already looking forward to it!) These taste delish even when you’re not in a rush… My favorite way to eat them is paired with a big ol’ Bloody Mary or mimosa on a Sunday morning! Enjoy!

IMG_3242Easy Bacon & Egg Mini Quiches (Makes 10-20 depending on the size of your tin)

Ingredients:

  • 12 large eggs
  • 1/2 cup half and half or heavy cream
  • 1/2 tsp garlic powder
  • 1/2 tsp black pepper
  • 1 tsp dried parsley
  • 2/3 cup grated Parmesan cheese
  • 3 cups shredded cheddar cheese
  • 6 slices of bacon, cooked and chopped
  • 1 10oz package frozen chopped spinach, thawed and drained

Directions:

  1. Pre-heat the oven to 375 degrees. In a large bowl whisk together eggs, half and half, garlic powder, pepper, and parsley until fully combined. Add Parmesan, cheddar, spinach and bacon, mix well.
  2. Spray muffin tins (I used mini and smaller sized ones) with cooking spray. Be sure not to miss any spots so the quiche does not stick! Fill muffin tins about 3/4 of the way full. Place them in the oven for 15-20 minutes or until golden brown and puffy. Remove from the oven and let sit for 5 minutes before removing them from the tin.
  3. Serve warm or these can be easily frozen and heated up in the microwave for a quick breakfast on the go.

Best Bloody Mary Mix

IMG_4857This weekend summer officially kicked off with the first Park City Silly Market on Main St. The rain held off and it was a wonderful morning wandering the streets checking out all the vendors and my favorite part… the Bloody Mary bar! The section of the market with the food, music and drink vendors is definitely the best section. So when you can’t make it to the Silly Market on Sunday or you’re having some friends over for brunch, mix up a batch of my family’s favorite Bloody Mary mix and enjoy them at home! You can add all your favorite toppings including but not limited to shrimp, bacon, celery, pickles, olives- the options are endless! Be sure to mix this recipe up and serve it nice and cold! Cheers!

IMG_4861Best Bloody Mary’s (Makes about 15-18 glasses)

Ingredients:

  • 3 32oz bottles Clamato juice
  • 1 jar spicy cocktail sauce
  • 3 cups vodka of your choice
  • 1/2 cup real lime juice
  • 1/2 cup real lemon juice
  • 2 oz Worcestershire sauce
  • 2 oz A1 sauce
  • 1 teaspoon black pepper
  • 1/2 teaspoon Tabasco sauce
  • 1/2 teaspoon celery salt
  • lemon and lime slices for garnish
  • Garnishes: Pickles, celery, shrimp, bacon, olives, asparagus, peppers, baby corn etc….

Directions:
Combine all ingredients and stir well. Refrigerate for 2-3 hours before serving. Serve over ice with garnishes of your choice.

Published on Dishing PC – June 8, 2015

No Name Saloon Zesty Red Burger Remade

IMG_2203If you have walked down Park City’s historic Main Street before you’ve probable seen the famous No Name Saloon and if you’re smart, you’ve been inside and enjoyed one of their burgers! Year round, any day of the week, you will find No Name packed with  visitors and locals hungry for one of their epic burgers and homemade chips. Now you might be saying, a burger is a burger- what could be so special about this burger? First off lets just say all burgers are not equal! The No Name starts off with lean Bison meat and fresh toasted bun, from there you’ve got 5 options or build your own… if you love bacon and bleu cheese, go for the bacon bleu cheeseburger or if you’re looking for some spice the No Name Burger with freshly sliced jalapeno is the way to go.

Personally, my favorite is the Zesty Red Cheeseburger, it is flavor packed and topped with caramelized onions and red peppers then finished with pepper jack cheese for some added spice! It might be a little dramatic to say but this burger will change your view on life. So I’ve decided to recreate my favorite burger at home but with a little twist.

Instead of topping the burger with onions, peppers and cheese, how about stuffing all that goodness inside the burger? Well I gave it a shot and let me tell you, it delicious! Now whether you’re in Park City or home in your own kitchen, you can enjoy a delicious Zesty Red Burger anytime! Enjoy!

No Name Saloon Zesty Red Burger Remade (Serving Size 2 large burgers)
Ingredients
  • 1 20oz package ground bison meat
  • 2 slices pepper jack cheese
  • 1/4 cup sliced onions, sauteed
  • 1/4 cup sliced roasted red peppers
  • 1 teaspoon cumin
  • 2 dashes Worcestershire sauce
  • 2 fresh burger buns
  • lettuce, tomato, ketchup for garnish
Instructions:
  1. In a medium bowl, combine bison meat, cumin and Worcestershire sauce. Using your hands mix the meat until fully combined. Break the meat into 4 equal balls to form patties. Set aside.
  2. In a saute pan, heat 1 teaspoon olive oil. Add sliced onions and cook until caramelized and golden brown, about 5 minutes. Remove from heat and mix in red peppers.
  3. Place one slice of pepper jack cheese on top of two patties, then divide the onion and pepper mixture evenly between the two burgers. Take the other two patties and place them on top to form a “sandwich”. Carefully pinch the edges of the two burgers to form one larger stuffed burger.
  4. Using the same pan you used to cook the onions, heat the pan over medium heat and place both burgers in the skillet and cook about 4minutes per side or until they are cooked to your desired temperature. (warning the cheese does ooze out the sides!)
  5. Place the burgers on the toasted buns and top with tomato and lettuce. Serve immediately.

This recipe was published on the Dishing PC website.