Avocado, Cheddar and Arugula Breakfast Sandy

IMG_2441They say breakfast is the most important meal of the day and I couldn’t agree more! Not only is it the most important meal of the day but it is my favorite, epically when it comes to breakfast sandwiches! There are so many options… you can have it on a bagel, English muffin or toast; topped with bacon, sausage or ham- or throw on some cheddar, American or pepper jack cheese… as you can see the options are endless.

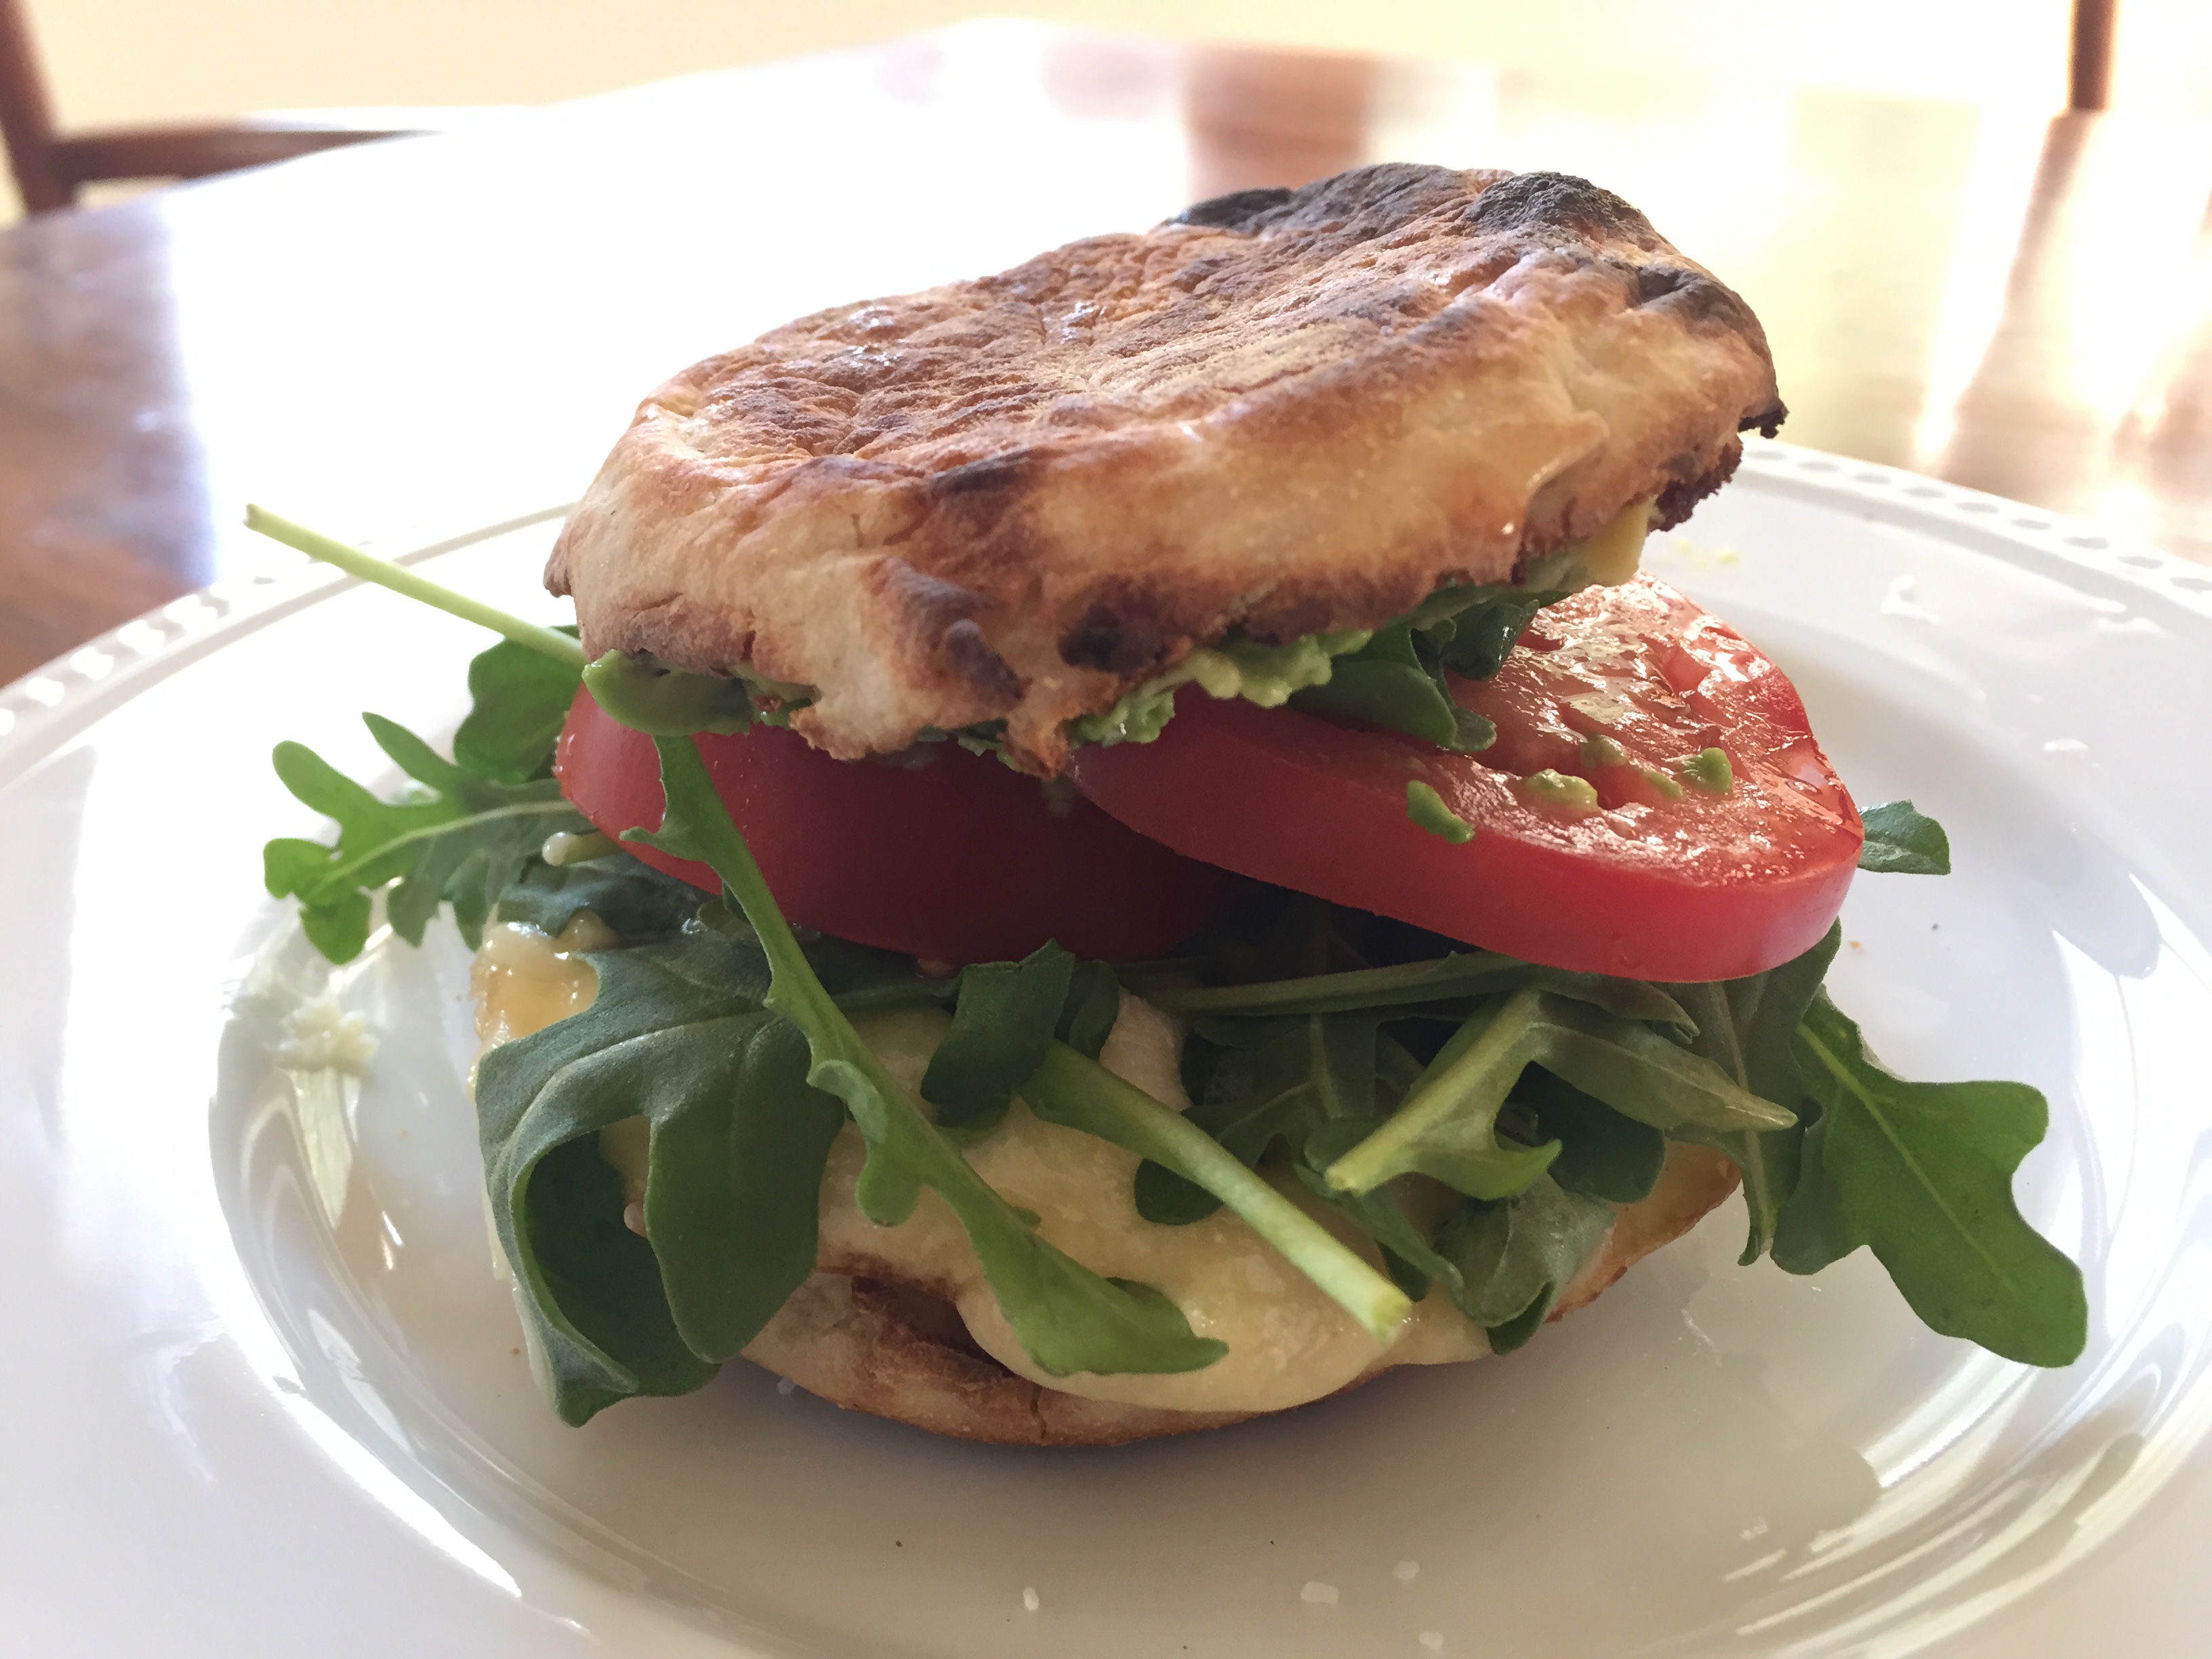
I prefer my breakfast sandwich on an English muffin (Thomas’ only please!) with cheddar so sharp it’ll cut you! I’ve learned that you don’t need meat to make a sandwich hearty, put a little avocado on that baby and not only do you get all those good fats in your diet, it fills you up quickly too! The Arugula adds a little peppery kick that is extra delicious. All in all you better make two of these breakfast sandys because you’ll be sad when the first one is gone! Happy weekend everyone!

Bomb Breakfast Sandy (Makes 1 Sandwich)

Ingredients:

  • 1 Large egg, fried
  • 1 English Muffin, toasted
  • 1 slice extra sharp cheddar
  • 1/4 Avocado
  • 2 slices of tomato
  • handful of Arugula
  • Salt and Pepper to taste

Directions:

  1. Melt some butter in a medium skillet. Crack the egg into the frying pan and let cook for 2 minutes. Flip the egg and cook for a minute more (now is when you’d want to break the yolk!). Place slice of cheddar cheese on top of the egg and cover with lid for 30 seconds. Leave covered and remove from heat, let it sit in the pan while you assemble the sandwich. Meanwhile, toast your English muffin.
  2. Take 1/4 of the avocado and smash it into the English muffin. Place the fried egg on the muffin and top with tomato and arugula. Season with salt and pepper.
  3. Server with hot sauce or ketchup (if you love ketchup as much as me!) Enjoy!


Advertisement

Best Guacamole

photo-590There are a few recipes that should be a staple in everyone’s home. I think guacamole is one of them. Especially in the summer, there is nothing better than a big bowl of fresh Guac and chips. When making a delicious guacamole, there are a few key things to remember…

#1 make sure the avocados are ripe… but not too ripe! no one likes a brown avocado or one that’s so hard you could bite into it like an apple! When picking avocados at the store, be sure they are slightly soft when you push your thumb into the skin, but not mushy.

#2 Dice your onions small, no one likes a big ol’ bite of bitter onion/bad breath! #3 Don’t over mix/mash your guac and leave a little chunk in your avocado, I think it tastes better and its easier to get more on your chip! Guacamole is great on its own as an appetizer or it’s delicious with tacos, burritos, and even on your breakfast sandwich! Happy Monday, hope you enjoy!

Guacamole (Serves 6)

  • 3 avocados, pitted, pealed and mashed
  • 1 lime, juiced
  • 1/2 red onion, diced small
  • 1 roma (plum) tomato, diced
  • 1 1/2 teaspoons kosher salt
  • 1 teaspoon garlic powder
  • 1/4 cup cilantro, chopped
  • Tortilla chips for dipping

Directions:

  1. In a medium bowl, mash avocados and lime juice with a fork, being sure to leave some small chunks of avocado.
  2. Mix in salt, garlic powder, tomato, red onion and cilantro. Mix until fully incorporated.
  3. Taste and adjust seasoning with a pinch more salt if desired.
  4. Cut a piece of Saran Wrap just lager than the bowl, press the plastic wrap down onto the guac so there is no air between the plastic wrap and the avocado, refrigerate for 1 hour. This will prevent the guacamole from turning brown while it is chilling. If you don’t have time to chill it… Serve immediately!


Jalapeno, Mango & Avocado Salsa

photo 3-9It has started to feel a lot like spring lately here in Park City. This weekend we had two gorgeous days of sunshine and warm weather, great for catching some rays and enjoying an apres drink after skiing… not so good for the snow! Practically all the snow around our house has melted and I’ve woken up the last few mornings to birds chirping outside my window and its only March 10th! photo-521Here is Piper… laying on the only patch of snow left on our lawn! I did get some great skiing and hikes in this weekend. After being cooped up all winter, its nice to finally get out and enjoy the sunshine! photo-520 And now that we’ve gained an extra hour of daylight at night I get to enjoy those late afternoon walks with the dog! Since I was feeling in the spring/summery mood this weekend I decided to whip up this delicious jalapeno, mango and avocado salsa!

I would put this salsa on anything! Its great with chips, on tacos, chicken, fish… the options are endless and you’ll wish the bowl of this salsa was endless too because it is so good! This salsa goes perfectly on my fish tacos with chipotle cabbage slaw… but you’ll have to check back tomorrow, Taco Tuesday, for that recipe!

Jalapeno, Mango & Avocado Salsa 

  • 1 large mango, cubed (about 1 1/2 cups)
  • 2 medium avocados, cubed
  • 1 large shallot, finely chopped (about 1/4 cup)
  • 1 medium jalapeno, diced (depending on how spicy you like it, remove either all or some of the seeds before chopping)
  • 2 tablespoons lime juice
  • 2 tablespoons olive oil
  • 2 tablespoons cilantro, chopped (if you don’t like cilantro, substitute mint)
  • salt and pepper to taste

Directions:

  1. In a large bowl, mix together mango, avocado, jalapeno and shallots. Be careful not to over mix and smash the mango and avocado.
  2. In a smaller bowl, combine lime juice and olive oil. Drizzle over mango mixture.
  3. Sprinkle cilantro, salt and pepper over the top and toss to combine. Taste and adjust seasoning to your liking. Enjoy!

Vietnamese Fresh Spring Rolls

photo-74I have always loved fresh spring rolls. There is a vendor at the West Tisbury farmers market that sells amazing fresh and fried spring rolls- they are always sold out. Why I have never tried to make these delicious little rolls my self is beyond me, now that I know how EASY they are to make. photo-75I looked up a few recipes on how to do it but none of them had all the ingredients I love- so I made up my own. The best part though is you can put anything you like in these and make them your own! Enjoy!

Vietnamese Fresh Spring Rolls (Click for printer friendly version)

Ingredients:

  • 2 ounces Thai rice noodles
  • 8 rice wrappers (8.5 inch diameter)
  • 8 large cooked shrimp – peeled, deveined and cut in half (tofu would also work)
  • 1 1/2 tablespoons chopped fresh Thai basil (or regular if you can’t find Thai)
  • 3 tablespoons chopped fresh mint leaves
  • 3 tablespoons chopped fresh cilantro
  • 2 leaves lettuce, chopped
  • 1/2 an avocado
  • shredded carrot (optional)
  • 3 tablespoons Hoisin sauce
  • 1 tablespoon chopped raw peanuts
  • Thai peanut dipping sauce or Sweet Chili Sauce

Directions:

  1. Bring a medium saucepan of water to boil. Boil rice noodles 3 to 5 minutes, or until al dente, and drain.
  2. Fill a large bowl with warm water. Dip one wrapper into the hot water for 1 second to soften. Lay wrapper flat.
  3. In a row across the center, place 2 shrimp halves, a handful of vermicelli
  4. Add chopped basil, mint, cilantro and lettuce to your taste, leaving about 2 inches uncovered on each side.
  5. Fold uncovered sides inward, then tightly roll the wrapper, beginning at the end with the lettuce. Repeat with remaining ingredients.
  6. Wet a paper towel and cover spring rolls with damp towel until ready to serve.
  7. For sauces- Any and all are great with the rolls- pick which flavor combo you prefer or use all three.
  8. Combine Hoisin sauce and chopped peanuts serve with rolls
  9. Thai Peanut Sauce and Sweet Chili Sauce can be purchased pre-made in the International foods aisle

photo-73

Chocolate Fudge Brownies… with Black Beans and Avocado!

photo-226

So you must be thinking that Ski Boots has gone off the deep end… Black bean brownies? Perhaps it’s the lack of snow we’ve been getting lately that’s made me want to experiment with some new recipes and ingredients. I had to try this one for a few reasons but mostly because I wanted to see if I could taste the black beans… Which you can’t… AT ALL.photo-225

In fact, everyone I served them to didn’t believe I actually made them with black beans. Nothing about these brownies are normal. Unlike your typical fudge brownies, where you feel sick after eating just one, these are dangerously perfect. They are rich AND light and you will most definitely not be able to stop at eating just one, Oh and did I mention they are gluten free? photo-228

Oh and did I also mention they are low fat? I wouldn’t feel guilty for a second eating these brownies for breakfast, they’ve got almost 5 grams of protein and only 150 calories per square (less if you use sugar substitute)… say what?! You won’t believe it until you try them for yourself but I promise you will enjoy them!

Black Bean & Avocado Fudge Brownies (Click for printer friendly version)
Ingredients:
  • 1 (15.5 oz) can black beans, rinsed and drained
  • 1 egg plus 2 egg whites
  • 1/3 of a large ripe avocado
  • 1 teaspoon olive or canola oil
  • 1/3 cup, plus 1 tablespoon unsweetened cocoa powder
  • 1/4 teaspoon baking powder
  • 1/4 teaspoon baking soda
  • 1/4 teaspoon salt
  • 1 teaspoon pure vanilla extract
  • 3/4 cup sugar or sugar substitute of choice
  • dark chocolate chips (to sprinkle on top)

Directions:

  1. Preheat oven to 350 degrees. Grease a 8×8 inch baking pan.
  2. Put all the ingredients besides chocolate chips into food processor (or a blender). Process or puree until ingredients form a smooth batter (scrapping down the sides with a spatula in between to make sure all the cocoa powder is incorporated.)
  3. Pour into prepared pan, sprinkle with chocolate chips, nuts, or any other desired brownie topping and bake for 35-40 minutes or until knife inserted in center comes out clean and top of the brownies begin to crack.
  4. Cool pan completely on wire rack then cut into 16 squares.

And if the kitchen didn’t smell amazing enough with all those brownies baking… my valentines day flowers are just starting to blooming and its like heaven on earth in my living room!photo-227Enjoy!

Original recipe from Ambitious Kitchen

Sweet Avocado Pie and Coconut Whipped Cream

Looking to have a little fun with your desserts this Thanksgiving? This is not your typical pie, I was skeptical at first but after tasting it, I was hooked. It only has 3 ingredients and it doesn’t require baking! I normally serve the pie with homemade whipped cream but I wanted to try a dairy free option. I found myself eating the coconut whipped cream by the spoon full (I didn’t just admit that)… I also tried it over strawberry rhubarb pie and brownies (wow). I definitely prefer it over classic whipped cream. Try both these easy 3 ingredient recipes… I promise you won’t be disappointed. Enjoy!

Avocado Pie

Filling:

  • 2 ripe avocados, flesh scooped out
  • 1 Lemon, juiced
  • 1 14oz. can sweetened condensed milk

Crust:

  • 1 1/4 graham cracker crumbs (or ginger snaps)
  • 5-6 tablespoons unsalted butter, melted

Preheat oven to 350 degrees. Mix together the graham cracker crumbs and melted butter. Press into the bottom and up the sides of a 9-inch pie pan. Bake in oven for about 8- 10 minutes, don’t allow it to get too brown. Let cool completely.

With a hand mixer combine avocado, lemon juice and sweetened condensed milk. Pour filling into pie crust and press a piece of plastic wrap directly on the surface and chill for 2- 4 hours. (Note: Avocados oxidize when they are exposed to air (which makes them turn brown) by pressing the plastic wrap tightly to the surface of the pie it will prevent the pie from turning brown! Now for the coconut whipped cream…

This whipped cream is so delicious and creamy, its hard to believe its dairy free! Its a great option if you’re lactose intolerant or vegan or if you love whipped toppings.

Ingredients:

  • 1 can coconut milk (full fat, do not buy ‘light’ it will not work!)
  • 1 Tablespoon powdered sugar
  • 1/2 teaspoon vanilla extract

Place can of coconut milk in the fridge over night (if you forget ahead of time put in freezer for 1 hour) put bowl and hand mixing blades in freezer for 10-15 minutes before whipping the coconut- this really helps with the process.

I placed this whole bowl in the freezer for 15 minutes to make sure everything was super cold. Without shaking the can of coconut, open can and remove solid white coconut leaving the remaining coconut water at the bottom of the can. (you can discard the remaining coconut water- you do not want to mix the water with the coconut cream!) Mix cream in chilled bowl with chilled mixers until fluffy, about 2-3 minutes. Add powdered sugar and vanilla and mix until fully incorporated.

Coconut whipped cream does not break down the way dairy whipped cream does and can be stored in the fridge for a few days without separation. Place whipped cream over the avocado pie or your favorite dessert and ENJOY!!!