Bourbon-Poached Peaches

photo-149Wow, what a weekend to be a New England sports fan! My throat hurts from yelling with excitement! After a beautiful Friday and Saturday in the mountains, Sunday was raining and gray and perfect for sitting inside to watch two amazing games. photo-143
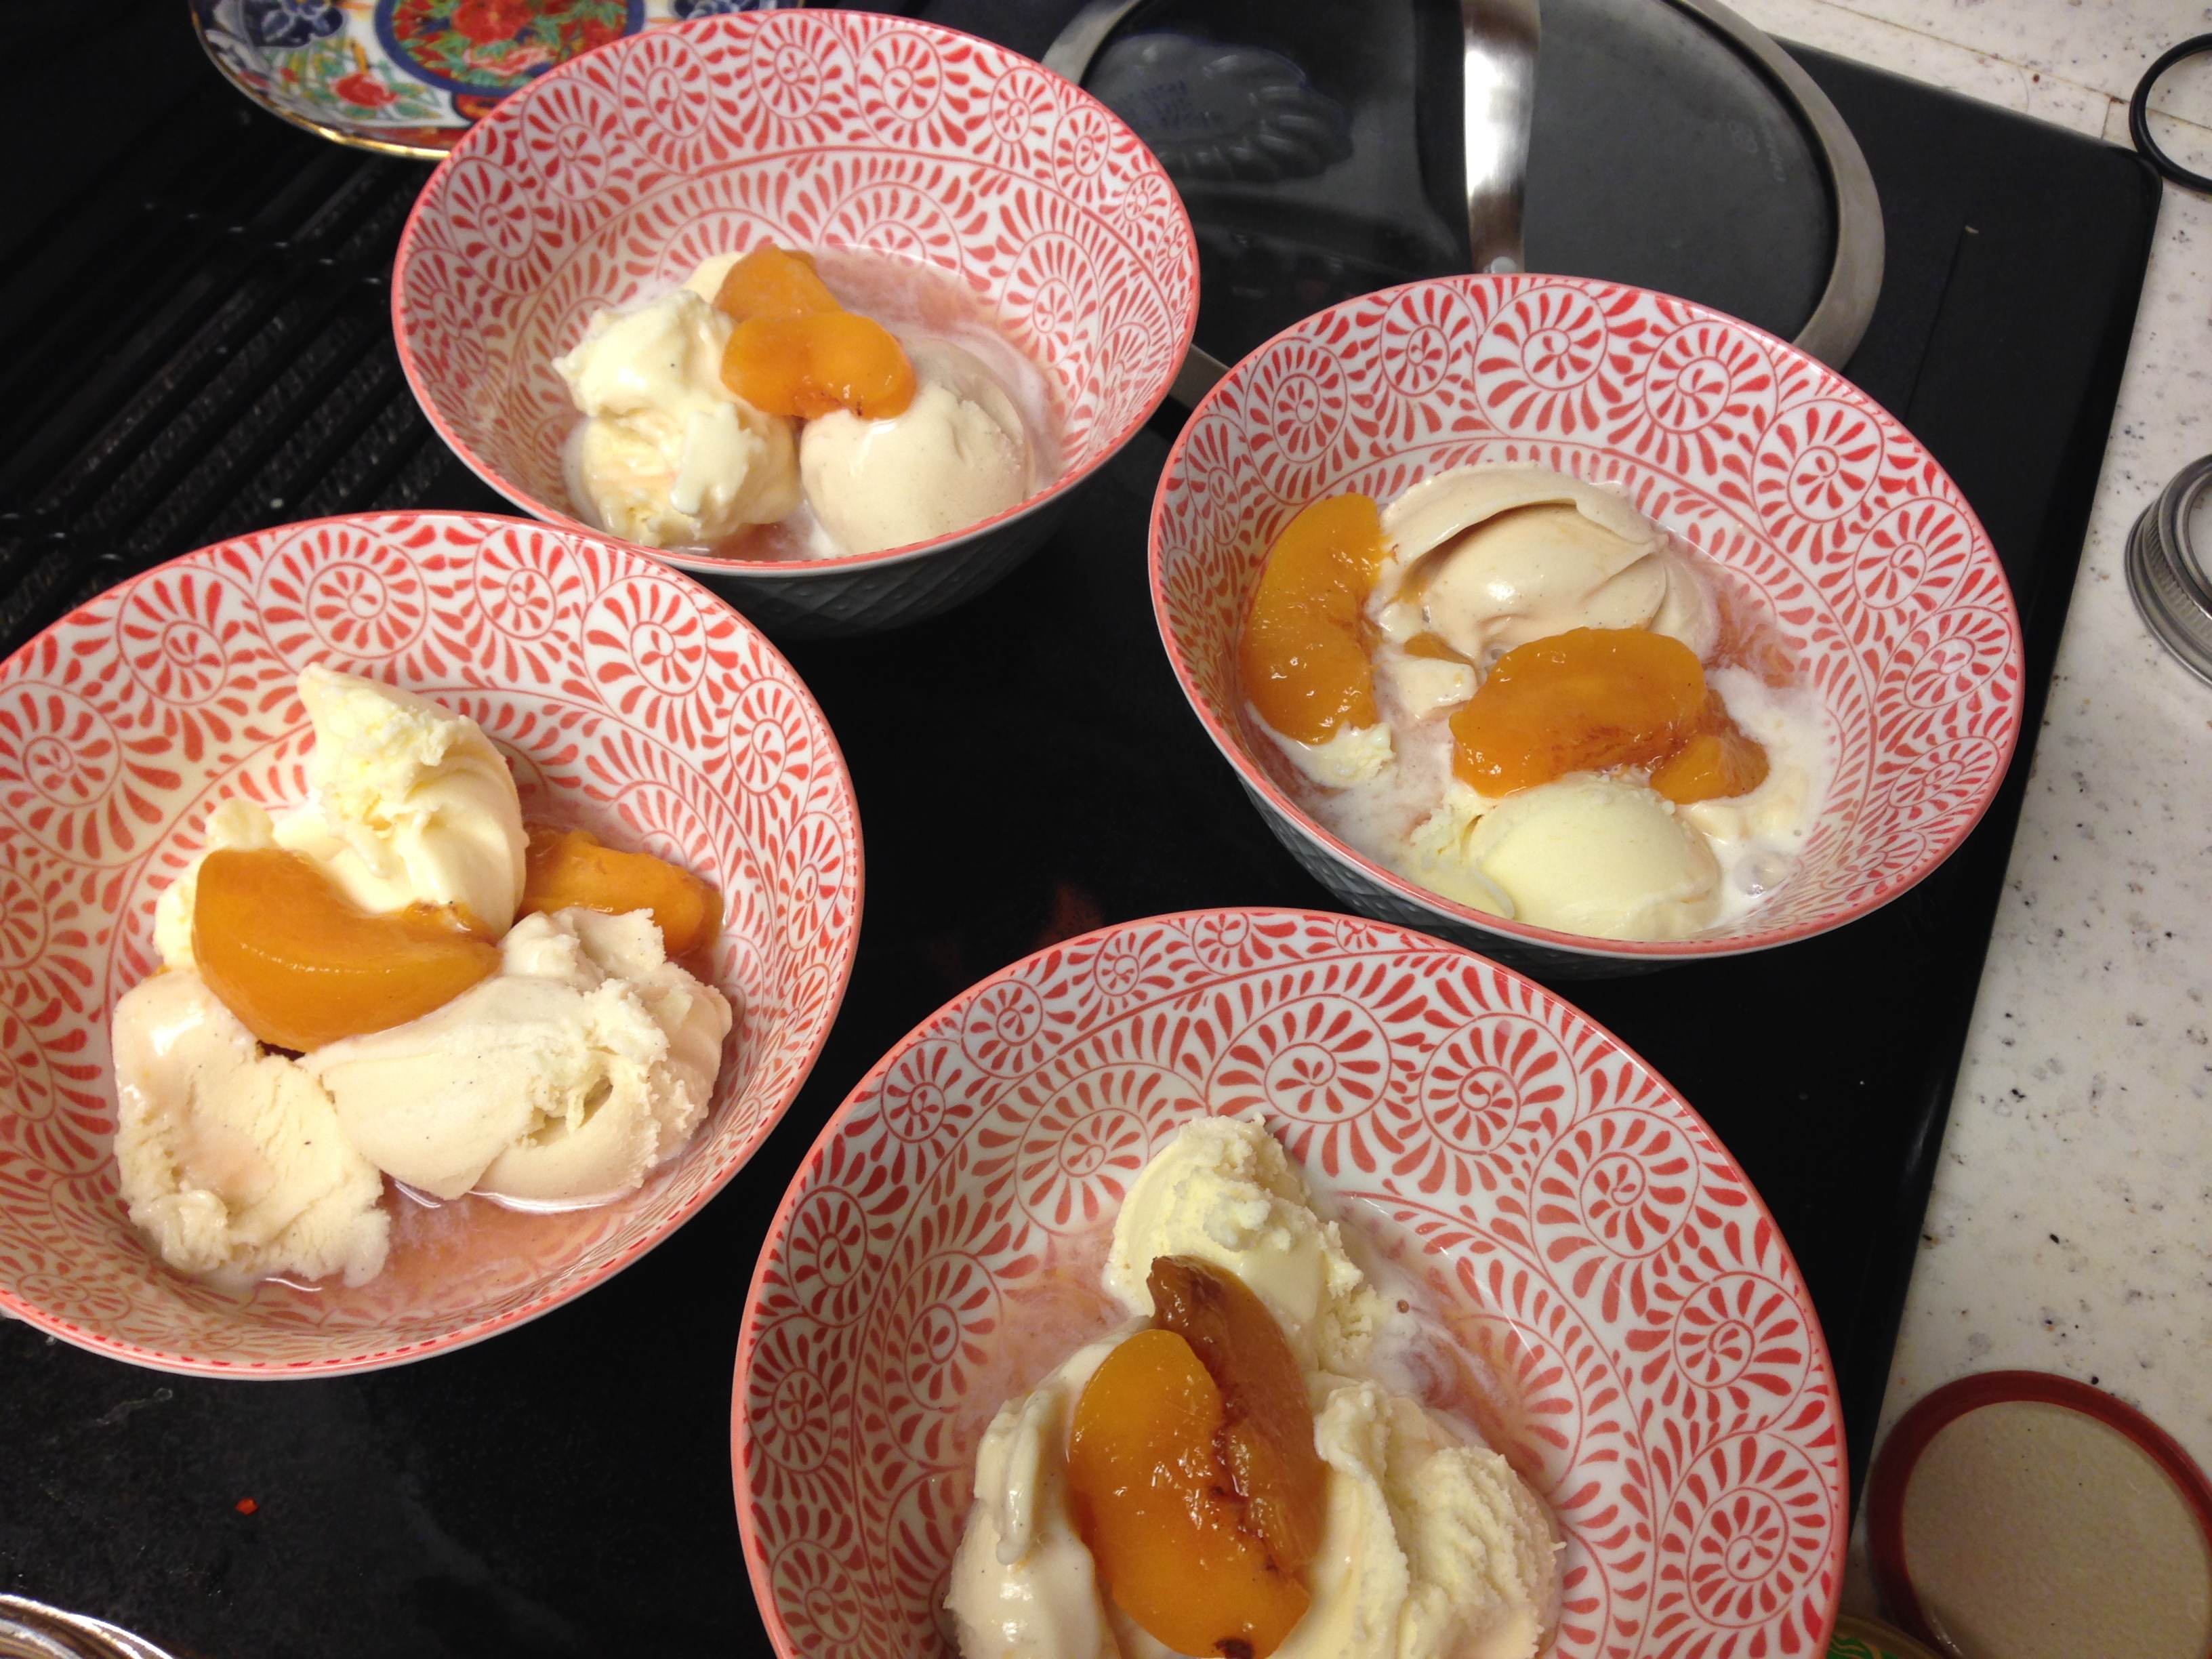
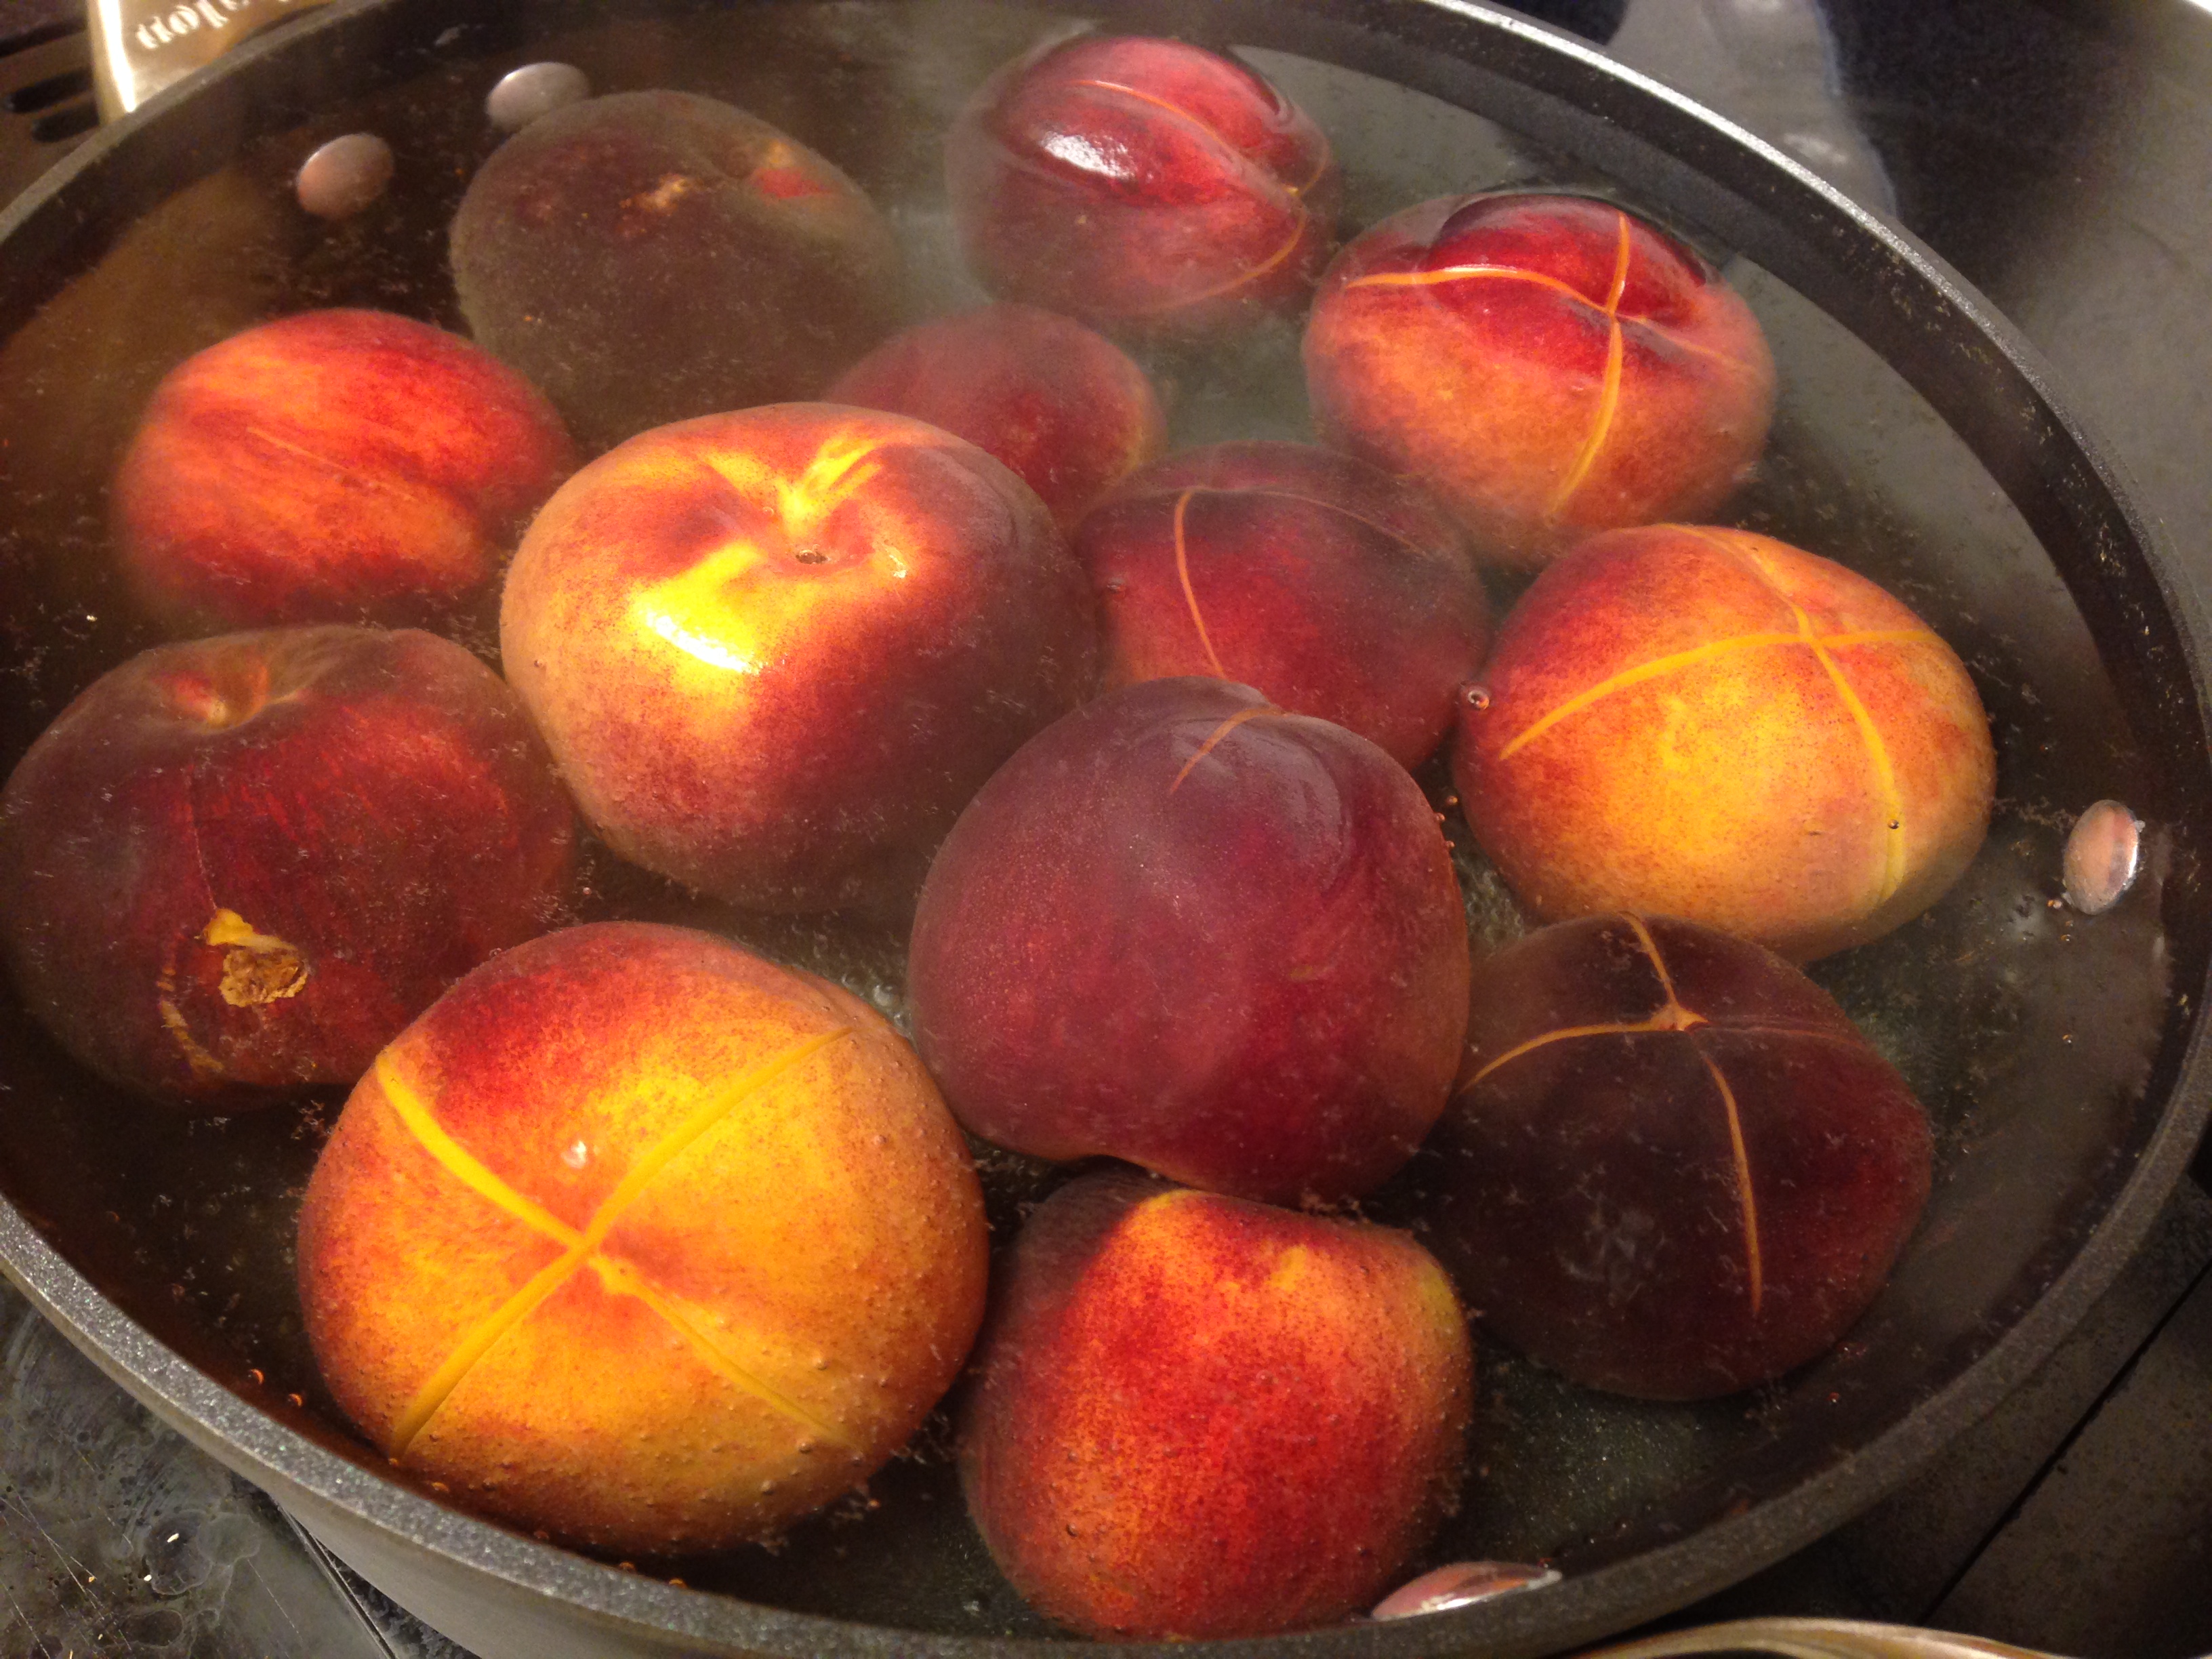
The Patriots and The Red Sox both coming back with two big wins in the last seconds of the game. To celebrate- we ate some delicious drunk fruit! I used some really nice bourbon for this recipe thanks to High West, the whiskey distillery in town. photo-142
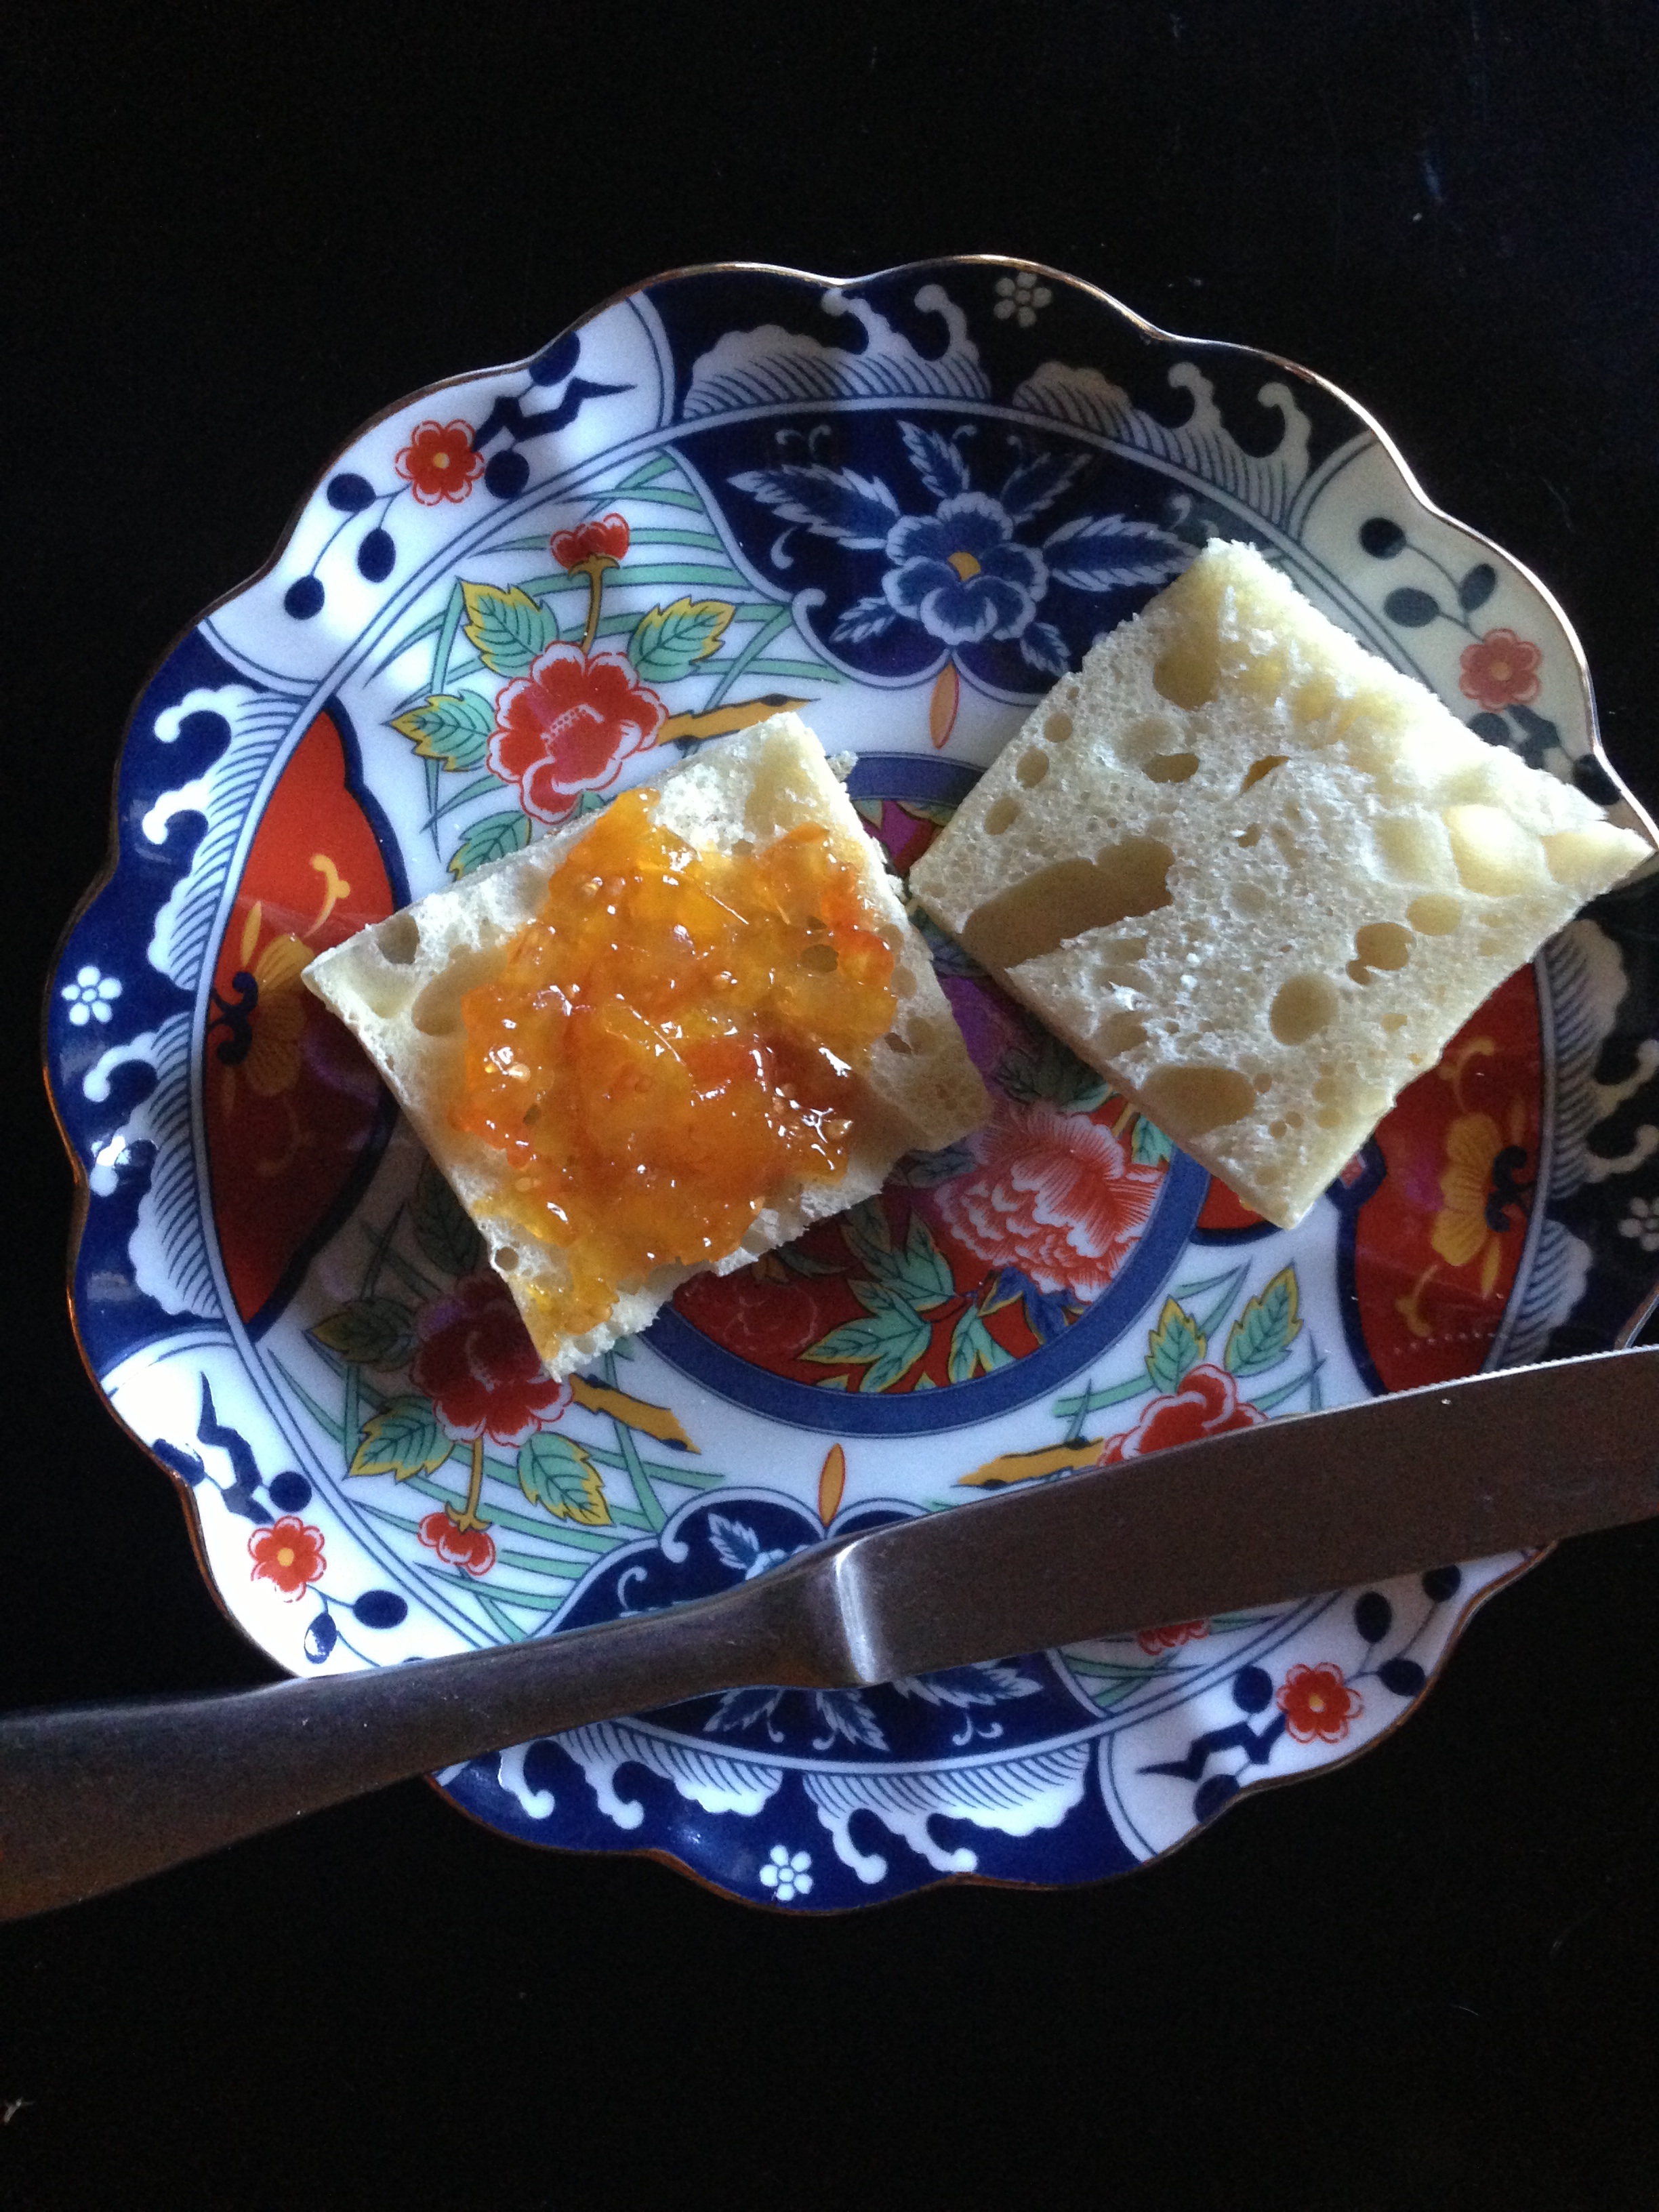
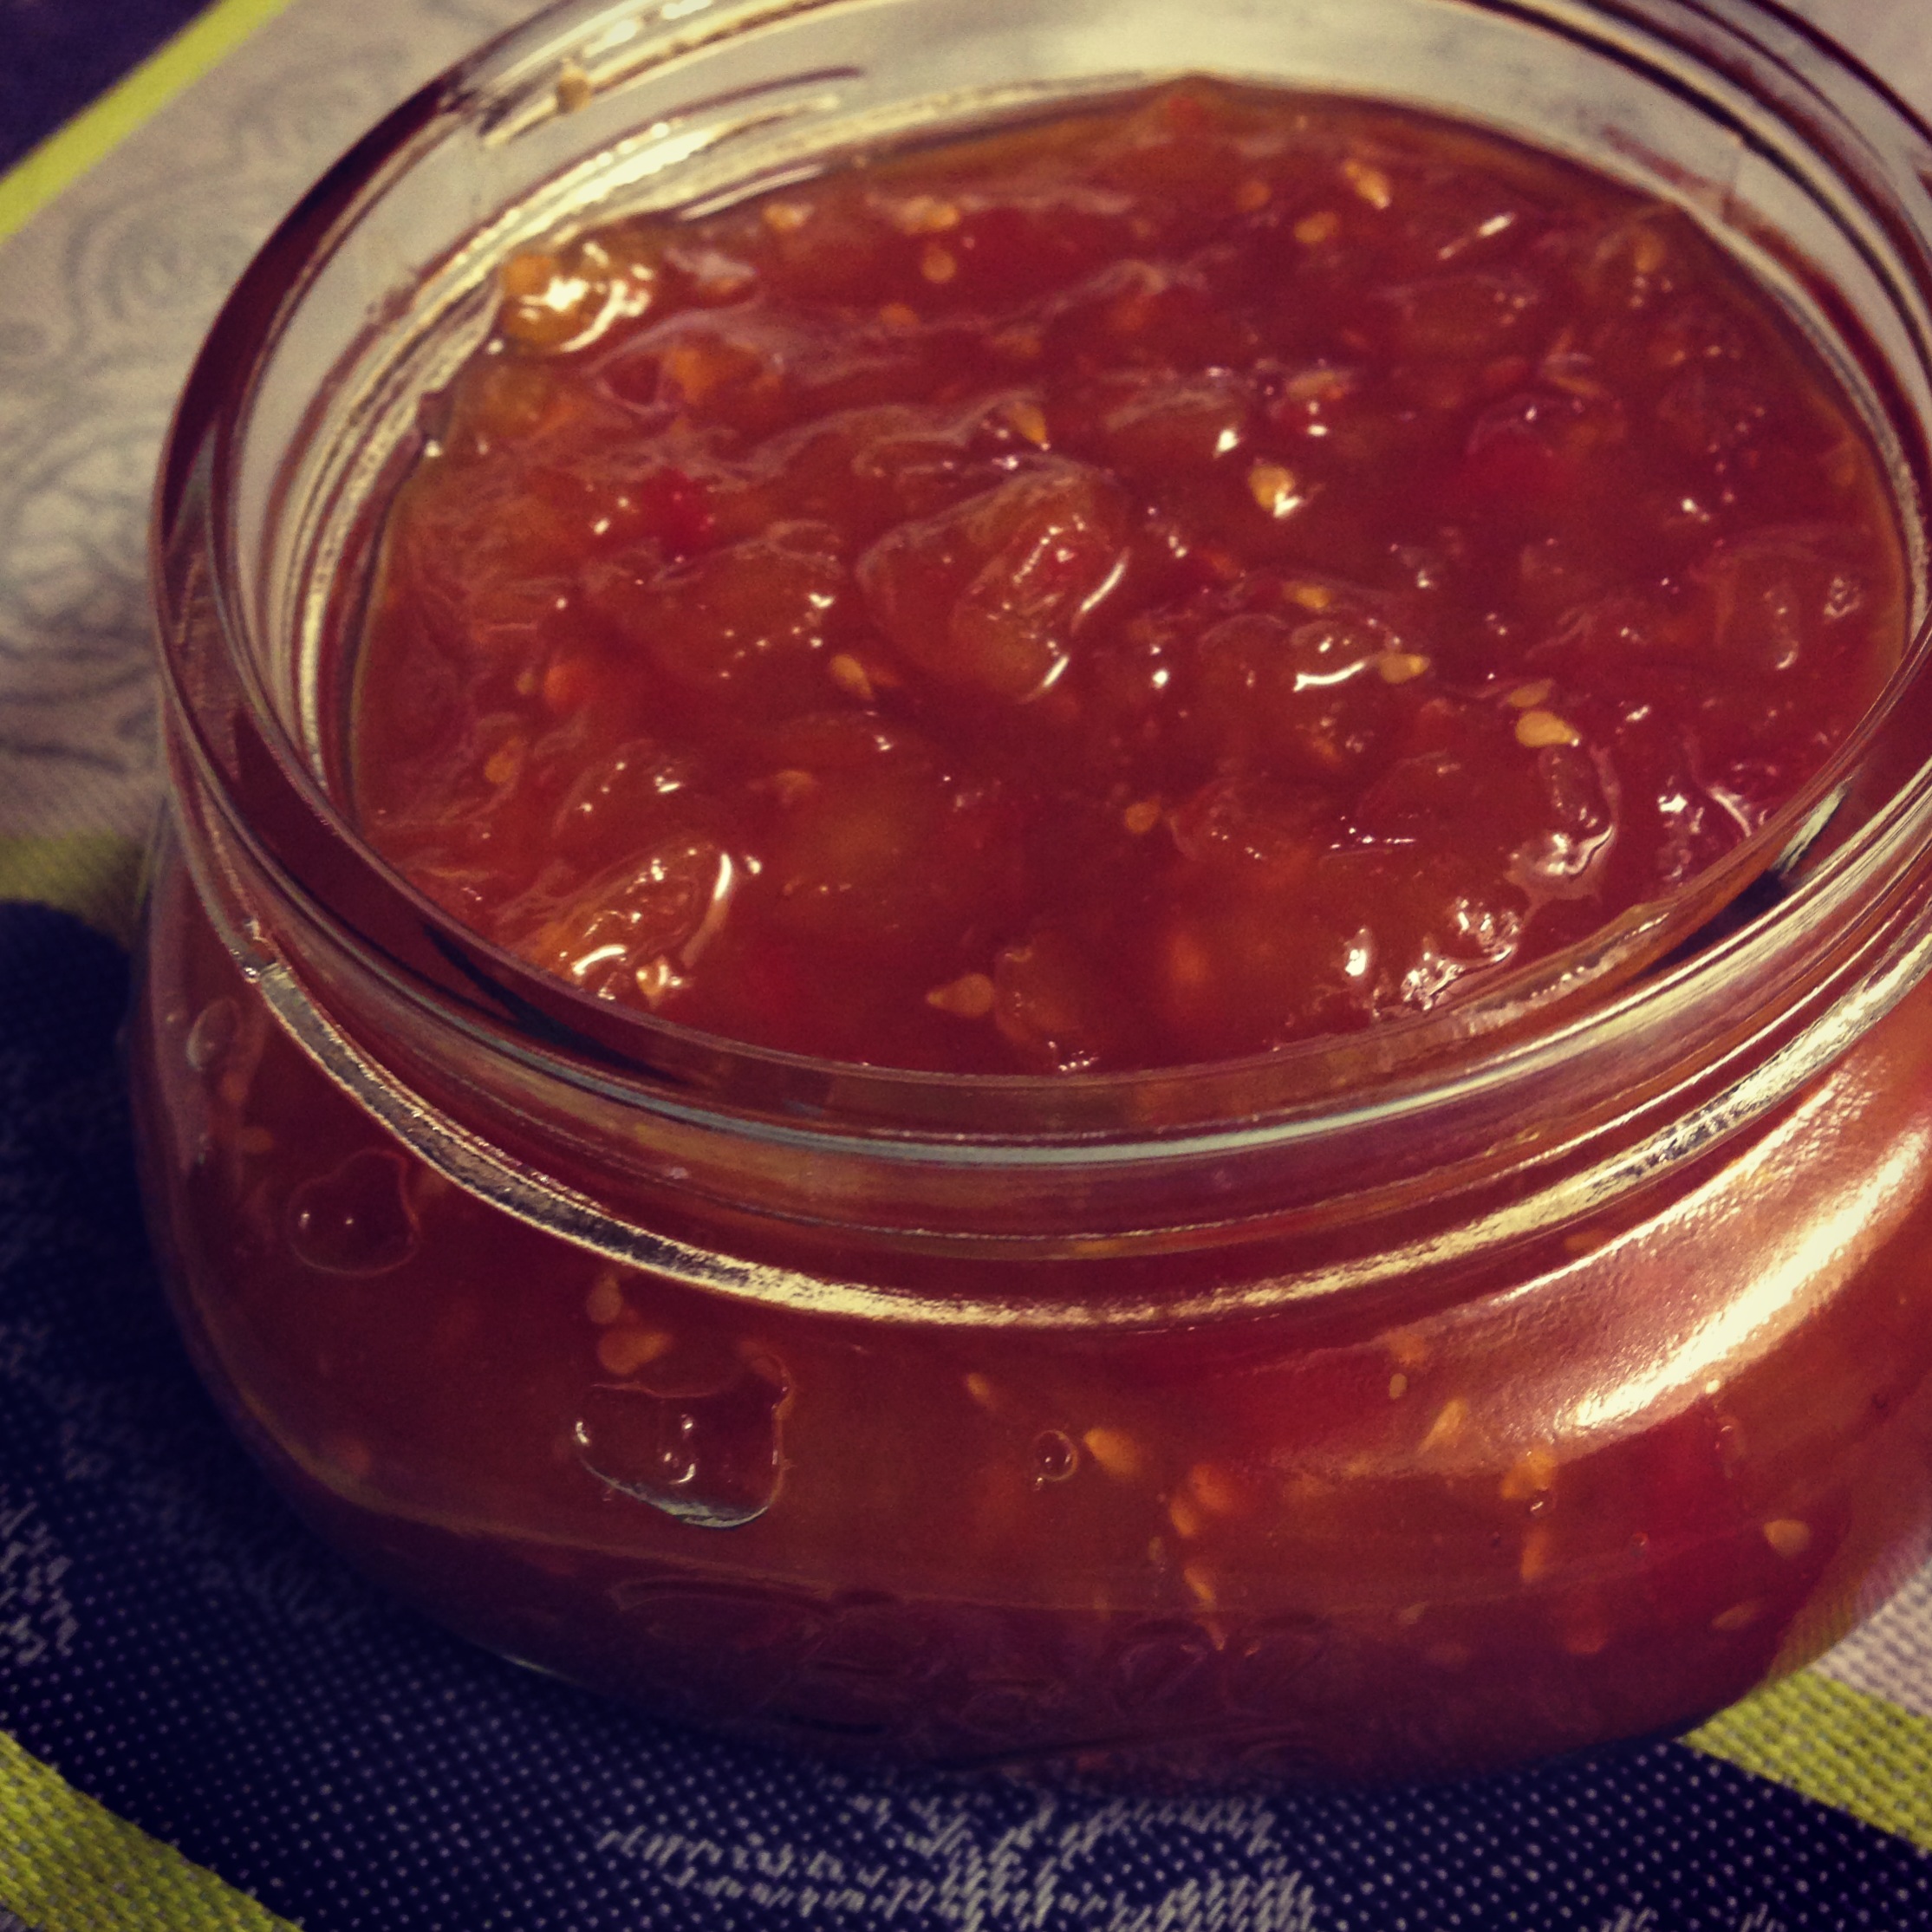
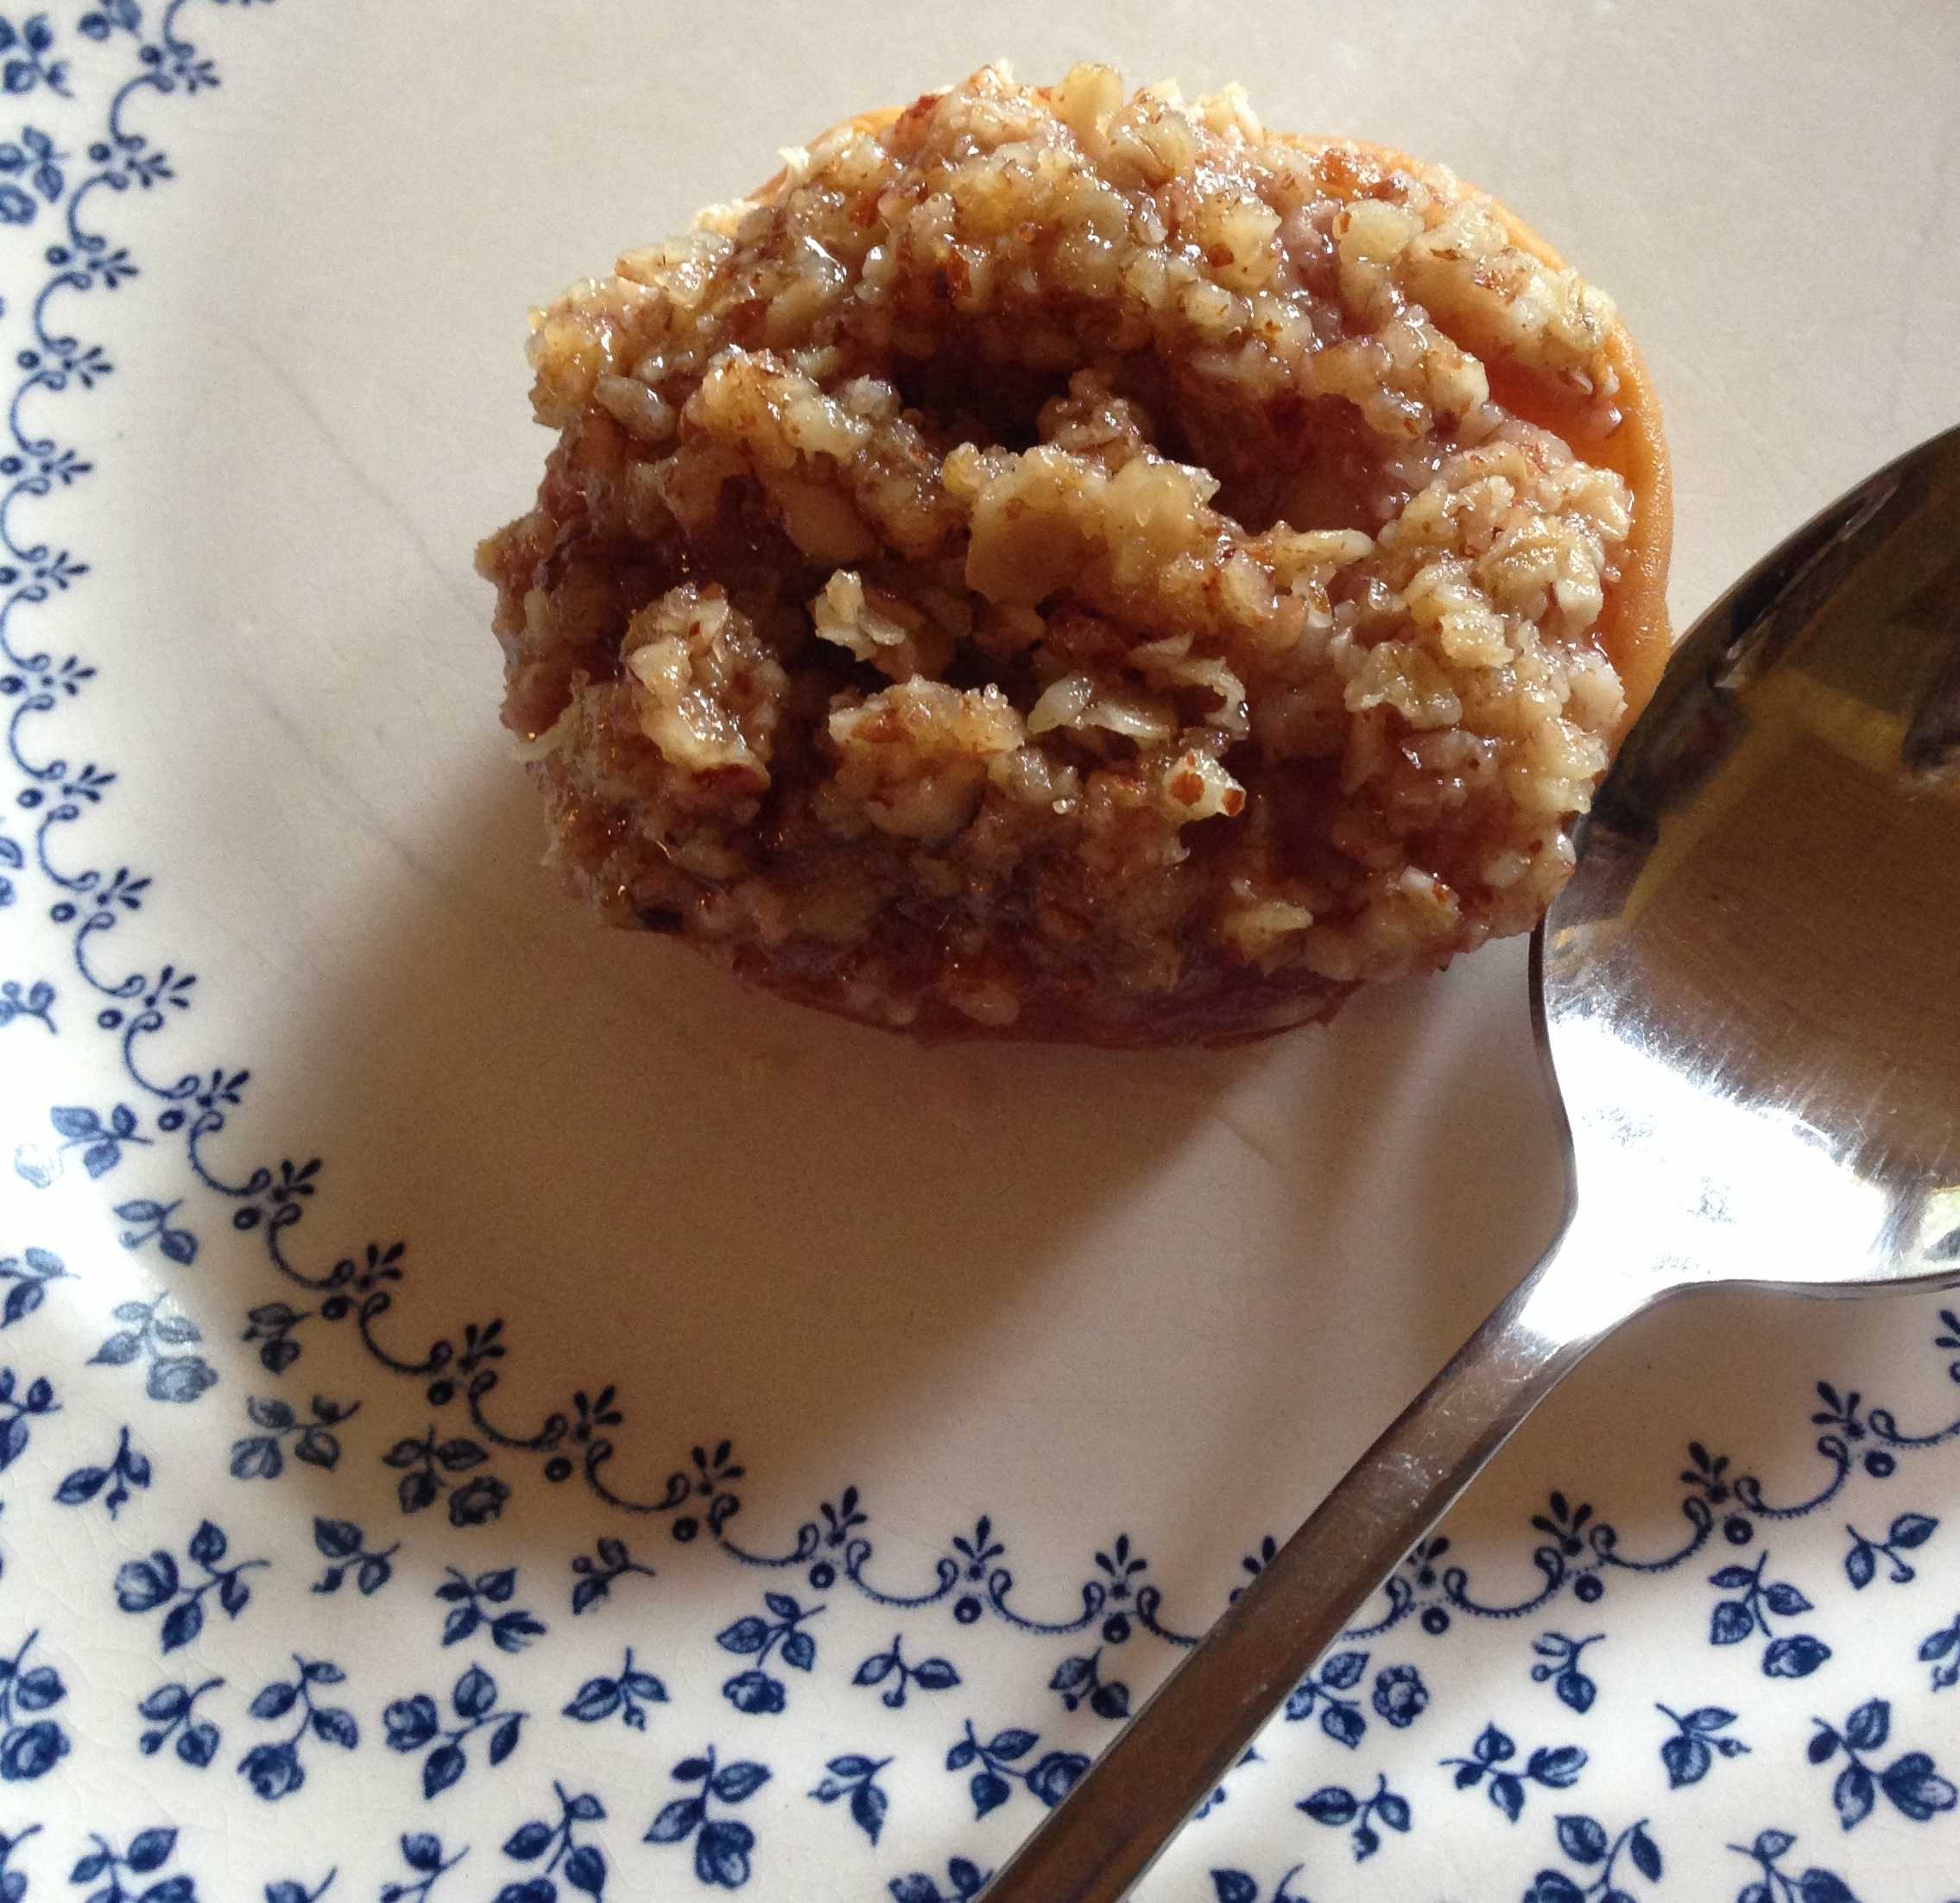
These Bourbon poached peaches are a great way to preserve summer fruit and it is easy to can them and store them for up to a year! The recipe also works well with pears too if you prefer!photo-140 
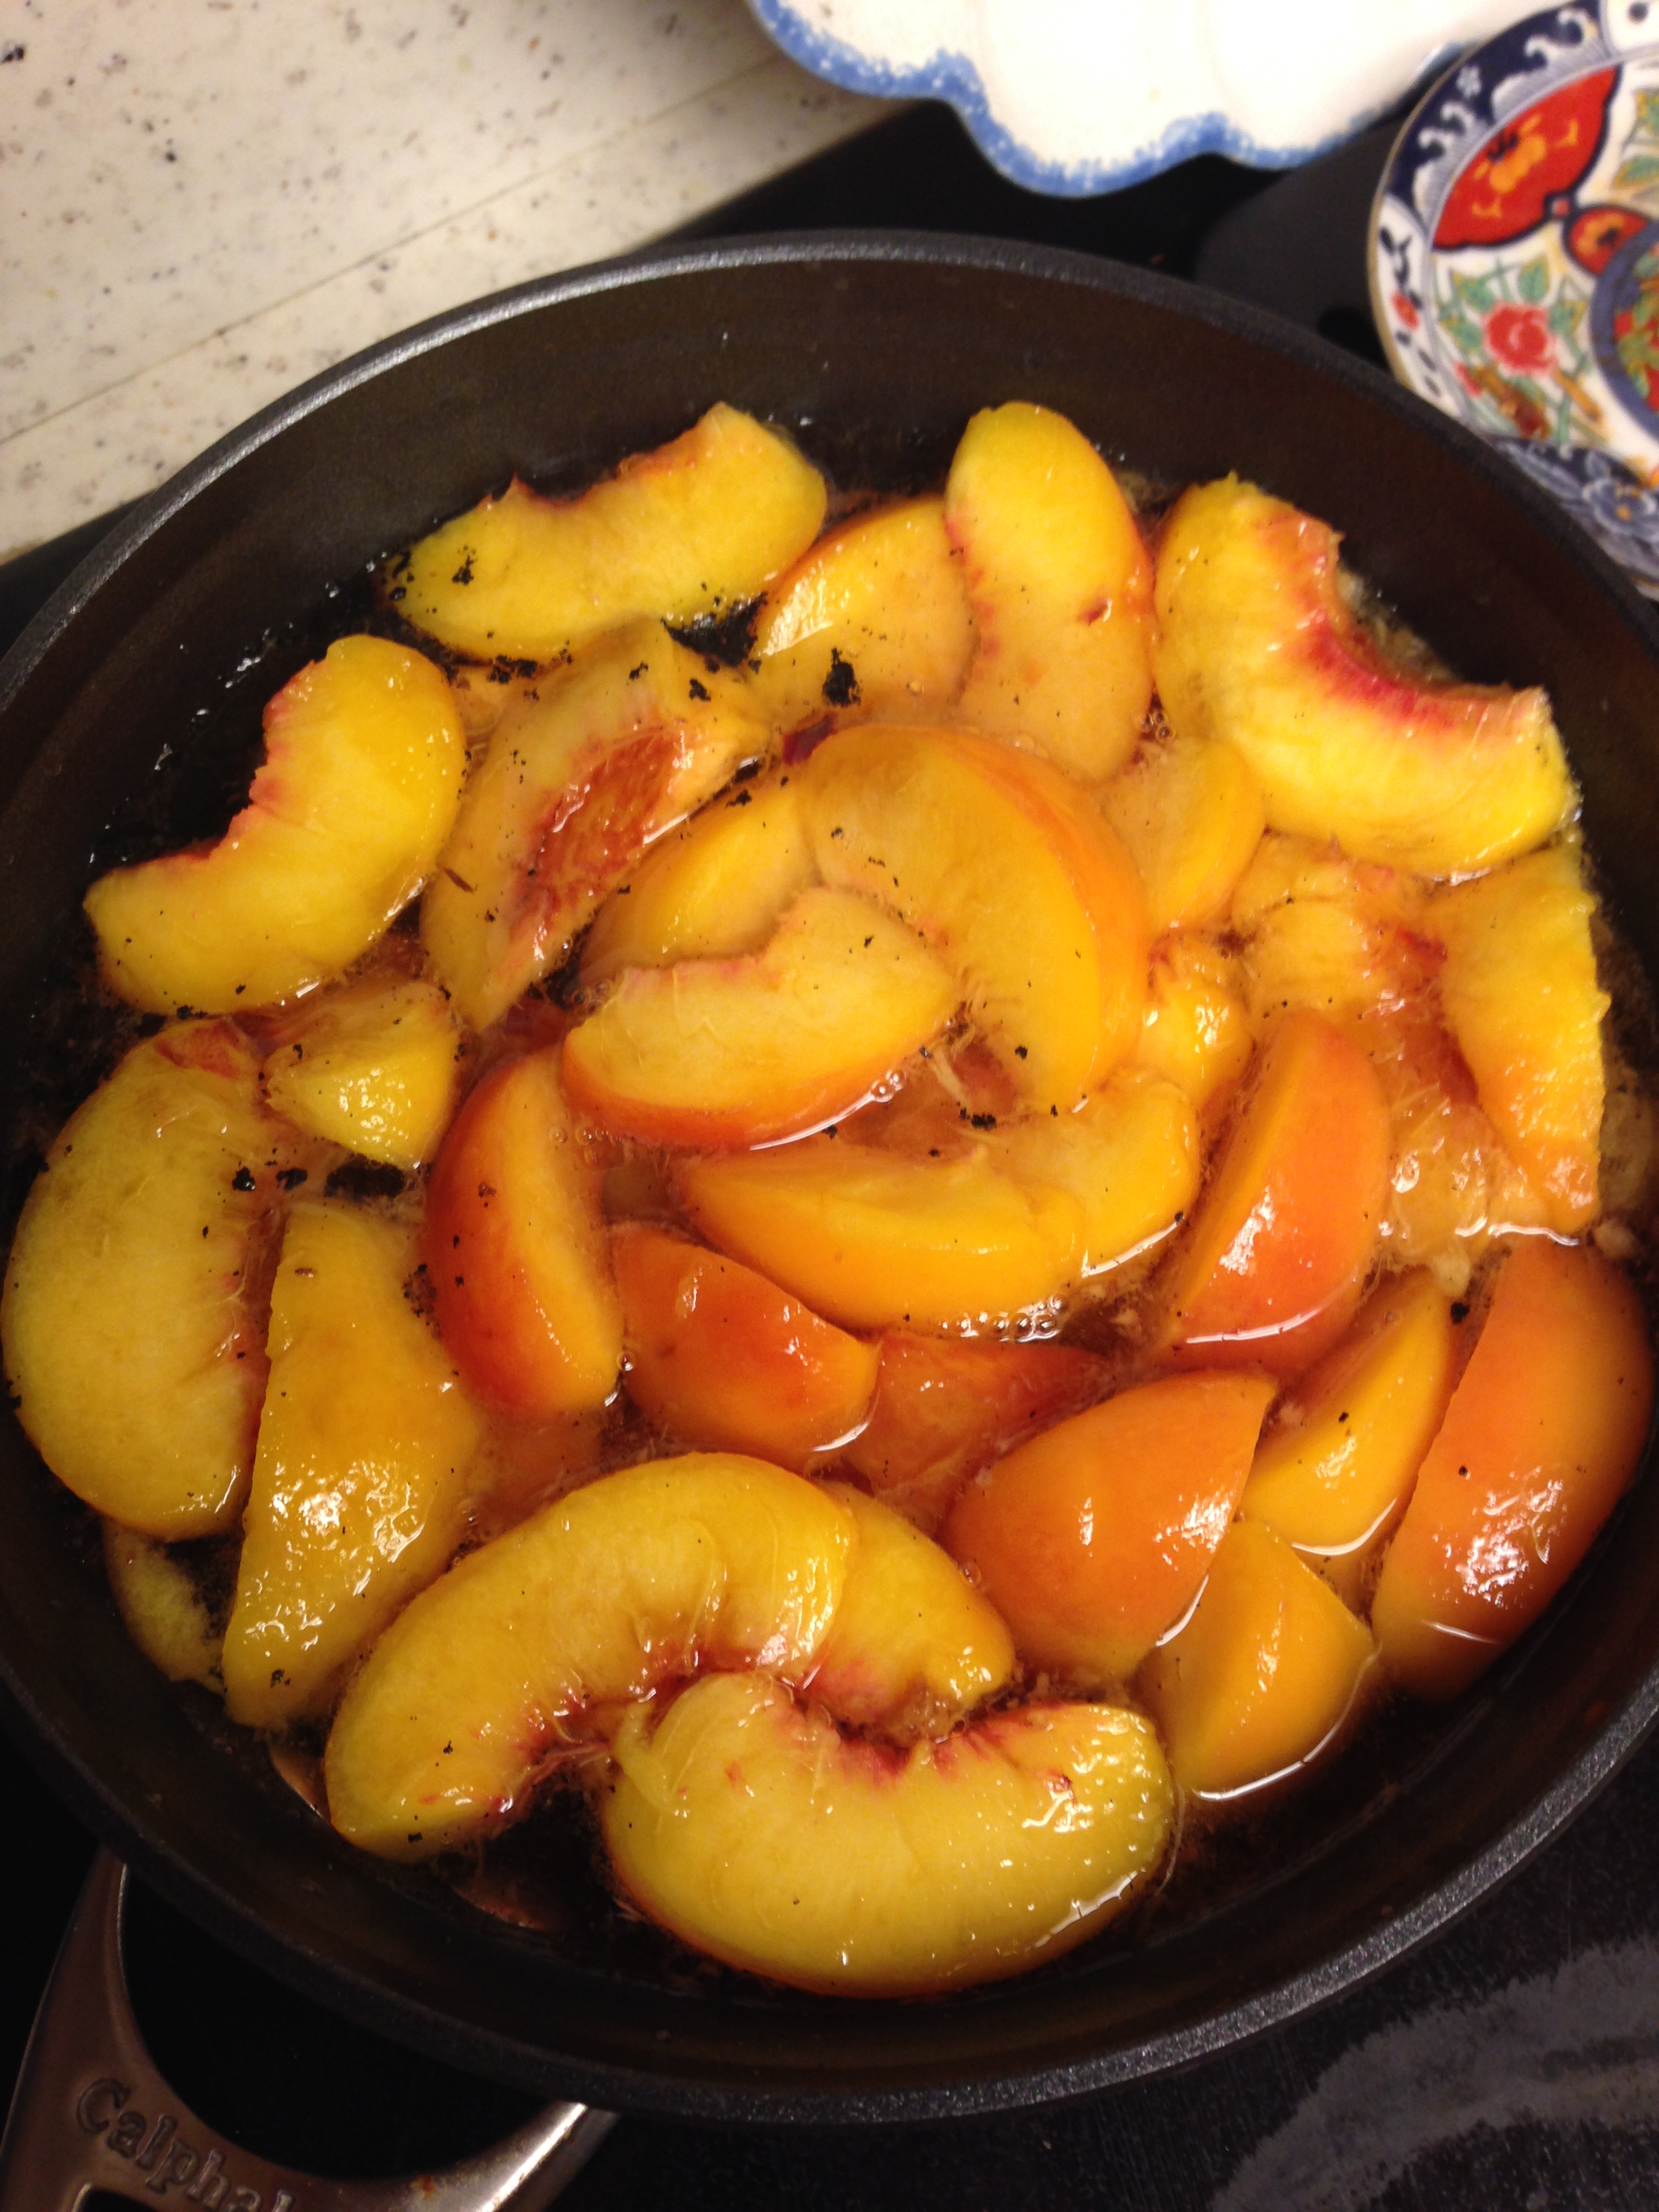
If you’re looking for a quick dessert option to satisfy your sweet tooth, throw these over some ice cream, frozen yogurt or greek yogurt for an easy treat! Enjoy!

Bourbon Poached Peaches:

  • 4 pounds peaches (about 12)

  • 2 1/2 cups sugar

  • 2 vanilla beans, split and scraped, pods reserved

  • 1 cup bourbon

Directions:

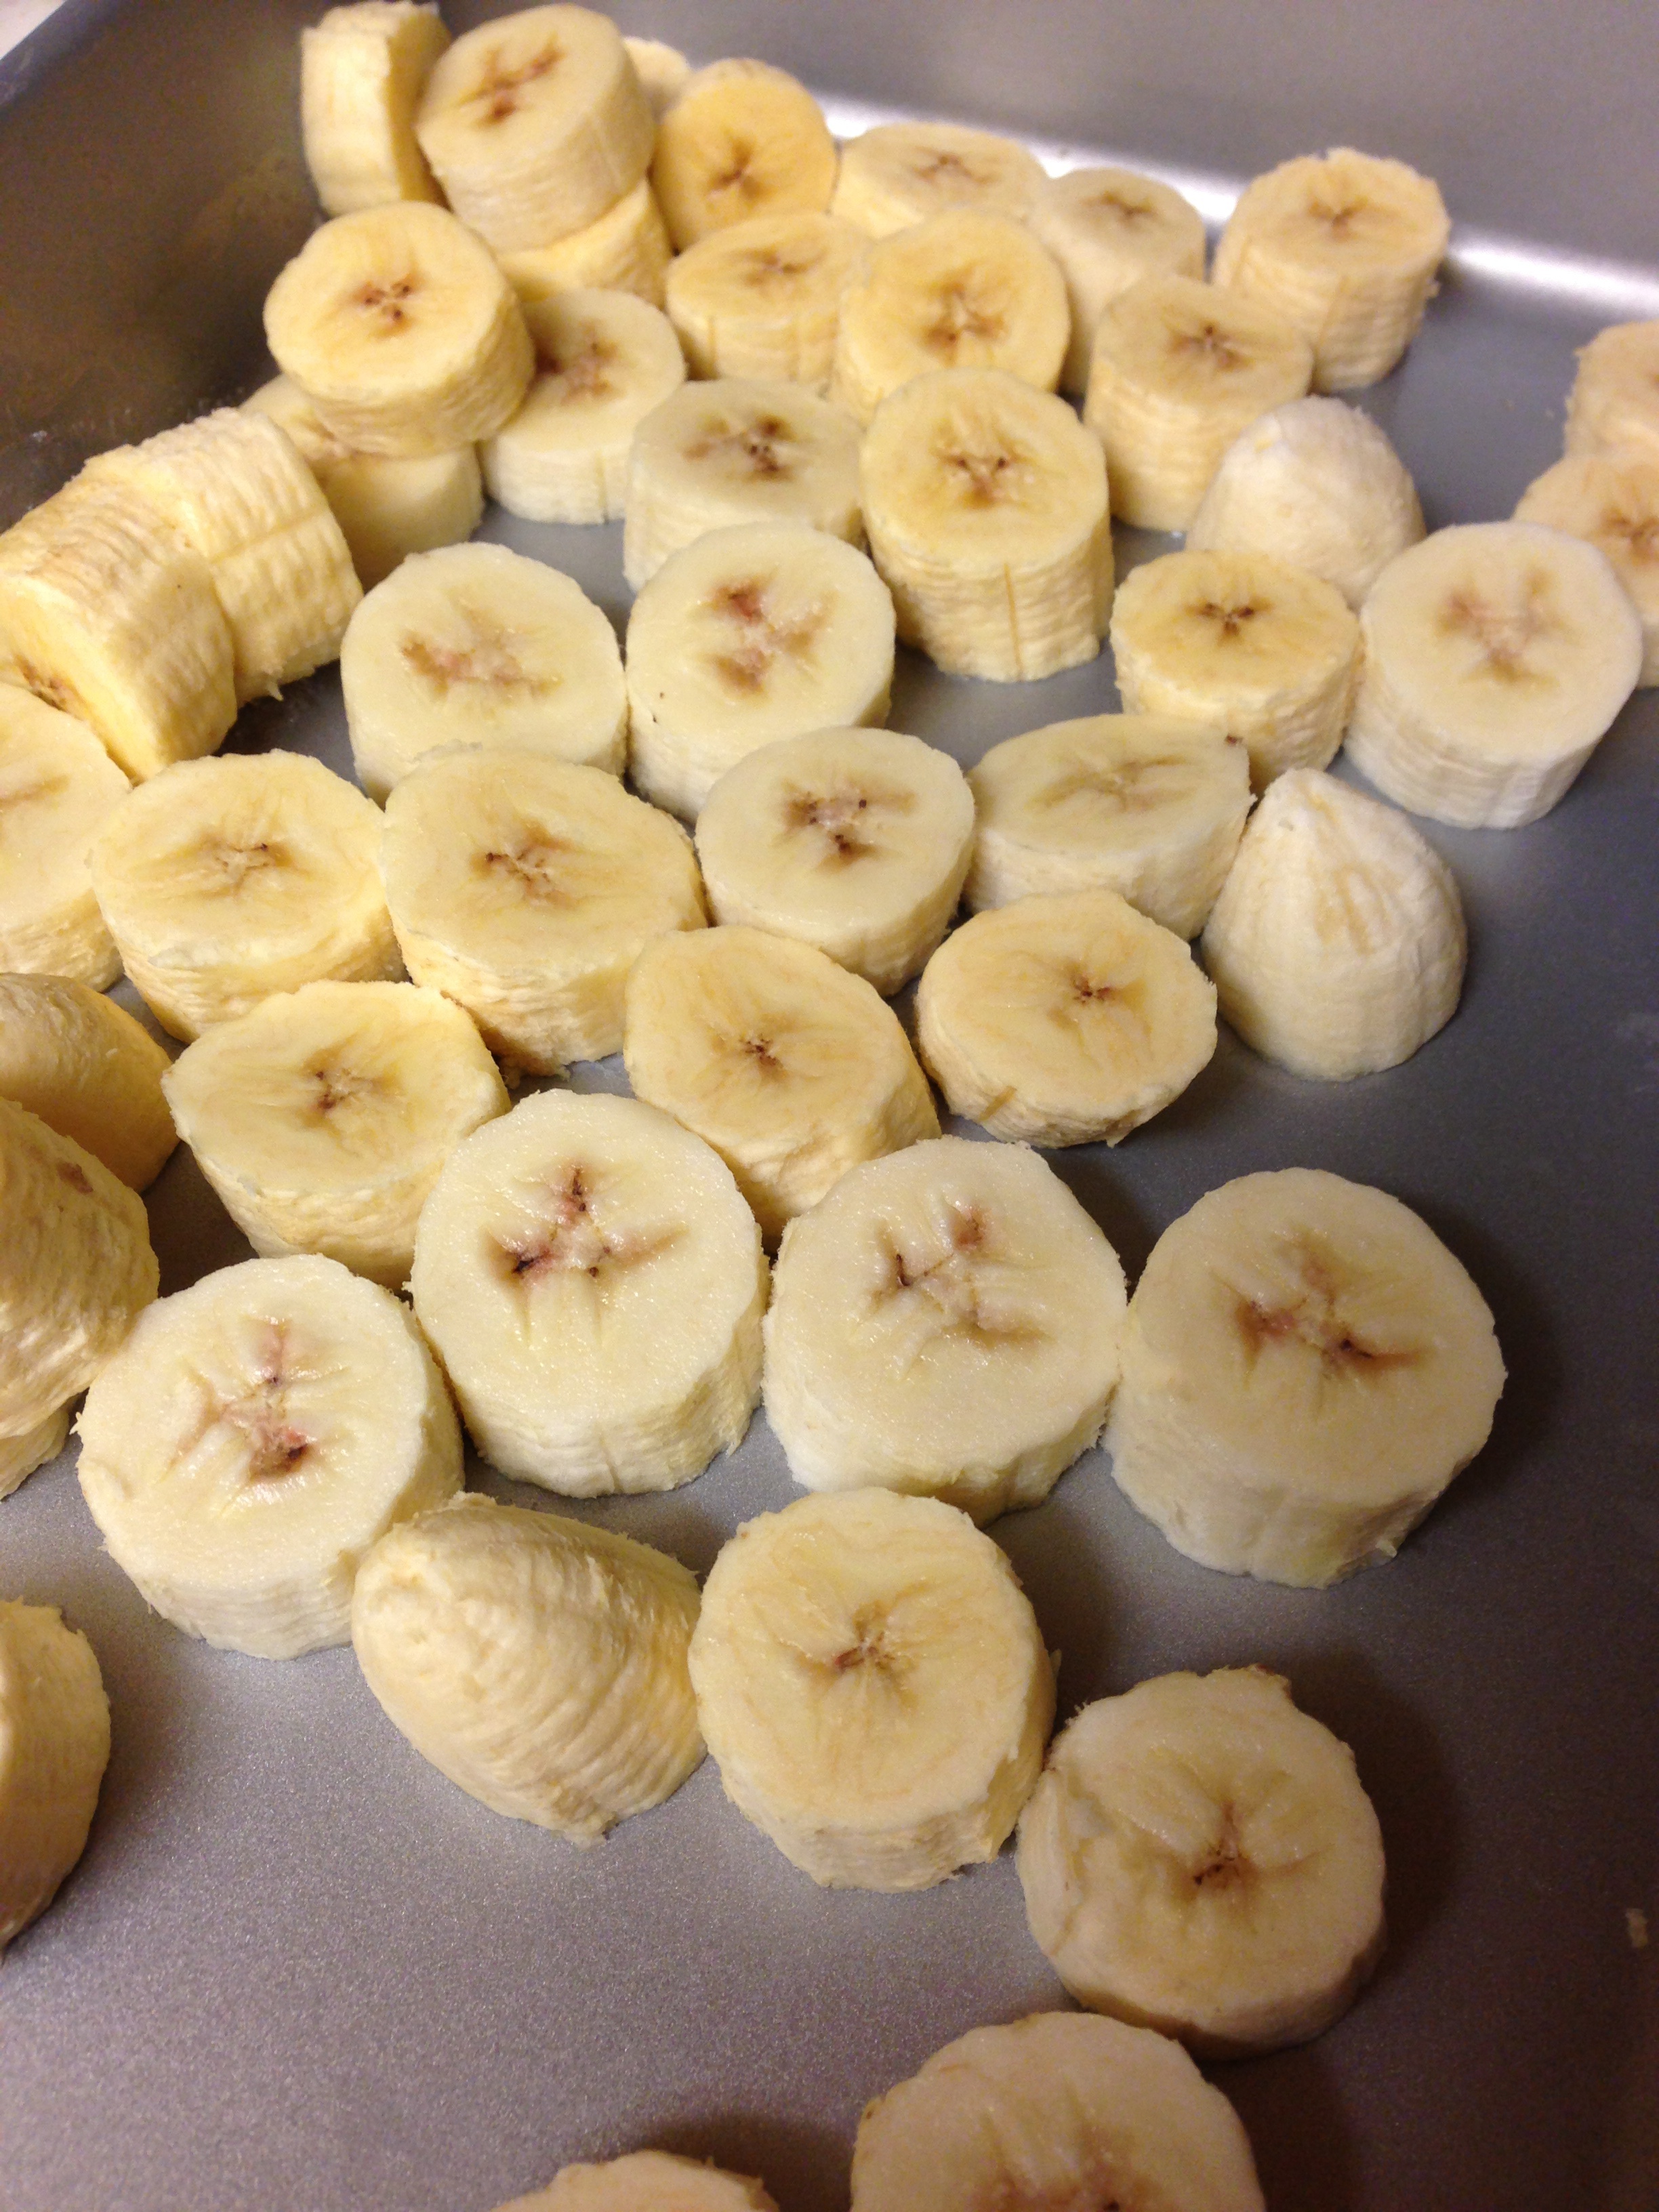
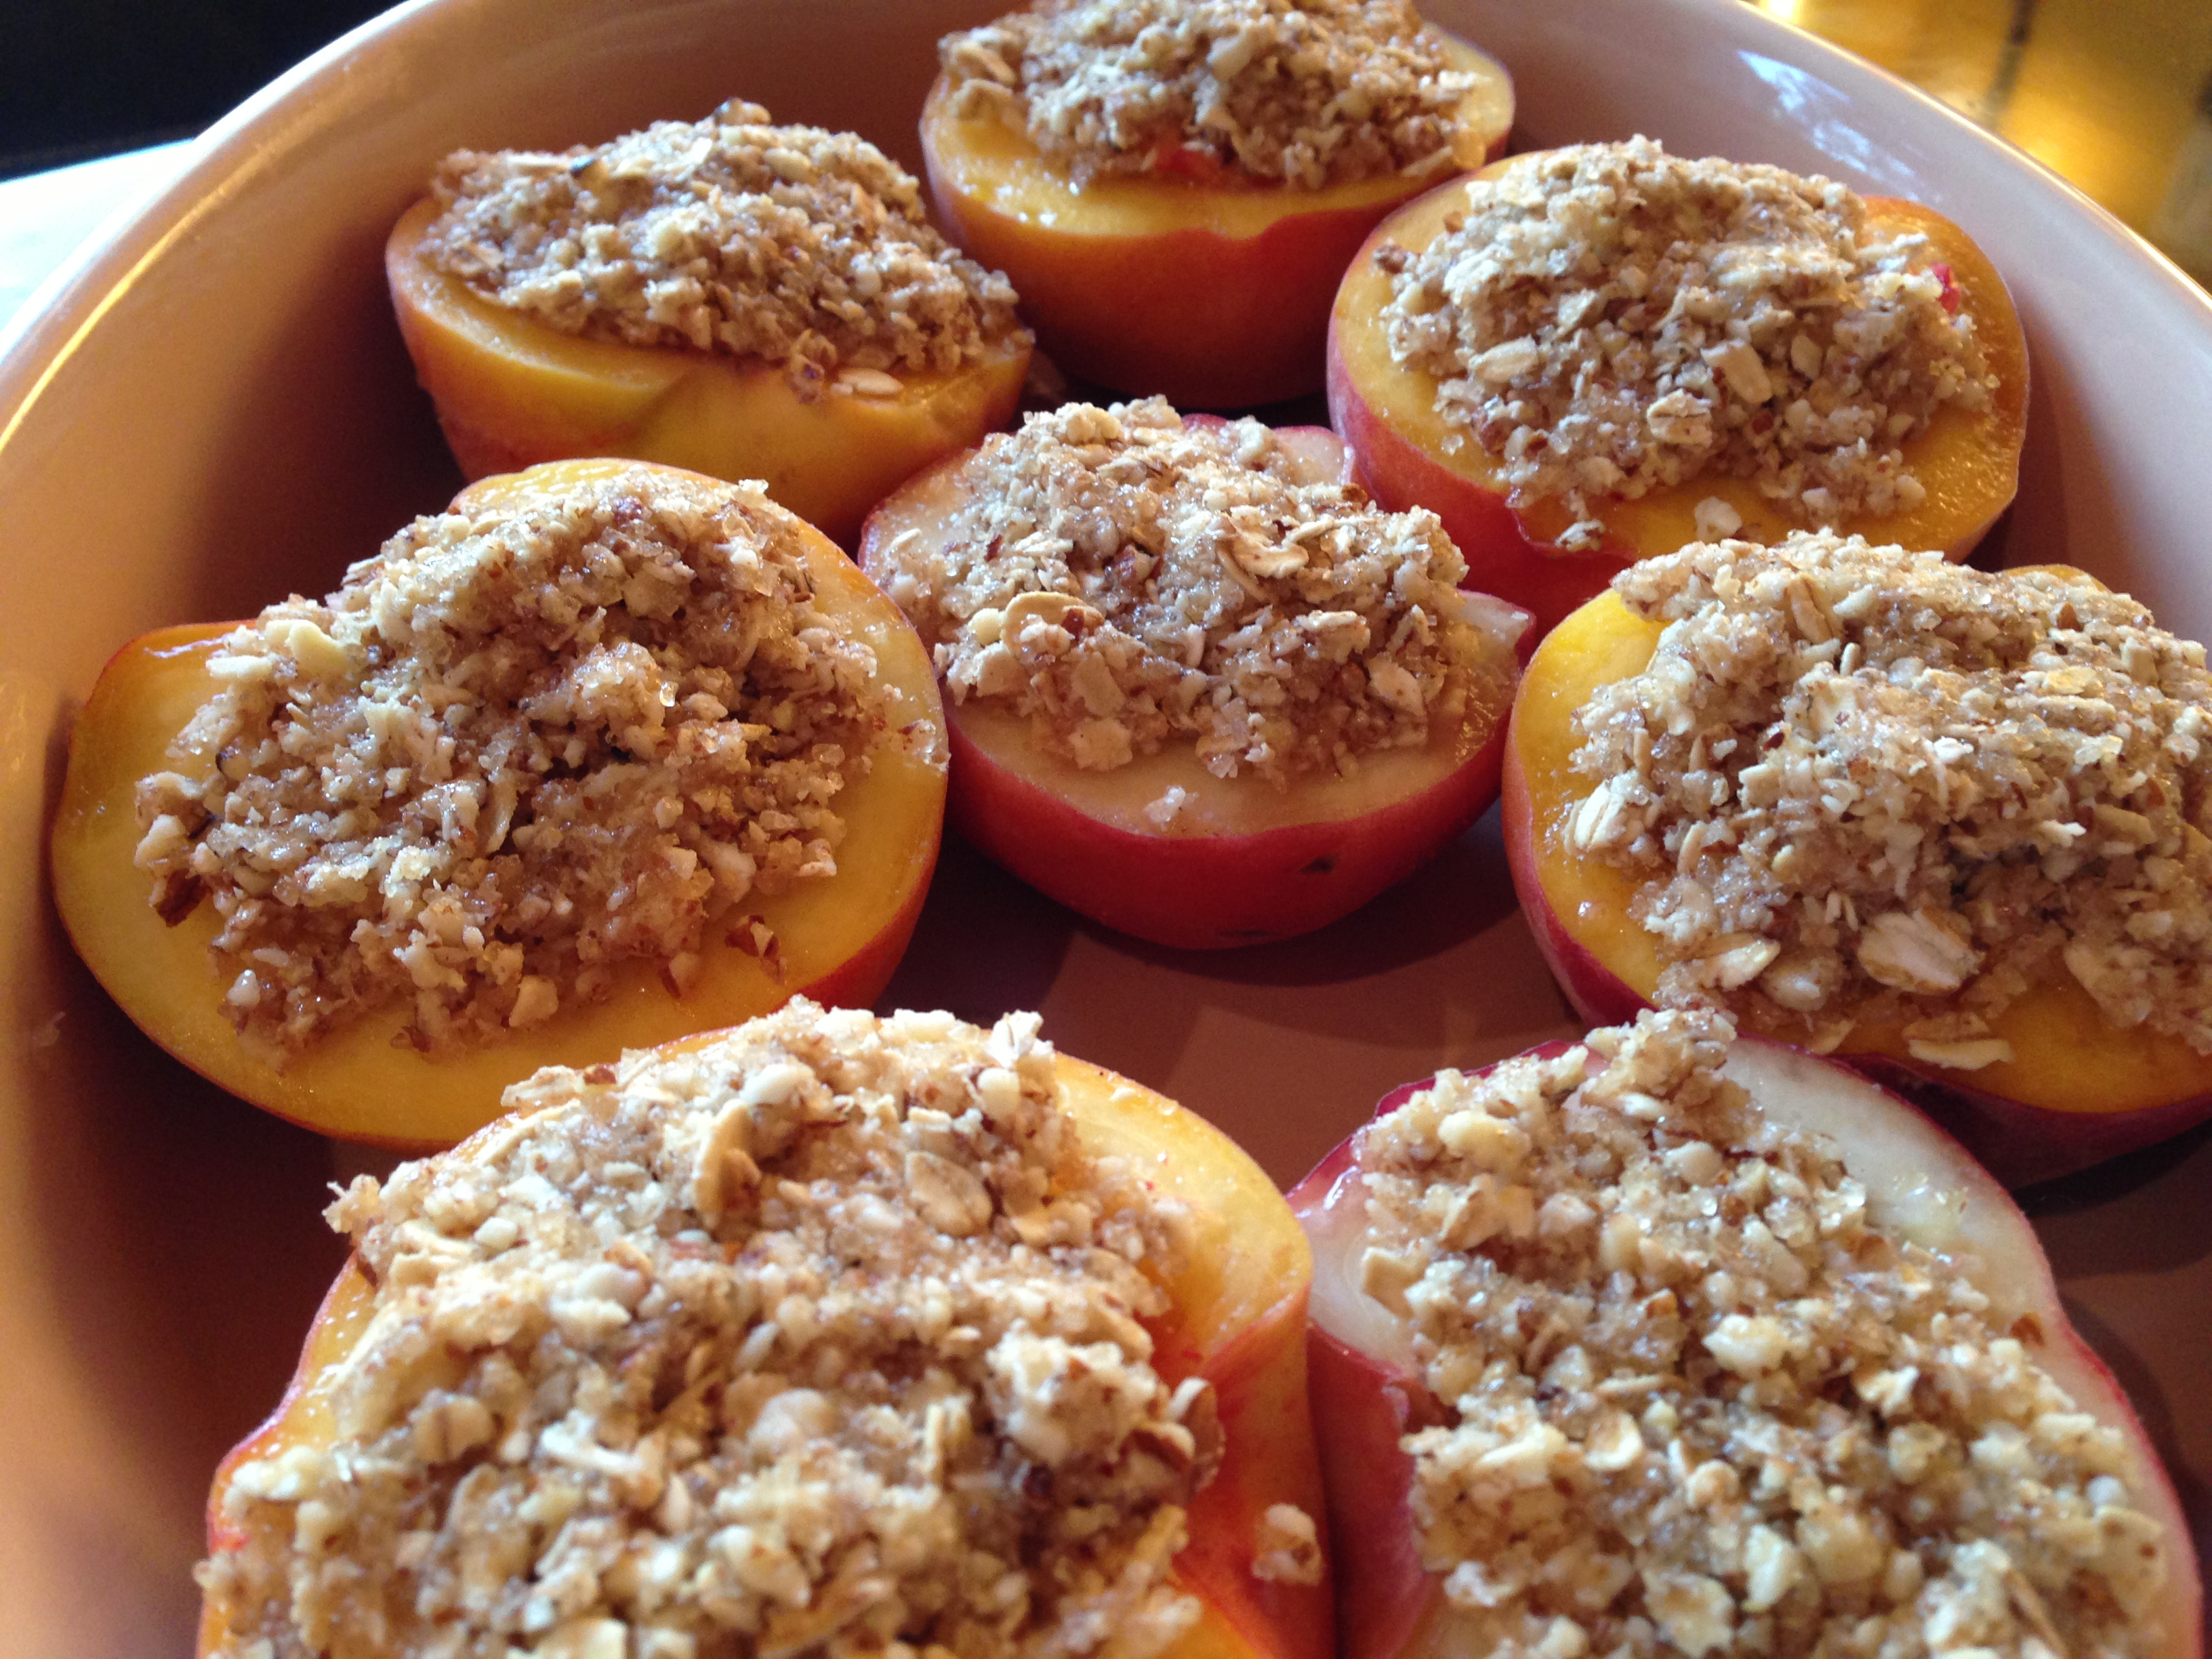
  1. Bring a large pot of water to a boil. Meanwhile, prepare an ice-water bath. Cut a small X into the bottom of each peach. Boil peaches for 1 minute.

  2. Transfer to ice-water bath. Let cool slightly. Peel and pit peaches, and cut into 3/4-inch-thick wedges.

  3. Bring 4 cups water, the sugar, and vanilla seeds and pods to a boil in a large saucepan, stirring until sugar dissolves. Add peaches and bourbon. Simmer until peaches are tender but still hold their shape, 5 to 7 minutes.

  4. Transfer peaches to a large bowl using a slotted spoon. Cook syrup over medium heat until reduced by half, about 15 minutes. Pour over peaches. Let cool completely.

  5. Divide peaches among five 12-ounce sterilized jars using a slotted spoon. (Jars can be sterilized by boiling in water, submerged, for 10 minutes.) Pour syrup over tops. Add vanilla pods to jars if desired. Seal jars, and refrigerate until ready to use or can and process in a hot water bath for long term shelf storage. photo-352Recipe from Martha Stewart Living, August 2011.

Advertisement

Healthy Banana “Ice Cream”

photo-344Last weekend was the autumnal equinox which means bye, bye summer, welcome autumn, fall, bright colored leaves, pumpkins and… snow? Yup that’s right it was snowing in the mountains today! photo-341 Big fluffy flakes, which we are all hoping means its going to be a great ski year. I am still trying to hold on to a few last pieces of summer and nothing says summer like ice cream. Unfortunately, I have a slight intolerance to classic ice cream, which is a HUGE bummer, because its so unbelievably delicious. Then I found out you can make “ice cream” from frozen bananas and my whole life changed. I wish that I was brilliant enough to come up with this idea because it actually is brilliant. photo-343It’s creamy, thick, and tastes like real ice cream, you’d never know it was just frozen whipped bananas. Yup that’s it- ONE ingredient. Which means its vegan, dairy free, sugar free, low calorie but it tastes like the full fat, total guilty pleasure stuff… I promise! This recipe falls into my favorite category of should I eat it for “breakfast or dessert?” It’s so healthy you could eat if for breakfast sprinkled with your favorite granola or put a scoop on pie, peach crumble or chocolate cake for an unbelievable topping. photo-342Add your favorite ingredients to make it your own: peanut butter, chocolate chips, Nutella, maple syrup, almond butter, even a few strawberries and you’ve got a totally different treat! All those ripe bananas you’ve been saving for banana bread but haven’t gotten around to it- this recipe requires less time, effort and is more delicious! Enjoy!

Ingredients:

  • 3 frozen bananas

Optional:

  • 3-4 Tablespoons peanut butter, almond butter or Nutella
  • 1/2 Cup chocolate chips
  • 3 Tablespoons Maple syrup or honey
  • 1/4 teaspoon sea salt
  • 1 Cup frozen strawberries

Directions:

  1. Slice bananas (like you would for cereal- pictured above) and freeze for a minimum of 3 hours or overnight, on a flat cookie sheet, baking dish or Tupperware.
  2. Place bananas in a food processor with desired ingredients (peanut butter, syrup, strawberries etc). I did peanut butter chocolate chip! Add bananas and 3-4 Tablespoons peanut butter (depending on how much you love peanut butter add more or less) and pulse until fully combined, use a spoon or spatula to break up large chunks of frozen banana.
  3. Once mixed, stir in chocolate chips at the last minute with a spoon (otherwise the food processor will chop them up.)
  4. Scoop into bowls and top with chocolate sauce, sprinkles, pretzels or your favorite ice cream sunday toppings or put a scoop on pie, cake or another delicious dessert and enjoy!
  5. If your bananas don’t seem to be mixing as easily as you’d like, add 2-3 tablespoons of almond milk or soy milk which will speed up the mixing process.
  6. Looking for more ideas to mix with your banana ice cream? Dark chocolate chunks and sea salt, strawberry banana, peanut butter and honey, Nutella banana, 2 teaspoons mint extract and dark chocolate chunks… mint chip! the options are endless… get creative!

Sweet & Savory Tomato Jam

photo-336It has been a very busy end of the summer with lots of travel to see friends and family for weddings and vacations! I just returned from 4 beautiful days on the Vineyard and I’m only home for a week before I’m off traveling again! I realized I haven’t been in my kitchen much at all this month. I tested out this recipe in Utah over Labor Day weekend and it was so fantastic when I arrived home last weekend I robbed my mother of all her tomatoes from her CSA to make a batch for her to keep!  photo-333 Fresh, plump tomatoes are one of the sweetest rewards of Fall. Heirlooms, beefsteak or cherry- you can’t go wrong – they are all so delicious and in season! With the Farmers market bursting at the seams with fresh tomatoes I’ve been looking for new and different recipes to enjoy them!  photo-335The classic Caprese salad is always a delicious treat however, I usually max out after eating it three nights in a row. This tomato jam is the perfect balance of sweet and savory- I love spreading it on a French baguette with some goat cheese or a delicious creamy cheese like St. Andrea or Brie.  photo-340It also pairs perfectly with pork tenderloin, beef and is great for jazzing up fish or chicken. There is nothing better than preserving fresh produce and pulling it out of the cupboard in the dead of winter when you’re craving a little taste of summer! photo-339It also makes a really great house warming or birthday gift… but this recipe only makes 1 1/2 pints of jam so it better be a very special (and lucky) someone because once you try it you’ll have a very hard time giving it away! Enjoy!

Sweet & Savory Tomato Jam (Original recipe from Food52)                                                  Makes 1 1/2 pints

  • 3 1/2 pounds tomatoes, coarsely chopped (red or yellow or mixture of both)
  • 1 small onion, chopped
  • 1/2 cup brown sugar
  • 1 1/2 cup granulated sugar
  • 1 teaspoon salt
  • 1/2 teaspoon coriander
  • 1/4 teaspoon cumin
  • 1/4 cup cider vinegar
  • juice of 1 lemon

Directions:

  1. Put all ingredients in a 2-quart pot. Bring to a gentle boil, then reduce heat to a simmer. Cook until thickened to a jam-like consistency, about 3 hours.
  2. Transfer to 3 sterilized 1/2 pint glass jars and store in refrigerator or use a hot-water canning bath for 15 minutes for long-term storage. (See here for canning 101 basics).

Here are a few other delicious and inspiring tomato recipes I am dying to try!

Almond Crisped Peaches

photo-326Holy smokes- its September. I actually have no idea where my summer went. But September means a lot of great things: kids are back in school, fall foliage, peach season and most importantly…Football season! The peaches are in full swing in Utah and they are so delicious! photo-320This recipe is a fun and healthy spin on the classic peach crumble or crisp. The individual peach halves make a beautiful presentation if you are entertaining. The crunchy almond crisp topping is light enough that it allows the sweetness of the fresh peaches to shine through – so you’re actually enjoying the peach instead of a lot of sugar. photo-321Crunchy sweet perfection. Originally, I topped the dessert with ice cream- turns out, it doesn’t need it, they are amazing au natural! And… They are gluten free! Come to think of it a dollop of plain yogurt on these peaches would make a delicious breakfast…drool.photo-324This recipe calls for such basic and simple ingredients you’re bound to have some variation on hand at all times- which makes this a perfect last minute sweet treat! Sub peaches for plums, nectarines, apples or pears. Switch up the almonds for your favorite nut- the options are endless! photo-325I’ve eaten (and made) many different kinds of peach deserts but this one might be my new favorite and definitely the easiest! Enjoy!

Almond-Crisped Peaches (Original recipe from Smitten Kitchen)

Ingredients:

  • 4 ripe peaches, halved and pitted
  • 1/3 cup whole almonds (roasted or raw)
  • 1/4 cup turbinado sugar (raw sugar)
  • 1/4 cup rolled oats
  • 1/8 teaspoon cinnamon (optional)
  • pinch of sea salt (optional)
  • 3 Tablespoons cold unsalted butter, cubed

Directions:

  1. Preheat the oven to 350 degrees.
  2. Place peaches cut side up in a baking dish.
  3. In a food processor, combine almonds and sugar until coarsely ground (till only a few pebbles remain).
  4. Add oats, cinnamon and salt if adding them, and butter, pulsing until they are blended.
  5. Scoop almond mixture into the center of each peach and press flat to coat the whole top of the peach.
  6. Bake for 45 minutes to 1 hour (baking time will depend on peach size) till the top is brown and the fruit is soft enough to cut with fork or spoon.
  7. Serve warm with fresh whipped cream, ice cream or with a drizzle of fresh maple syrup. Enjoy!

If you don’t have a food processor, use finely chopped almonds and combine them with other dry ingredients. Melt the butter and mix with dry ingredients until thoroughly combined. Scoop mixture into peaches as directed above.   photo-327

Rum Chocolate Mousse

photo-247

We recently started receiving a few wedding gifts in the mail, which as been like Christmas on steroids. One of the most recent gifts that would make any chef swoon… Fire engine red Le Creuset baking dishes, complete with 4 mini cocottes. I’ve died and gone to culinary heaven. Every time I open a new kitchen item I jump up and down like a little kid while Jake looks at me all confused. Anyways… The second I saw these little cocottes I thought chocolate- Chocolate souffle, chocolate mousse, chocolate molten cake- slightly obsessed with chocolate. But seriously, what is better than your very own mini dish coming out filled with chocolate? photo-245This mousse recipe is very special to me, as it belonged to my grandmother Harriet and I remember her making this for dinner parties when I was growing up. It’s extremely easy, super rich and the flavor of the rum comes through nicely, which makes the recipe a winner in my book. This is a family favorite, so I hope you ENJOY!

Rum Chocolate Mousse (Click for printer friendly version)

Ingredients:

  • 1 cup dark chocolate chips
  • 5 tablespoons boiling water
  • 2 tablespoons dark rum (Myers is my favorite)
  • 4 eggs, separated

Directions:

  1. Separate egg yolks and whites into two bowls
  2. Beat egg whites with an electric hand mixer or kitchenaid until stiff fluffy and peaks form, set aside.
  3. Put chocolate chips and boiling water in a blender and blend until smooth, about 10 seconds.
  4. Add yolks and rum to blender, blend until fully incorporated
  5. Using a rubber spatula, transfer chocolate mixture into a medium bowl.
  6. Fold whipped egg whites into rum chocolate.
  7. Pour into ramekins, chill at least 1 hour.

photo-250

photo-249

Fresh Basil Lime Fruit Salad

photo-236

What a fantastic weekend of great weather, food and friends! I hope you all spent some quality time with someone special and soaked up some sunshine- I thought it was June it was so warm! I was in the mood for a fresh and light fruit salad that would be the perfectly refreshing desert on a warm afternoon. Only problem was, I got all the way home from the store and realized I forgot the mint I needed to make my fruit salad! With no time to go back to the store, I decided to improvise with what I had. I love fresh herbs with fruit and I had a whole bunch of fresh basil on hand for another recipe. I couldn’t have asked for a more perfect substitution, the flavors were so amazing, this will definitely become my go to combination for fruit salad, Enjoy!

Basil-Lime Fruit Salad (click for printer friendly version)

Ingredients:

  • 1/2 cup sugar
  • 1/2 cup water
  • 1/2 cup chopped basil leaves
  • 1 tablespoon lime zest
  • 1 medium size fresh pineapple cut into chunks (about 4 cups)
  • 2 mango’s peeled and cubed
  • 1 pound fresh strawberries quartered
  • 1 carton fresh blueberries
  • You can substitute any fresh fruit you enjoy such as Kiwi’s, Raspberries, Blackberries, Guava, etc.

Directions:

  1. Combine sugar and water in a small sauce pan and bring to a boil, stirring often until sugar is fully dissolved, about 1-2 minutes.
  2. Remove sauce pan from heat. Add lime zest and basil, stir and set aside to cool.
  3. Once the sugar mixture is completely cool, strain syrup through a mesh sieve into another bowl and discard solid pieces of basil and zest.
  4. Combine all fresh chopped fruit in one large bowl and drizzle with basil-lime syrup. Mix to coat fruit completely.
  5. Refrigerate and serve. Garnish with a few pieces of freshly chopped basil. photo-237

Chocolate Fudge Brownies… with Black Beans and Avocado!

photo-226

So you must be thinking that Ski Boots has gone off the deep end… Black bean brownies? Perhaps it’s the lack of snow we’ve been getting lately that’s made me want to experiment with some new recipes and ingredients. I had to try this one for a few reasons but mostly because I wanted to see if I could taste the black beans… Which you can’t… AT ALL.photo-225

In fact, everyone I served them to didn’t believe I actually made them with black beans. Nothing about these brownies are normal. Unlike your typical fudge brownies, where you feel sick after eating just one, these are dangerously perfect. They are rich AND light and you will most definitely not be able to stop at eating just one, Oh and did I mention they are gluten free? photo-228

Oh and did I also mention they are low fat? I wouldn’t feel guilty for a second eating these brownies for breakfast, they’ve got almost 5 grams of protein and only 150 calories per square (less if you use sugar substitute)… say what?! You won’t believe it until you try them for yourself but I promise you will enjoy them!

Black Bean & Avocado Fudge Brownies (Click for printer friendly version)
Ingredients:
  • 1 (15.5 oz) can black beans, rinsed and drained
  • 1 egg plus 2 egg whites
  • 1/3 of a large ripe avocado
  • 1 teaspoon olive or canola oil
  • 1/3 cup, plus 1 tablespoon unsweetened cocoa powder
  • 1/4 teaspoon baking powder
  • 1/4 teaspoon baking soda
  • 1/4 teaspoon salt
  • 1 teaspoon pure vanilla extract
  • 3/4 cup sugar or sugar substitute of choice
  • dark chocolate chips (to sprinkle on top)

Directions:

  1. Preheat oven to 350 degrees. Grease a 8×8 inch baking pan.
  2. Put all the ingredients besides chocolate chips into food processor (or a blender). Process or puree until ingredients form a smooth batter (scrapping down the sides with a spatula in between to make sure all the cocoa powder is incorporated.)
  3. Pour into prepared pan, sprinkle with chocolate chips, nuts, or any other desired brownie topping and bake for 35-40 minutes or until knife inserted in center comes out clean and top of the brownies begin to crack.
  4. Cool pan completely on wire rack then cut into 16 squares.

And if the kitchen didn’t smell amazing enough with all those brownies baking… my valentines day flowers are just starting to blooming and its like heaven on earth in my living room!photo-227Enjoy!

Original recipe from Ambitious Kitchen

Nutella-Stuffed Brown Butter Chocolate Chip Cookies

I have been on the hunt for the perfect chocolate chip cookie and I’ve found it… the most delicious chocolate chip cookie EVER.

Nutella on anything is amazing- then you stuff it inside a chocolate chip cookie and you’re on cloud 9. I found this recipe on Ambitious Kitchen yet another one of my new favorite blogs. Two tricks to this recipe, browning the butter before mixing it with the sugar gives the cookies a wonderful nutty flavor and making sure to refrigerate the dough before baking it keeps the cookies chewy and plump!
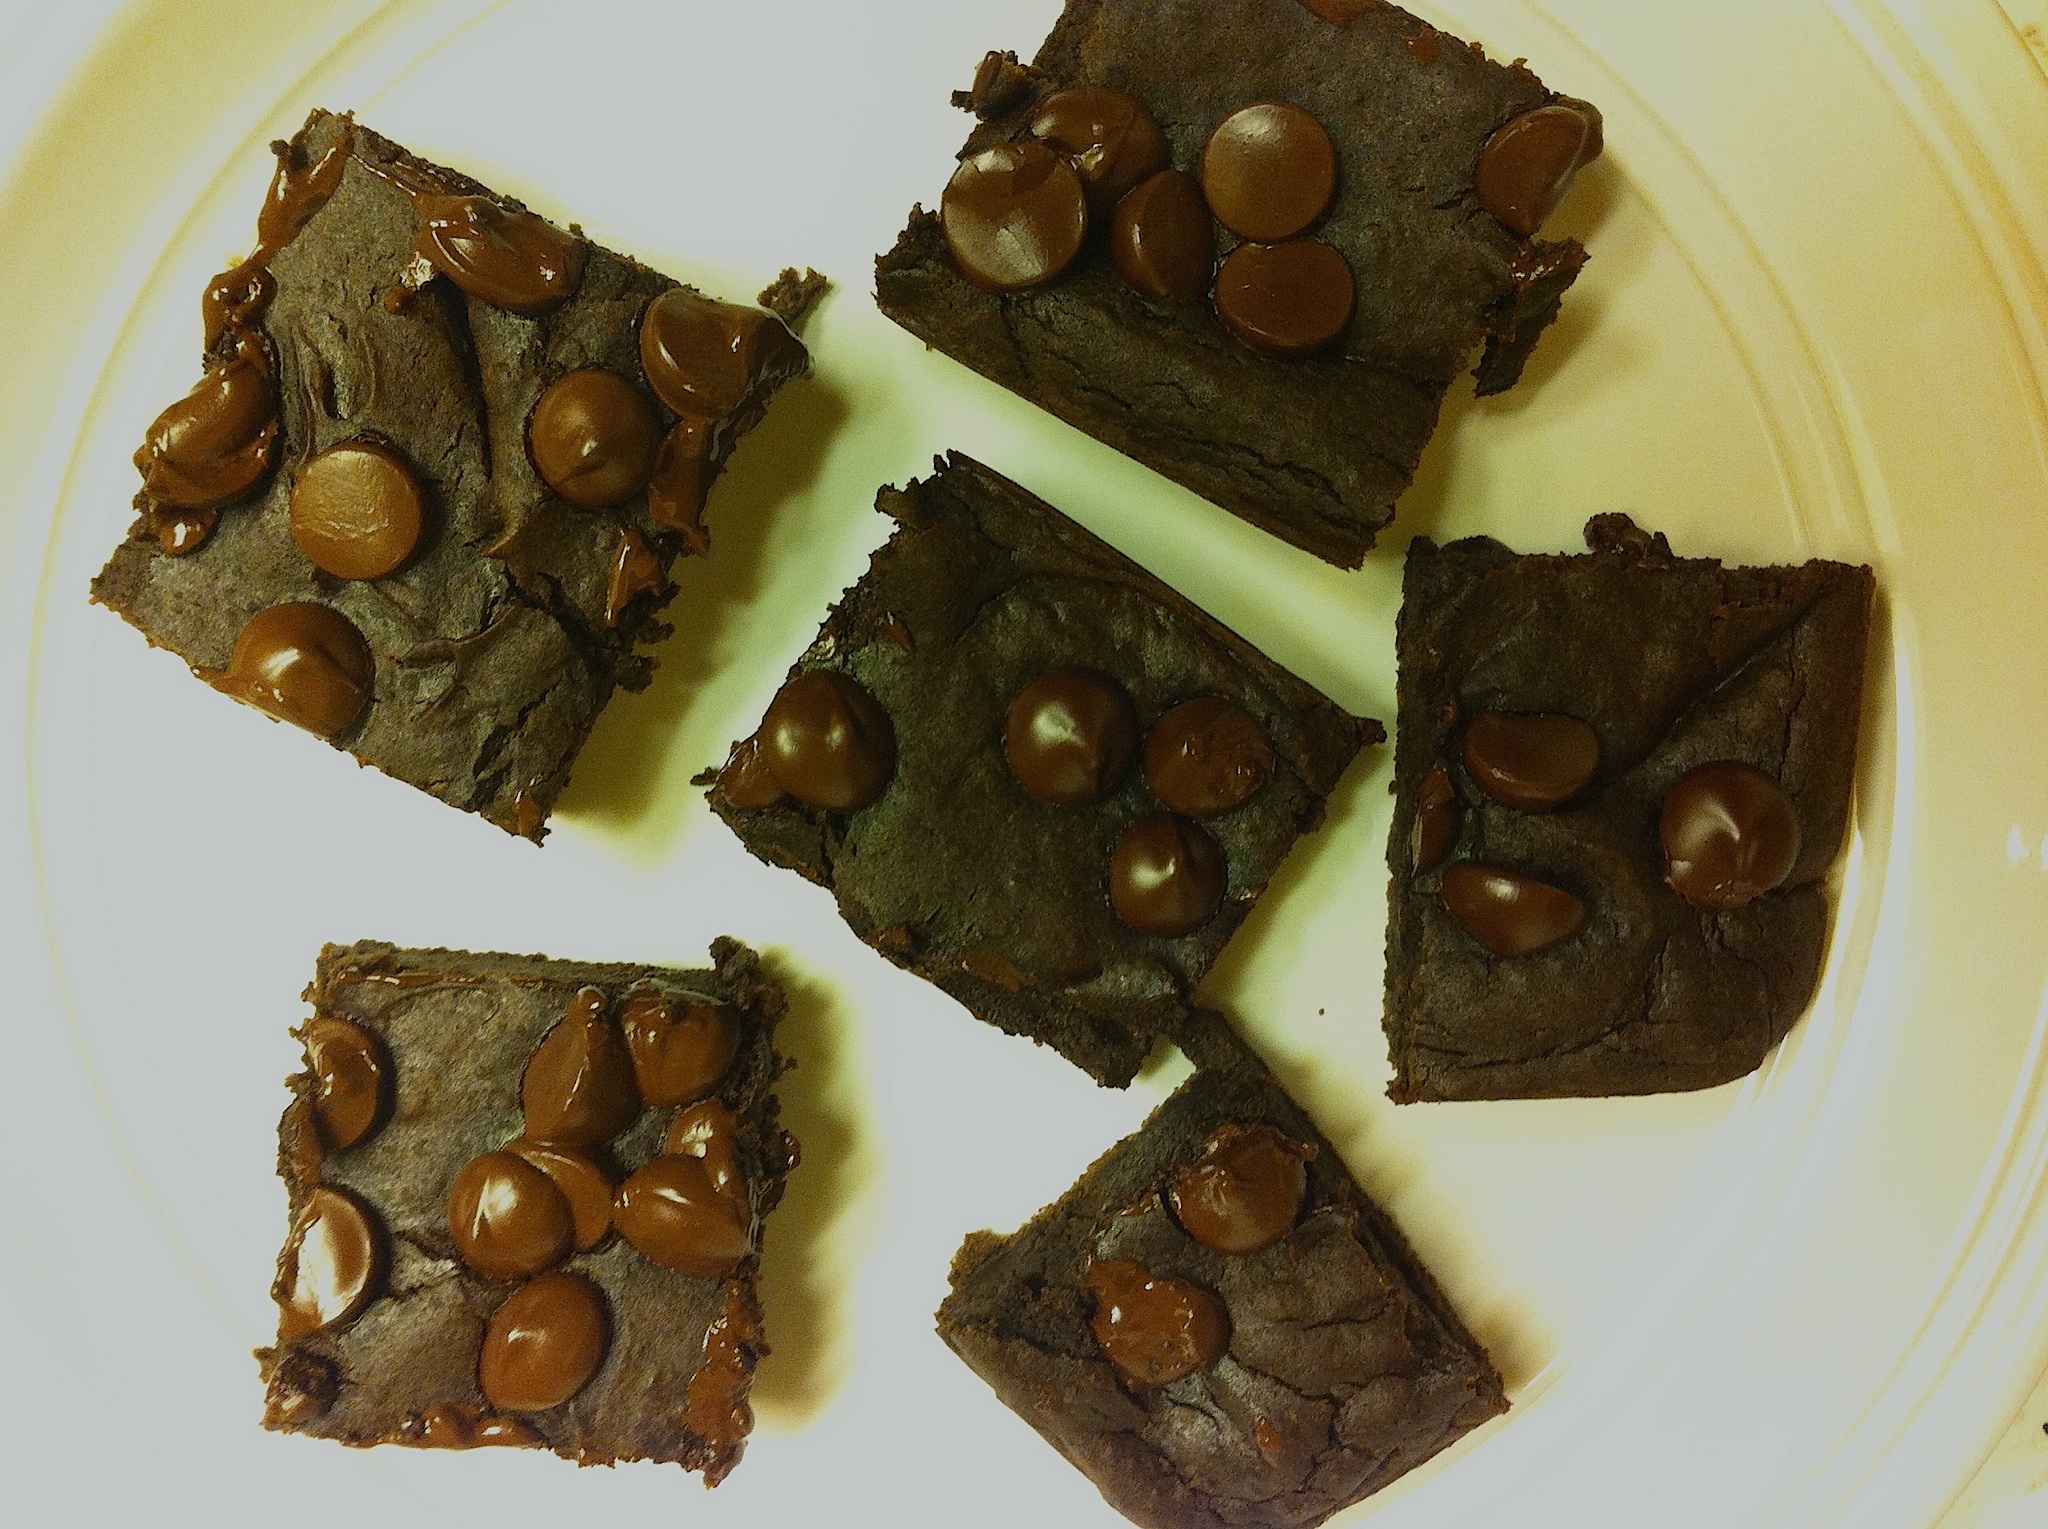
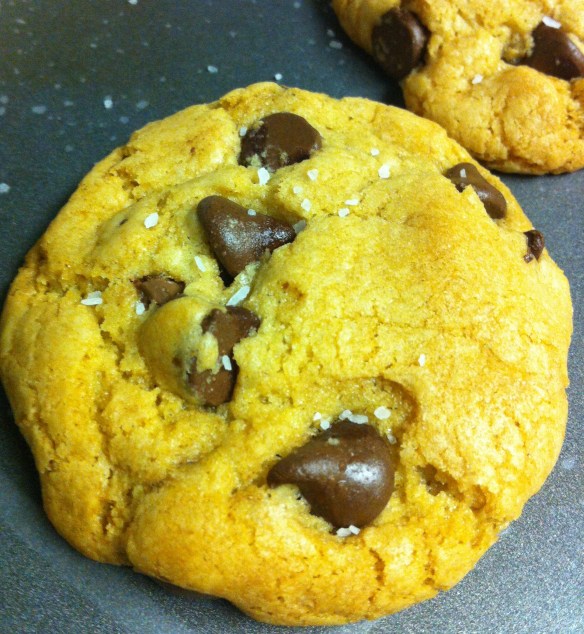
Three different kinds chocolate chips (dark, milk and semi-sweet) combine for awesomely chocolatey cookies. 

I don’t know if I’ll make a normal chocolate chip cookie again! sprinkling the cookies with some coarse sea salt gives that salty sweet combination that I love! Gooey and delicious, you’ll be addicted too!

Nutella Stuffed Brown-Butter Sea Salt Chocolate Chip Cookies:

Ingredients

  • 2 1/4 cup all-purpose flour
  • 1 1/4 teaspoons baking soda
  • 1/4 teaspoon of salt
  • 2 sticks (1 cup) unsalted butter
  • 1 1/4 cup packed dark brown sugar
  • 1/4 cup granulated sugar
  • 1 large egg plus 1 egg yolk
  • 1 1/2 teaspoons vanilla extract
  • 1 tablespoon plain Greek yogurt
  • 3/4 cup semi-sweet chocolate chips
  • 1/2 cup milk chocolate chips
  • 1/2 cup dark chocolate chips
  • 1 jar of Nutella, chilled in refrigerator
  • Coarse sea salt for sprinkling

Whisk together the flour, baking soda, and salt in a bowl and set aside. Melt butter in a saucepan over medium heat. The butter will begin to foam. Make sure you whisk consistently during this process. After a couple of minutes, the butter will begin to brown on the bottom of the saucepan; continue to whisk and remove from heat as soon as the butter begins to brown and give off a nutty aroma. Immediately transfer the butter to a bowl to prevent burning. Set aside to cool for a few minutes.

With an electric mixer, mix the butter and sugars until thoroughly blended. Beat in the egg, yolk, vanilla, and yogurt until combined. Add the dry ingredients slowly and beat on low-speed just until combined. Gently fold in all of the chocolate chips.

Chill your dough for 2 hours in the refrigerator, or place in freezer for 30 minutes (I tried putting mine in the freezer the first batch and found it was nearly impossible to work with the dough- so try to leave enough time to put dough in the refrigerator even if its only for 1 hour).

Preheat the oven to 350 degrees F. Once dough is chilled measure about 1 1/2 tablespoons of dough and roll into a ball. Flatten the dough ball very thinly into the palm of your hand. Place 1 teaspoon of chilled nutella in the middle and fold dough around it; gently roll into a ball — it doesn’t have to be perfectly rolled! Make sure that the nutella is not seeping out of the dough. Add more dough if necessary. Place dough balls on cookie sheet, 2 inches apart. Bake the cookies 9-13 minutes or until the edges of the cookies begin to turn golden brown. They will look a bit underdone in the middle, but will continue to cook once out of the oven. Cool the cookies on the sheets at least 2 minutes. Sprinkle with a little sea salt. Remove the cooled cookies from the baking sheets after a few minutes and transfer to a wire rack to cool completely. 
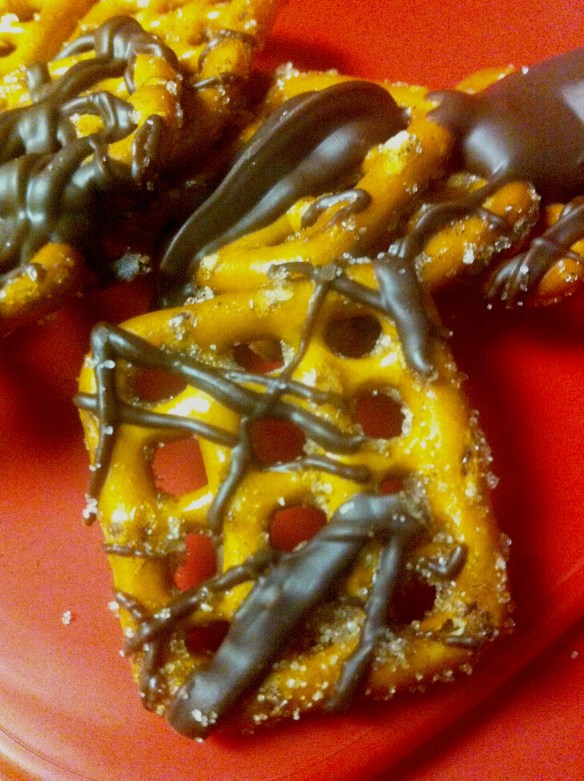
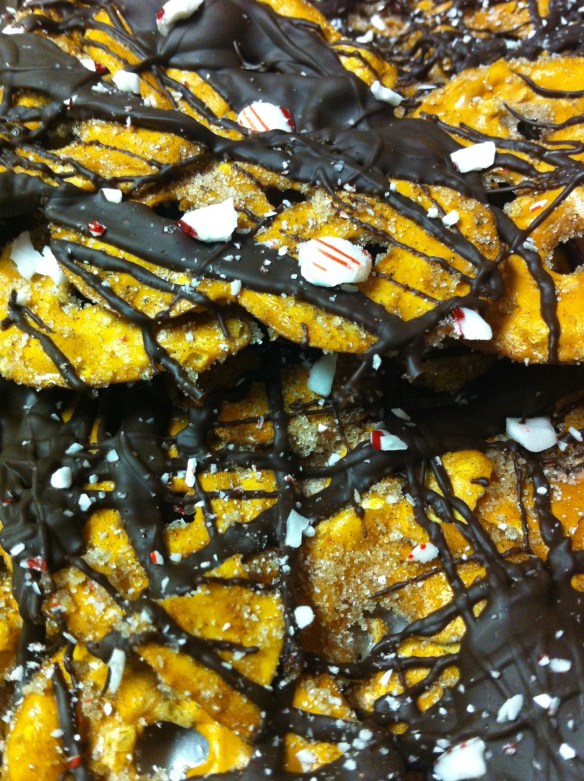
I continued my holiday baking with an updated version of the chocolate cinnamon pretzels I blogged on before. This time I used pretzel thins which catch even more cinnamon, sugar and chocolate! I crushed up some candy canes and sprinkled them on top! Its a great combination! I’ve packaged up all my holiday goodies! Happy Holidays everyone!

Rose’s Caramel Graham “Crack”er Bark

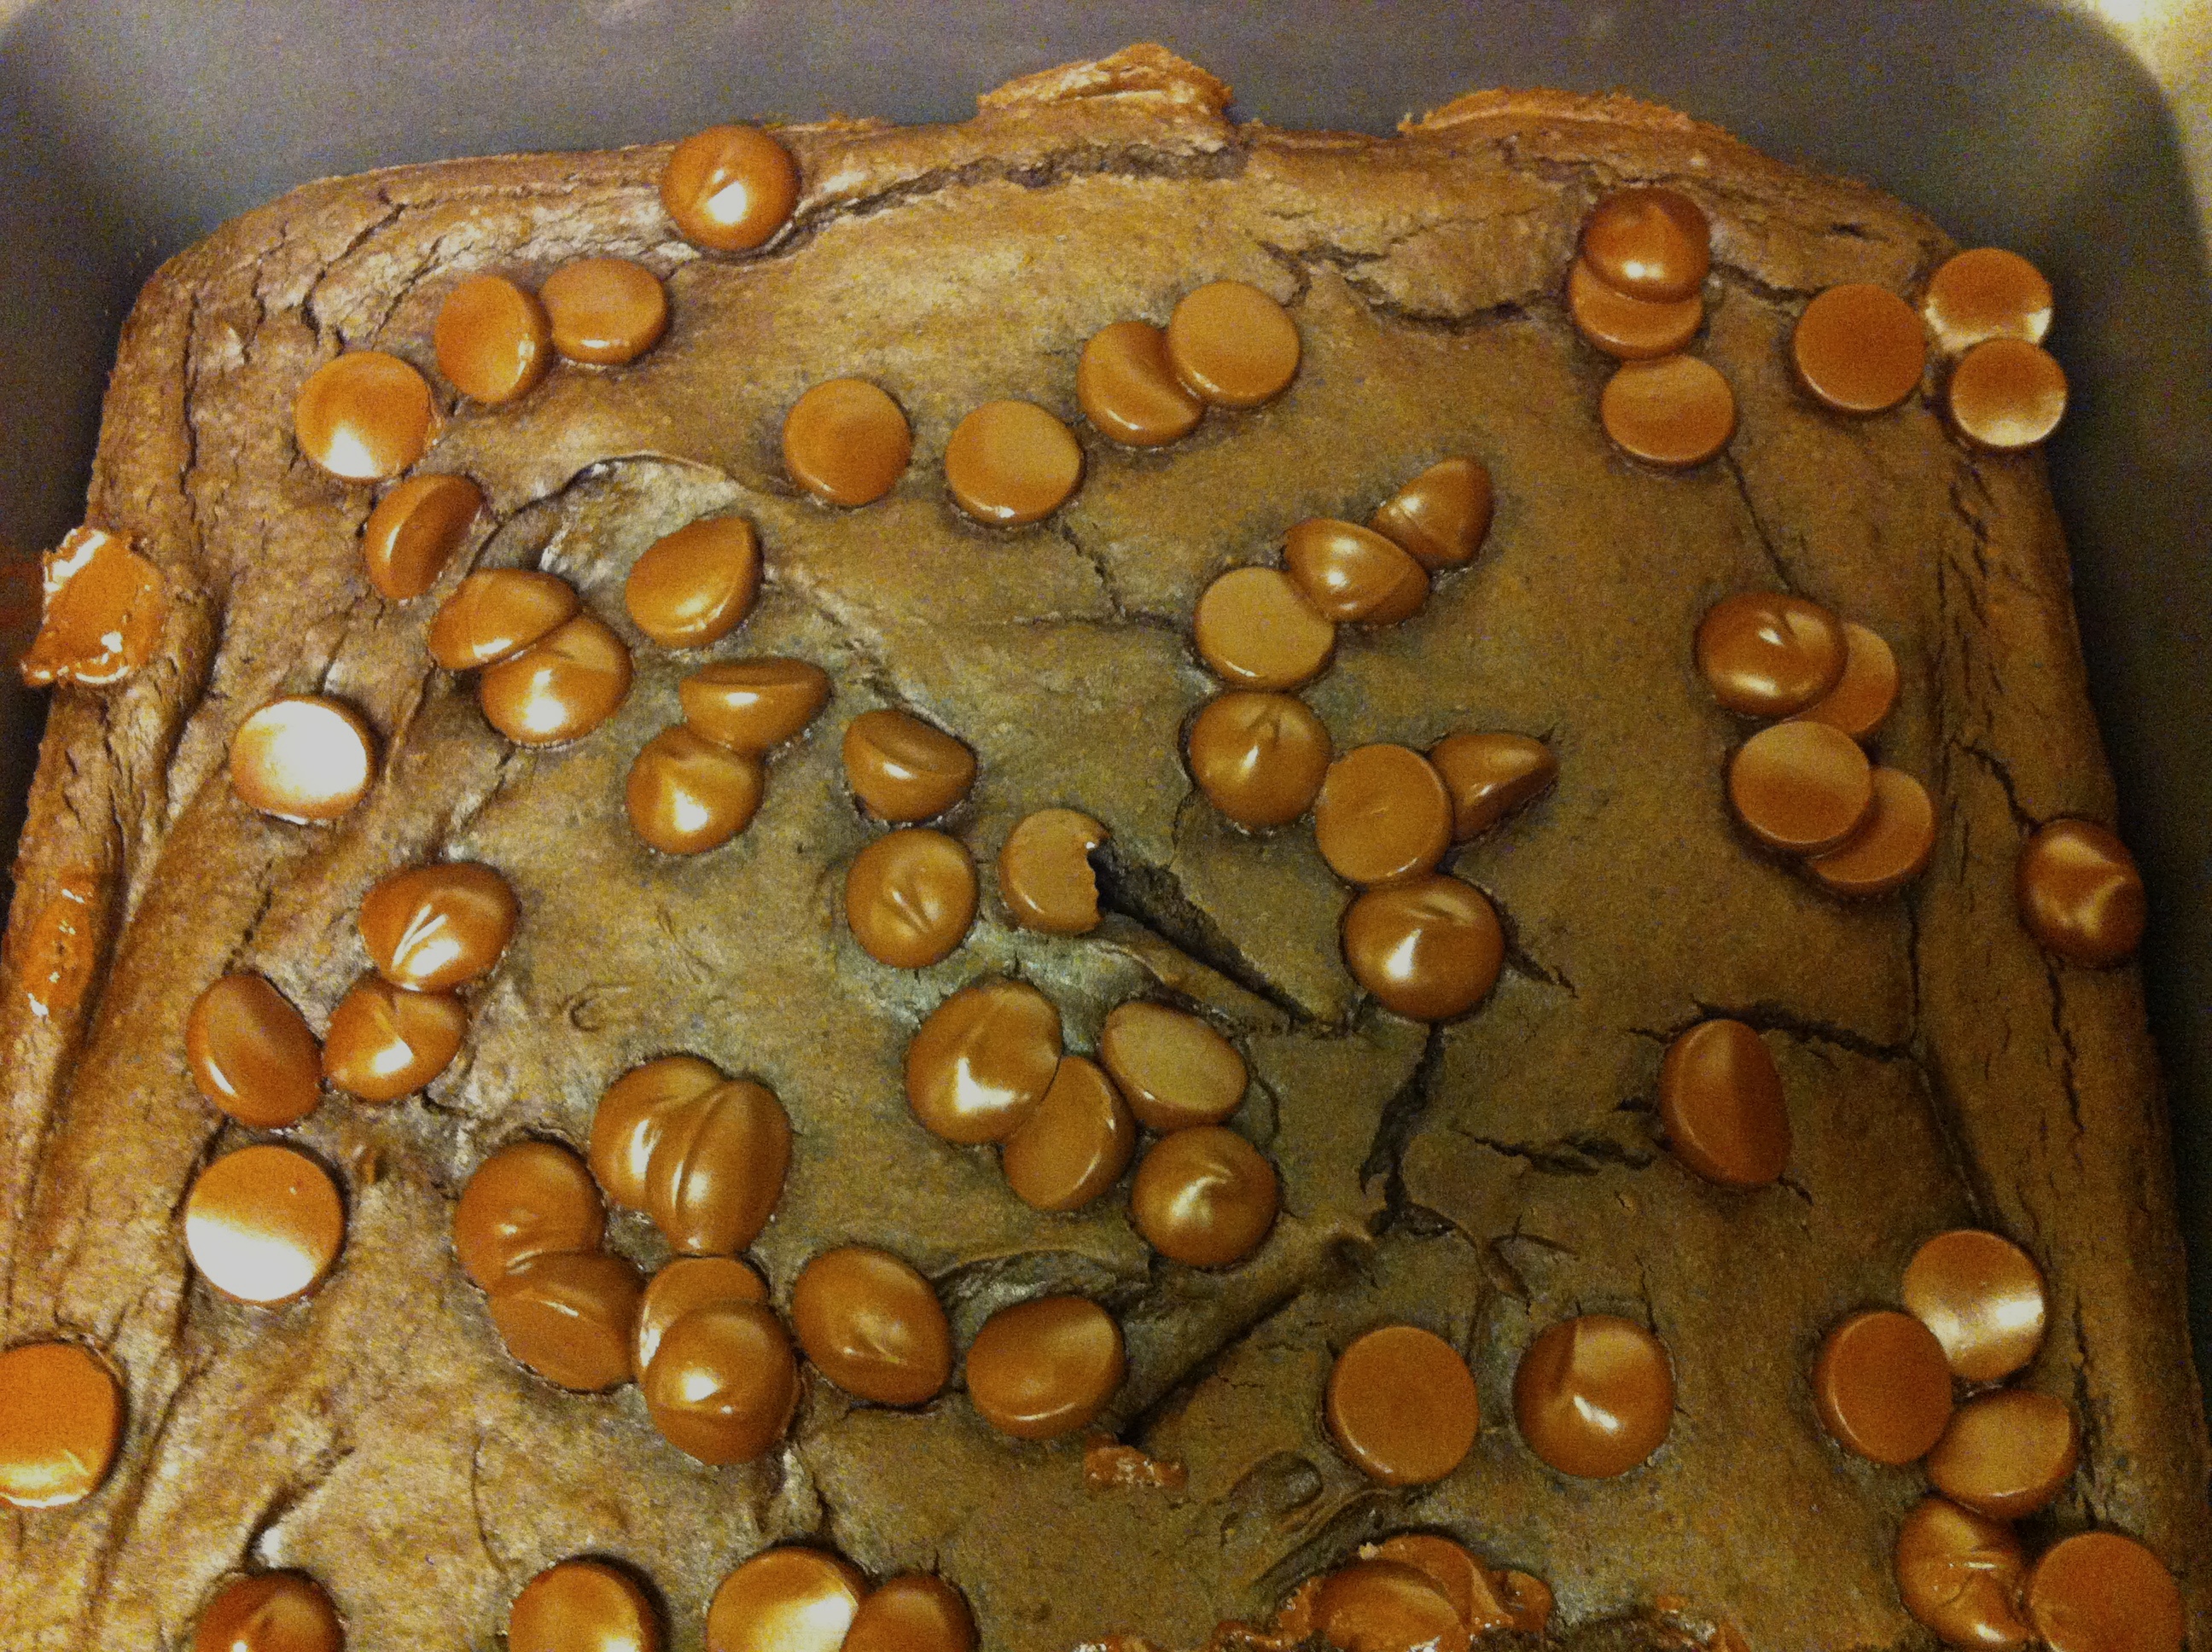
This holiday treat is totally addicting (you will see why I call it crack once you’ve made it) and a huge crowd pleaser. The delicious recipe is courtesy of my friend Jacki’s mom, Rose, who always has this graham cracker bark around the house during the holiday’s. The best part about it…it’s a snap to make and you can tweak the toppings to your liking! The classic recipe calls for slivered almonds, but we also added dried cherries to one and dark chocolate chunks to other (we doubled the recipe). Next time I’d love to try this recipe with some chopped pretzels or popcorn or a little Fleur de Sel sprinkled on top. Bring this to your next holiday party and you’re sure to be the most popular guest! Thanks Jacki and Rose for sharing! Enjoy! 🙂

Rose’s Graham Cracker Bark

Ingredients:

  • 12-14 graham crackers
  • 1 cup butter
  • 3/4 cup brown sugar
  • Slivered Almonds (or another kind of chopped nut)
  • Dried Cherries (Optional)
  • Dark Chocolate (Optional)

Preheat the oven to 350degress. Line a cookie sheet with tin foil and spray with cooking spray. Lay graham crackers side-by-side on the cookie sheet so there are not gaps between the crackers. In a medium sauce pan, melt butter on medium heat until completely melted. Slowly add brown sugar to the melted butter and stir. Allow to the butter and sugar mixture to boil and thicken for about 4 minutes, stirring constantly make sure it doesn’t burn. 
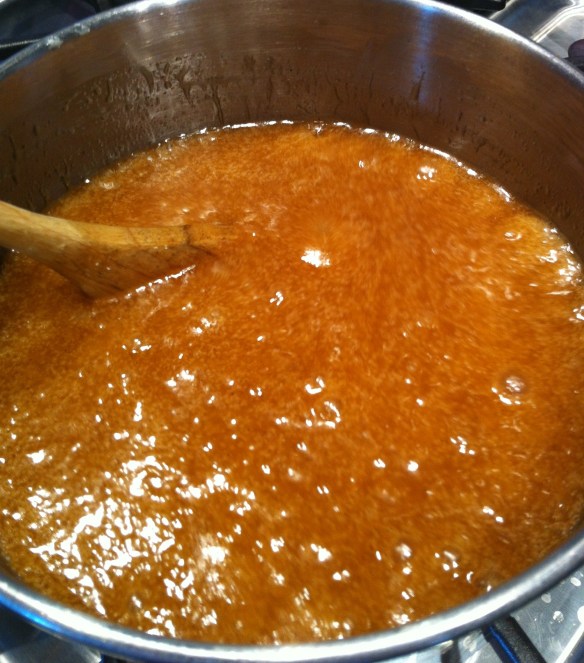
Remove sugar from heat and pour sugar mixture over graham crackers, spreading evenly. Sprinkle graham crackers with slivered almonds, cherries or chocolate (or both!). Bake at 350 for 8 minutes. Remove cookie sheet from the oven and allow it to cool completely (this is the hardest step as you will want to eat it right away!) before breaking bark into smaller pieces. 
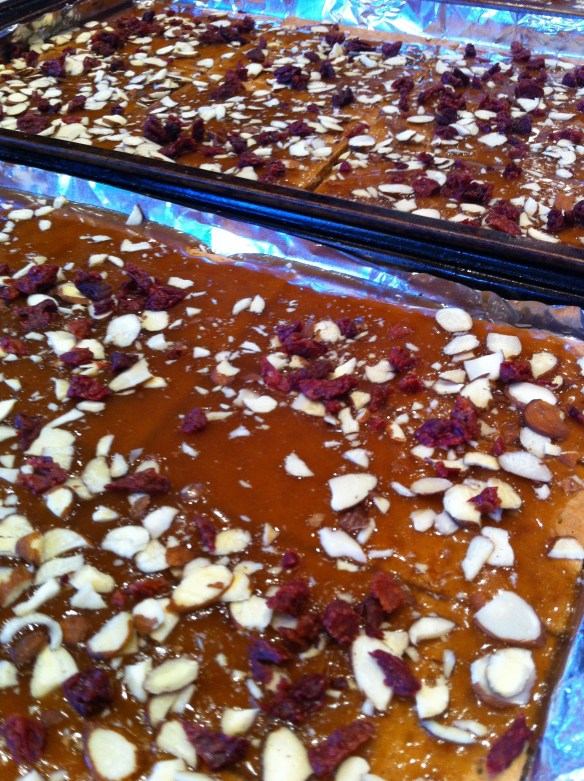
To store, line tupperware or tin with wax paper, separating each layer of bark with another sheet of wax paper. Enjoy!

Chocolate Cinnamon Pretzels

pretzel

This recipe was a Pineterst find. They turned out great and would be perfect holiday party snack! The original recipe called for white chocolate (which I hate) So I used semi-sweet chocolate chips and added some creamy peanut butter to the melted chocolate… I had to bag them up before I ate them all they were so tasty! This is the first of many blogs dedicated to Christmas/Holiday recipe ideas. Sign up to get my emails and I will be randomly selecting one of my followers to receive a goody bag with some of the holiday cookies and sweets I’ll be blogging on! Enjoy!

Ingredients

  • 1 16ounce bag of pretzels (I took the recipes advice and got the checkered pretzels so they would catch more chocolate)
  • 2/3 cup oil (I used vegetable)
  • 1/3 cup sugar
  • 1 1/2 teaspoons cinnamon
  • 1/2 cup cinnamon/sugar mixture for sprinkling
  • 1 cup semi-sweet chocolate chips (or white chocolate if you prefer)
  • 1 Tablespoon creamy peanut butter (optional)

Directions

  1. In a small bowl whisk together oil, sugar and cinnamon.
  2. Pour bag of pretzels into microwave safe bowl and pour sugar mixture over them. Mix with your hands or use another bowl to pour mixture back and forth so all the pretzels get coated with the mixture.
  3. Microwave for 1 minute, remove and stir. Microwave another 45 seconds- 1 minute make sure the pretzels are warm.
  4. Spread pretzels evenly on to two cookie sheets covered with parchment paper and generously sprinkle with cinnamon/sugar mixture while the pretzels are still warm.
  5. Melt chocolate chips and peanut butter in a double boiler or in a sauce pan on low heat while constantly stirring, making sure not to burn the chocolate. Drizzle the chocolate over the cooled pretzels.
  6. I popped the whole cookie sheet in the freezer for 5 minutes to make sure the chocolate was hard before putting in air tight containers or decorative baggies.