Simple Scones

IMG_9141

One of my weaknesses is baked good. I love them all, sweet, savory I just can’t stay away. I try not to buy or make them however because if they are in my house, I will eat them all. One treat I will make are scones. Maybe because they are so simple, or maybe because they are so delicious – its hard to say. I have another great fall recipe for scones, these cranberry orange ones from my Morning Glory Farm cookbook are to die for. This recipe is one that my mother always makes, she got it out of the cookbook “Perfect Recipes for having people over.” I love that this recipe uses raisins instead of currents which give the scones some extra sweetness. Also the sour cream gives these a perfectly flaky texture. You’ll love these anytime of day! Enjoy.

Simple Scones (Makes 8)

Ingredients: 

  • 1/2 Cup Sour Cream
  • 1 Large Egg
  • 2 Cups all-purpose flour
  • 6 Tablespoons plus 2 teaspoons sugar
  • 1 Teaspoon baking powder
  • 1/2 teaspoon salt
  • 1/4 teaspoon baking soda
  • 1/2 cup raisins
  • 8 tablespoons (1 stick) unsalted butter, frozen

Directions:

  1. Place oven rack to lower-middle position and heat oven to 400 degrees. Grease a cookie sheet or line it with parchment paper.
  2. Whisk sour cream and egg in a small bowl until smooth.
  3. Mix flour 6 tablespoons sugar, baking powder, salt, baking soda, and raisins in a medium bowl. Grate butter into flour mixture, using large holes of a box grater; toss to combine.
  4. Stir in sour cream mixture until large clumps of dough form. Use your hands to press dough against sides and bottom of bowl to form a ball.
  5. Place dough on a lightly floured work surface and pat into a 7 1/2 inch circle about 3/4 inch thick. Use a sharp knife to cut into 8 triangles. Place 1 inch apart on greased cookie sheet.
  6. Bake until golden, 15 to 17 minutes. Cool for a least 5 minutes. Serve hot, warm or room temperature.
Advertisement

Wild Rice Salad with Apricot & Cranberry

photo 2-29Happy weekend y’all! I hope you had a great week! Last weekend Park City mountain resort closed, it was a beautiful weekend, 60 degrees and sunny! Just when I thought spring had arrived… I woke up Tuesday morning to this…photo-573More snow! I couldn’t believe it! But that’s how it goes in the mountains! Sadly, I’m sure it won’t be the last time this spring we see snow. Regardless of what the weather does, I am READY for spring. photo 2-28This delicious wild rice salad is one of my favorite spring/summer salads. It’s super easy to make and its best when it’s served cold, so making it the day before is a snap and saves you time! Its great for picnics, BBQs or anytime.

The combination of the sweet cranberries, apricots and currents with the wild rice and orange dressing is perfection! It will become one of your favorite summer staples. photo 1-29

Wild Rice Salad with Apricot & Cranberry with Orange Dressing (click for printer friendly version)
Ingredients: (Serves 6-8)

  • 2 1/2 Cups Wild Rice
  • 5 Cups of water
  • 1 Cup low sodium chicken broth
  • 1 Cup dried cranberries
  • 1 Cup dried apricots, chopped
  • 1/2 Cup currents
  • 1 Cup scallions, sliced
  • 1/2 Cup parsley, chopped
  • 3 Tablespoons fresh thyme, chopped
  • 3/4 Cup pine nuts, toasted

Orange Dressing

  • 1/2 cup fresh orange juice
  • 1/4 cup cider vinegar
  • 2 tablespoons grated orange peel
  • 1/2 cup olive oil
  • salt and pepper to taste

Directions:

  1. In a medium pot, bring water and broth to a boil, add the rice and bring it to a boil again. Reduce heat and simmer until the rice is tender but still firm- about 40-45 minutes.
  2. Meanwhile, whisk together the dressing ingredients and set aside.
  3. Drain the rice, transfer to a bowl and allow it to cool.
  4. Mix the remaining ingredients with the rice, drizzle with orange dressing and gently toss to combine.
  5. Serve over spinach or on its own as a side dish.


Thai Style Peanut, Mushroom and Tofu Stir-Fry

photo-485Happy hump day! Hard to believe the week is already half over! Continuing with some healthy, clean eating of 2014 I started the week off with this super easy, delicious and vegan meal! This dish single handedly turned me into a tofu lover. Back in the day you couldn’t pay me to eat the stuff but pairing it with spicy peanut dressing, crispy snap peas and water chestnuts… changes everything!

This stir-fry is also so easy and quick to prepare, dinner is ready in 20 minutes! It was the perfect dish to serve for guests that came over to watch the season premier of the bachelor (don’t judge, its my guilty pleasure) because I barely spent anytime in the kitchen!

Serve this dish over brown rice, quinoa or glass noodles and you’ve got a perfect weeknight or Meatless Monday dish!

Ingredients:

  • 1/4 cup creamy peanut butter
  • 2 Tablespoons soy sauce
  • 2 Tablespoons lime juice
  • 1/3 cup water
  • 2 teaspoons sesame oil
  • 2 teaspoons cornstarch
  • 1 teaspoon chili garlic paste or Sriracha (you can add more or less depending on how spicy you like it)
  • 12 oz oyster mushrooms or 8oz baby bella mushrooms, sliced
  • 1/2 lb (1 bag) snow peas or snap peas, trimmed
  • 8 oz (1 small can) canned sliced water chestnuts, rinsed and drained
  • 1 lb extra firm tofu, drained and cut into 1/2-inch cubes
  • cilantro for garnish

Directions:

  1. In a small bowl, whisk together peanut butter, soy sauce and lime juice until smooth. Add the water, sesame oil, cornstarch and chili paste and whisk until blended. Set aside.
  2. Coat a nonstick wok or large nonstick frying pan with cooking spray or sesame oil and heat over high heat. Add mushrooms and stir-fry until lightly browned (about 4 minutes). Add peas and saute another 3-4 minutes until bright green and tender-crispy.
  3. Add peanut butter sauce, water chestnuts and tofu and stir until the sauce thickens and coats everything. Cover and let simmer on low for 3-5 minutes.
  4. Serve over brown rice or other grain and garnish with cilantro. Enjoy!

Chicken Suzanne

photo-414You know those days you crave your favorite childhood meal? Maybe its spaghetti and meatballs or buttery macaroni and cheese- mine is most definitely Chicken Suzanne. This was a dish my mother used to make all the time growing up because its simple and tasty. It only takes half an hour to whip up, it freezes easily and its a comforting dish for cozy cold nights.

The combination of mushrooms, artichokes and cream with tender chicken and crispy almonds is the perfect culmination of delicious ingredients. It’s also a great way to use up some leftover Thanksgiving turkey! Substitute 2 1/2- 3 cups of shredded turkey for the chicken and you’ve got a creative dish for all those leftovers! photo-417I found this great card shopping over the weekend- I do wish that all life’s problems could be solved with a stick of butter! Sometimes all it takes to turn around a bad day is some classic comfort food to warm your soul and make you feel at home. Serve with a fresh baguette and your favorite glass of red wine! Enjoy!

Chicken Suzanne (Serves 8)

  • 1 box long grain and wild rice
  • 1 3 to 4 pound rotisserie chicken or 3 to 4 broiled chicken breasts
  • 8 oz fresh mushrooms, sliced thinly
  • 1 large can artichoke hearts
  • 1 medium onion diced
  • 3 tablespoons butter
  • 6 tablespoons flour
  • 2 cups chicken broth
  • 1 cup whipping cream (you can sub half & half if you prefer)
  • 1/2 cup milk
  • 6 tablespoons sherry or white wine
  • 2 teaspoons salt
  • 1/2 teaspoon paprika
  • 1/4 teaspoon pepper
  • slivered almonds (about 1/2 cup, optional)

Directions:

  1. Preheat the oven to 325 degrees. Make rice to package directions. Butter a 4 quart casserole or baking dish. Set aside.
  2. Remove the meat from the bones of the rotisserie chicken and cut into pieces.
  3. Cut the artichoke hearts into bite size pieces. Combine chicken, rice and artichoke hearts in large bowl.
  4. Saute the diced onion in the butter. When the onion becomes transparent, add the flour. Cook for 1 minute over low heat.
  5. Add the chicken broth, milk and cream and stir until thickened. The mixture should be the consistency of heavy cream.
  6. Stir in the seasonings. combine the completed sauce with the chicken, rice and artichoke mixture. Add the sliced mushrooms.
  7. Pour mixture into prepared casserole dish and top with slivered almonds.
  8. Bake in the oven for 30 minutes or until hot and bubbly.
  9. Can be frozen or made the day before serving.

Best Ever Birthday Carrot Cake

photo-384You know that cake you ask for every year on your birthday, the one that makes you feel special and loved and happy all at once? The kind of cake you go back for seconds, not only because its YOUR birthday but its YOUR favorite cake and its freaking delicious. This carrot cake is THAT cake for me, my mother’s best ever birthday carrot cake.

Today isn’t my birthday, (although you might have seen in my last post, Ski Boots in the Kitchen just turned 1!) but I decided I needed a little slice of heaven! Whenever I go to a restaurant and they have carrot cake on the menu, I have to try it. Let me tell you good carrot cake is hard to come by and I am usually disappointed because its not as good as PomPom’s recipe.

There are two places that know how to do it right- one of the best carrot cakes I’ve ever had is at Bol in Vail, Colorado and the second runner up is from the Deer Valley Bakery (they made my carrot cake wedding cake… can you tell yet I’m slightly obsessed?) but that’s it. If you come across a restaurant that has better carrot cake than these two places call me, I’ll fly anywhere just to try it.

Long story short, I’ve been tasting cakes made with carrot for years and this one will forever be my favorite not only because its outrageously delicious but it brings me back home and its always made with love! Happy celebrating and cake eating- Enjoy!

Best Ever Birthday Carrot Cake (click for printer friendly version)

Ingredients:

For the Cake:

  • 2/3 cup vegetable oil
  • 1 cup honey
  • 4 eggs
  • 1 teaspoon vanilla
  • 1 cup white flour
  • 1 cup whole wheat flour
  • 2 teaspoons baking powder
  • 2 teaspoons baking soda
  • 2 teaspoons cinnamon
  • 1/2 cup powdered milk
  • 2 cups grated carrots
  • 1 small can (8oz) crushed pineapple and juice
  • 1/2 cup golden raisins
  • 1/2 cup shredded coconut
  • 3/4 cup chopped nuts (walnuts or pecans) (optional)

For the frosting:

  • 1 8oz. block of cream cheese at room temperature
  • 1 (1/2 cup) stick of butter at room temperature
  • 2 teaspoons vanilla
  • 1 1lb box confectioners sugar

Directions:

  1. Pre-heat the oven to 325 degrees
  2. Grease, flour and line with parchment paper 3, 9″ round cake pans
  3. Using a hand mixer, combine oil and honey in a bowl. Add eggs one at a time, blend in vanilla.
  4. In a separate bowl, sift flour, wheat flour, baking powder, baking soda, cinnamon, and powdered milk.
  5. Blend the sifted dry ingredients with the honey, oil and eggs. Stir in remaining ingredients (grated carrots, crushed pineapple, coconut, raisins and chopped nuts).
  6. Pour batter into the 3 prepared baking pans and bake for 25-30 minutes. Let them cool completely on racks until ready to ice.
  7. While the cake is cooling, using a hand mixer, combine cream cheese, butter, confectioners sugar and vanilla in a bowl.
  8. When cake has fully cooled, place the first layer on a cake plate, spreading a thin layer of icing between each layer of cake. Spread a thin layer of icing around the outside of the cake and place in the fridge for 1 hour. This is called a “crumb layer” this will keep all the crumbs stuck to the first layer of frosting giving you the perfect looking cake when you frost the final layer! For more directions on how to perfectly frost a cake see here. Enjoy! 

Rum Chocolate Mousse

photo-247

We recently started receiving a few wedding gifts in the mail, which as been like Christmas on steroids. One of the most recent gifts that would make any chef swoon… Fire engine red Le Creuset baking dishes, complete with 4 mini cocottes. I’ve died and gone to culinary heaven. Every time I open a new kitchen item I jump up and down like a little kid while Jake looks at me all confused. Anyways… The second I saw these little cocottes I thought chocolate- Chocolate souffle, chocolate mousse, chocolate molten cake- slightly obsessed with chocolate. But seriously, what is better than your very own mini dish coming out filled with chocolate? photo-245This mousse recipe is very special to me, as it belonged to my grandmother Harriet and I remember her making this for dinner parties when I was growing up. It’s extremely easy, super rich and the flavor of the rum comes through nicely, which makes the recipe a winner in my book. This is a family favorite, so I hope you ENJOY!

Rum Chocolate Mousse (Click for printer friendly version)

Ingredients:

  • 1 cup dark chocolate chips
  • 5 tablespoons boiling water
  • 2 tablespoons dark rum (Myers is my favorite)
  • 4 eggs, separated

Directions:

  1. Separate egg yolks and whites into two bowls
  2. Beat egg whites with an electric hand mixer or kitchenaid until stiff fluffy and peaks form, set aside.
  3. Put chocolate chips and boiling water in a blender and blend until smooth, about 10 seconds.
  4. Add yolks and rum to blender, blend until fully incorporated
  5. Using a rubber spatula, transfer chocolate mixture into a medium bowl.
  6. Fold whipped egg whites into rum chocolate.
  7. Pour into ramekins, chill at least 1 hour.

photo-250

photo-249

Mushroom-Spinach Stuffed Beef Tenderloin

IMG_6218Spring is here, or so the calendar says. It snowed all last weekend and now its warming up again. It’s seriously confusing. I want to take out my bright pants and tank tops and go for trail runs and mountain bike rides. Spring also means Easter! IMG_6187
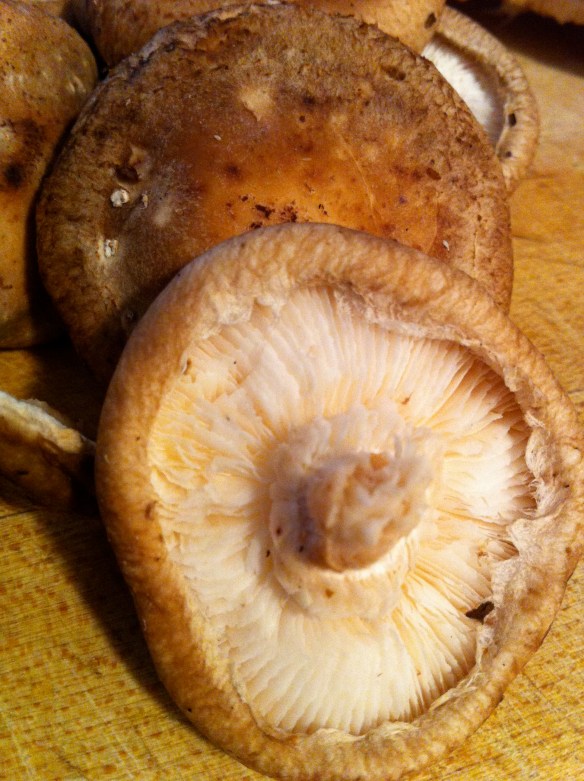
I always love celebrating a holiday that revolves around food and getting together with people. My grandparents used to serve lamb on Easter with that electric green “mint jelly” who knows whats actually in that stuff… its weird. This stuffed beef tenderloin is one of my favorite recipes- my mother makes it every year for Christmas but it would make the perfect dish for any special occasion. IMG_6192

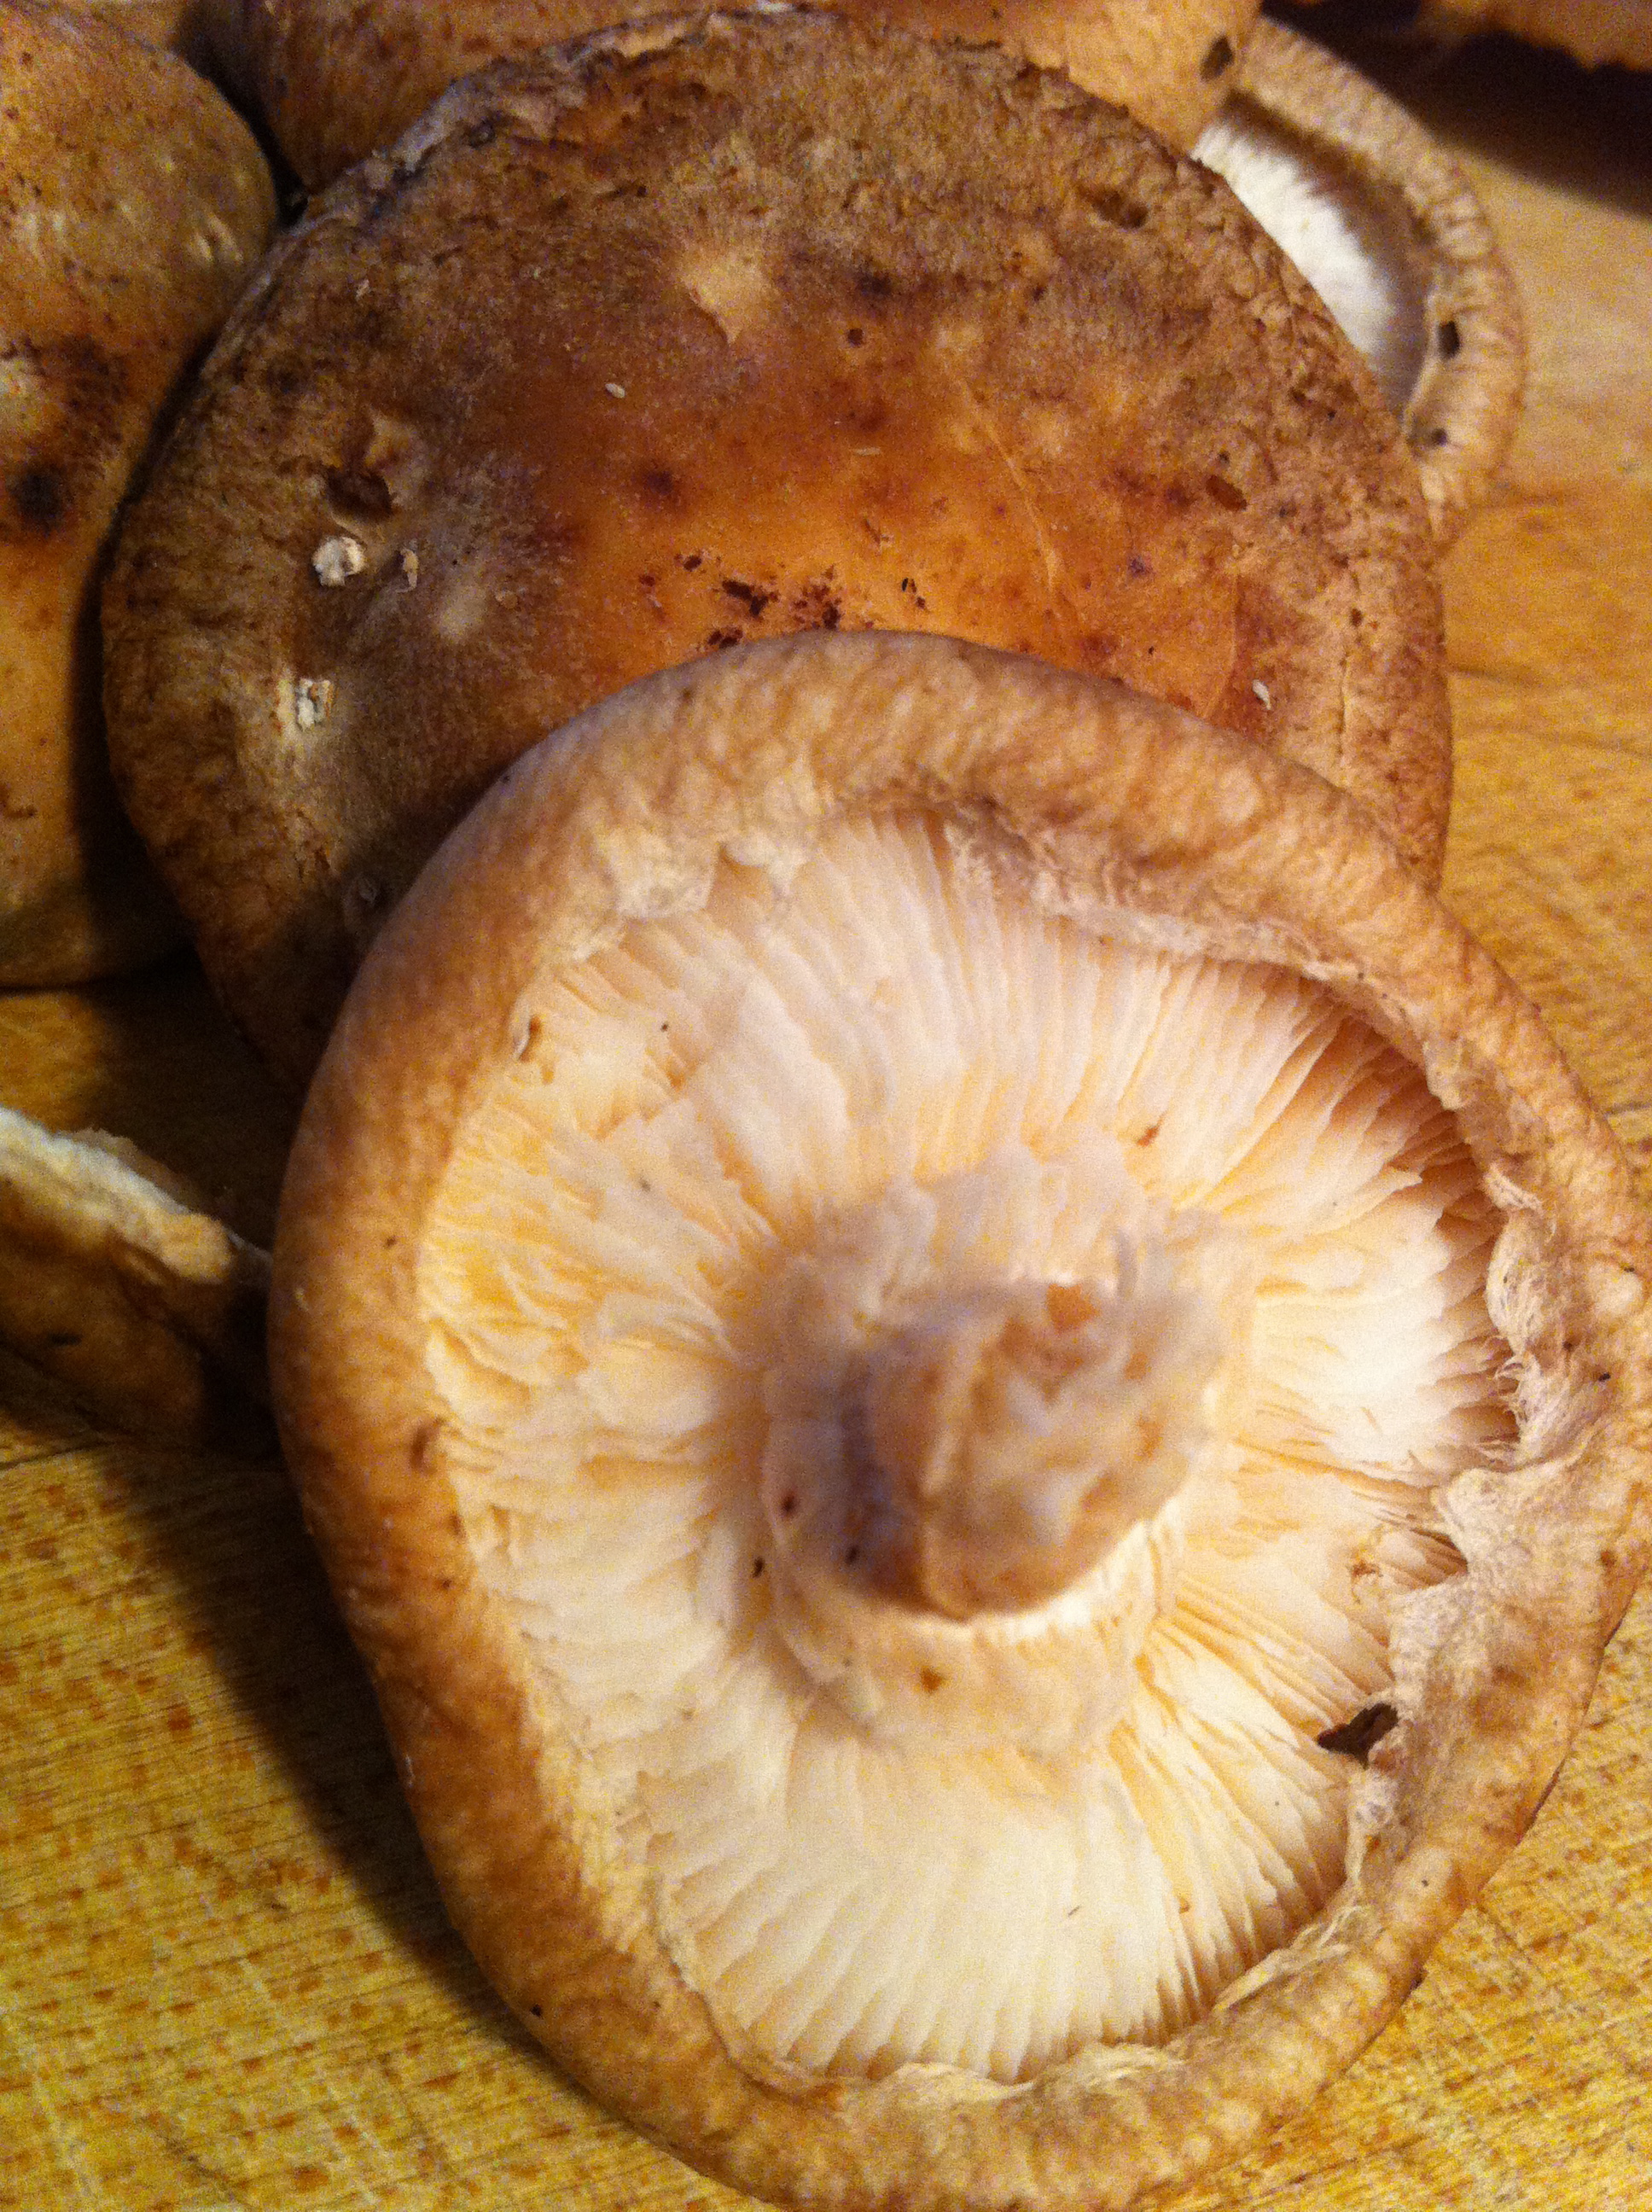
The combination of Shiitake mushrooms, shallots, and brandy is literally the definition of heaven on earth. Then wrap that all up in the most tender filet of beef…You get the picture. IMG_6195

I usually make this dish with my favorite scalloped yukon gold and sweet potato recipe or celery root puree and finish it with some maple roasted brussel sprouts or absurdly addictive asparagus. IMG_6222That is the definition of a holiday feast- make sure you eat early, you’ll want to savor this meal! You can pick up a trimmed beef tenderloin at the meat counter of your local market or whole foods. Don’t be surprised when you see its $25 per pound (that is why I only make this dish on special occasions!) but its worth every penny! IMG_6197

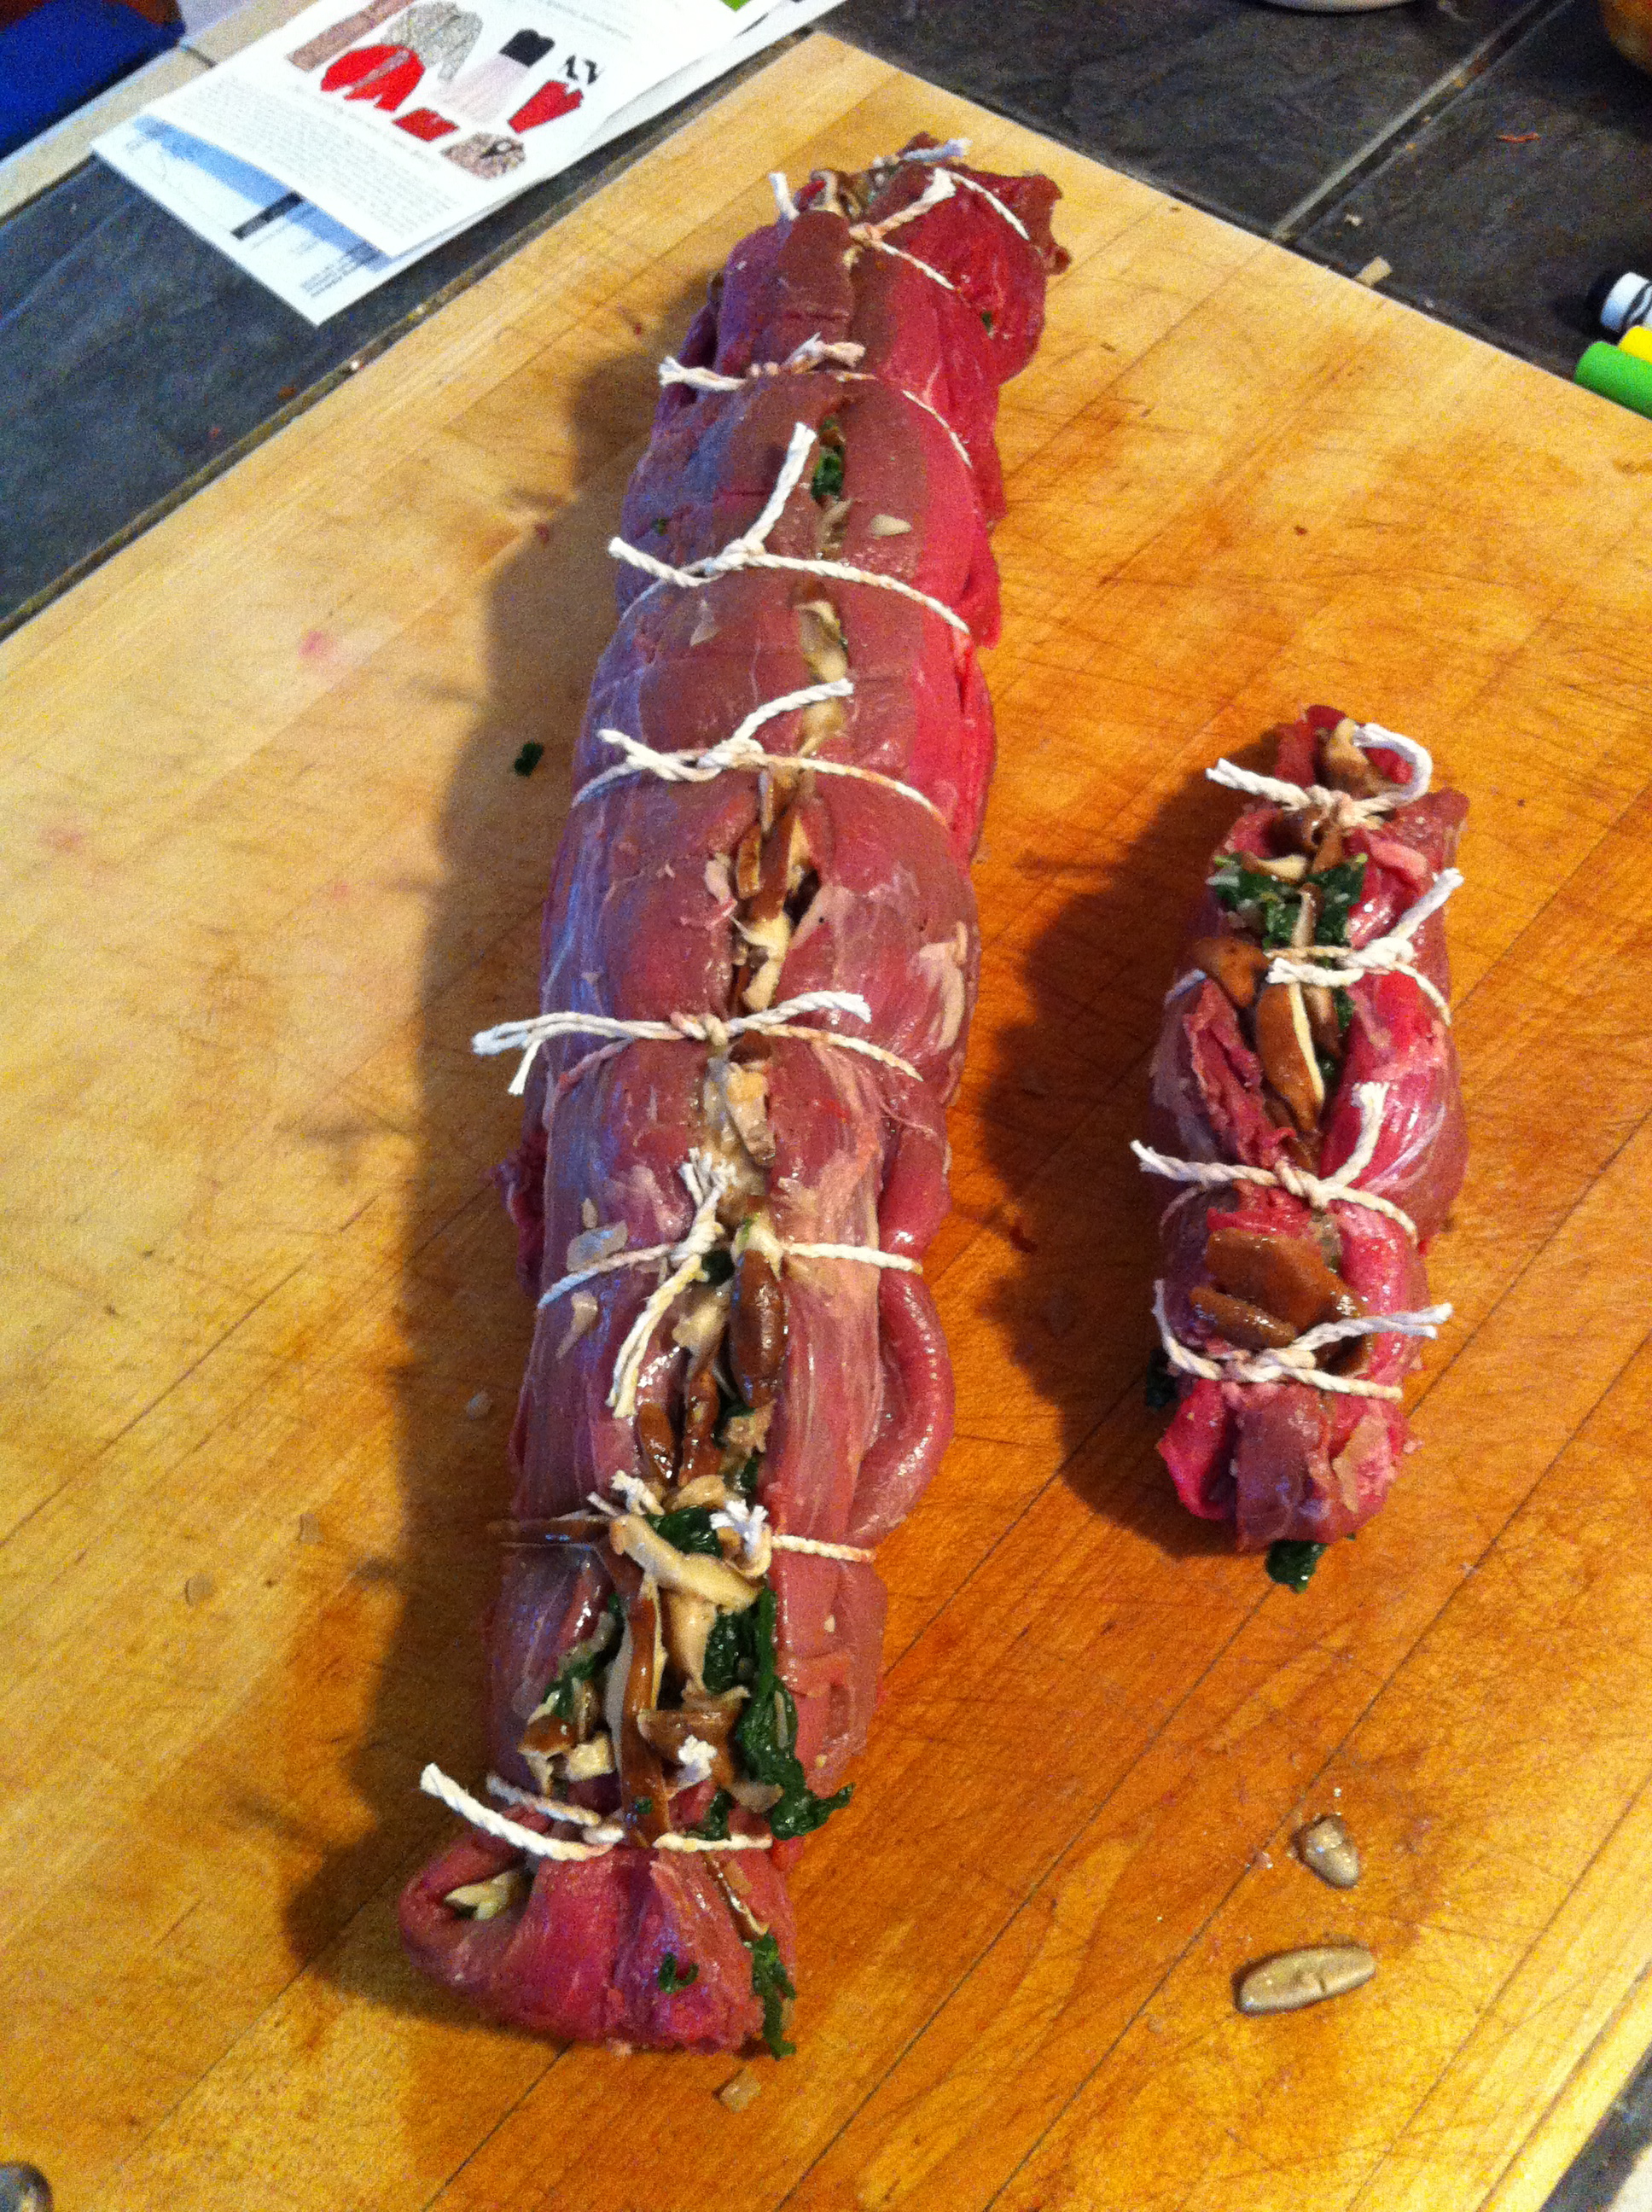
Make sure you ask the butcher to put some twine in with your cut of beef, you’ll need it to tie the tenderloin together and keep the yummy stuffing inside. Sometimes they’ll butterfly it for you if you ask them to but I prefer to do it myself.IMG_6201

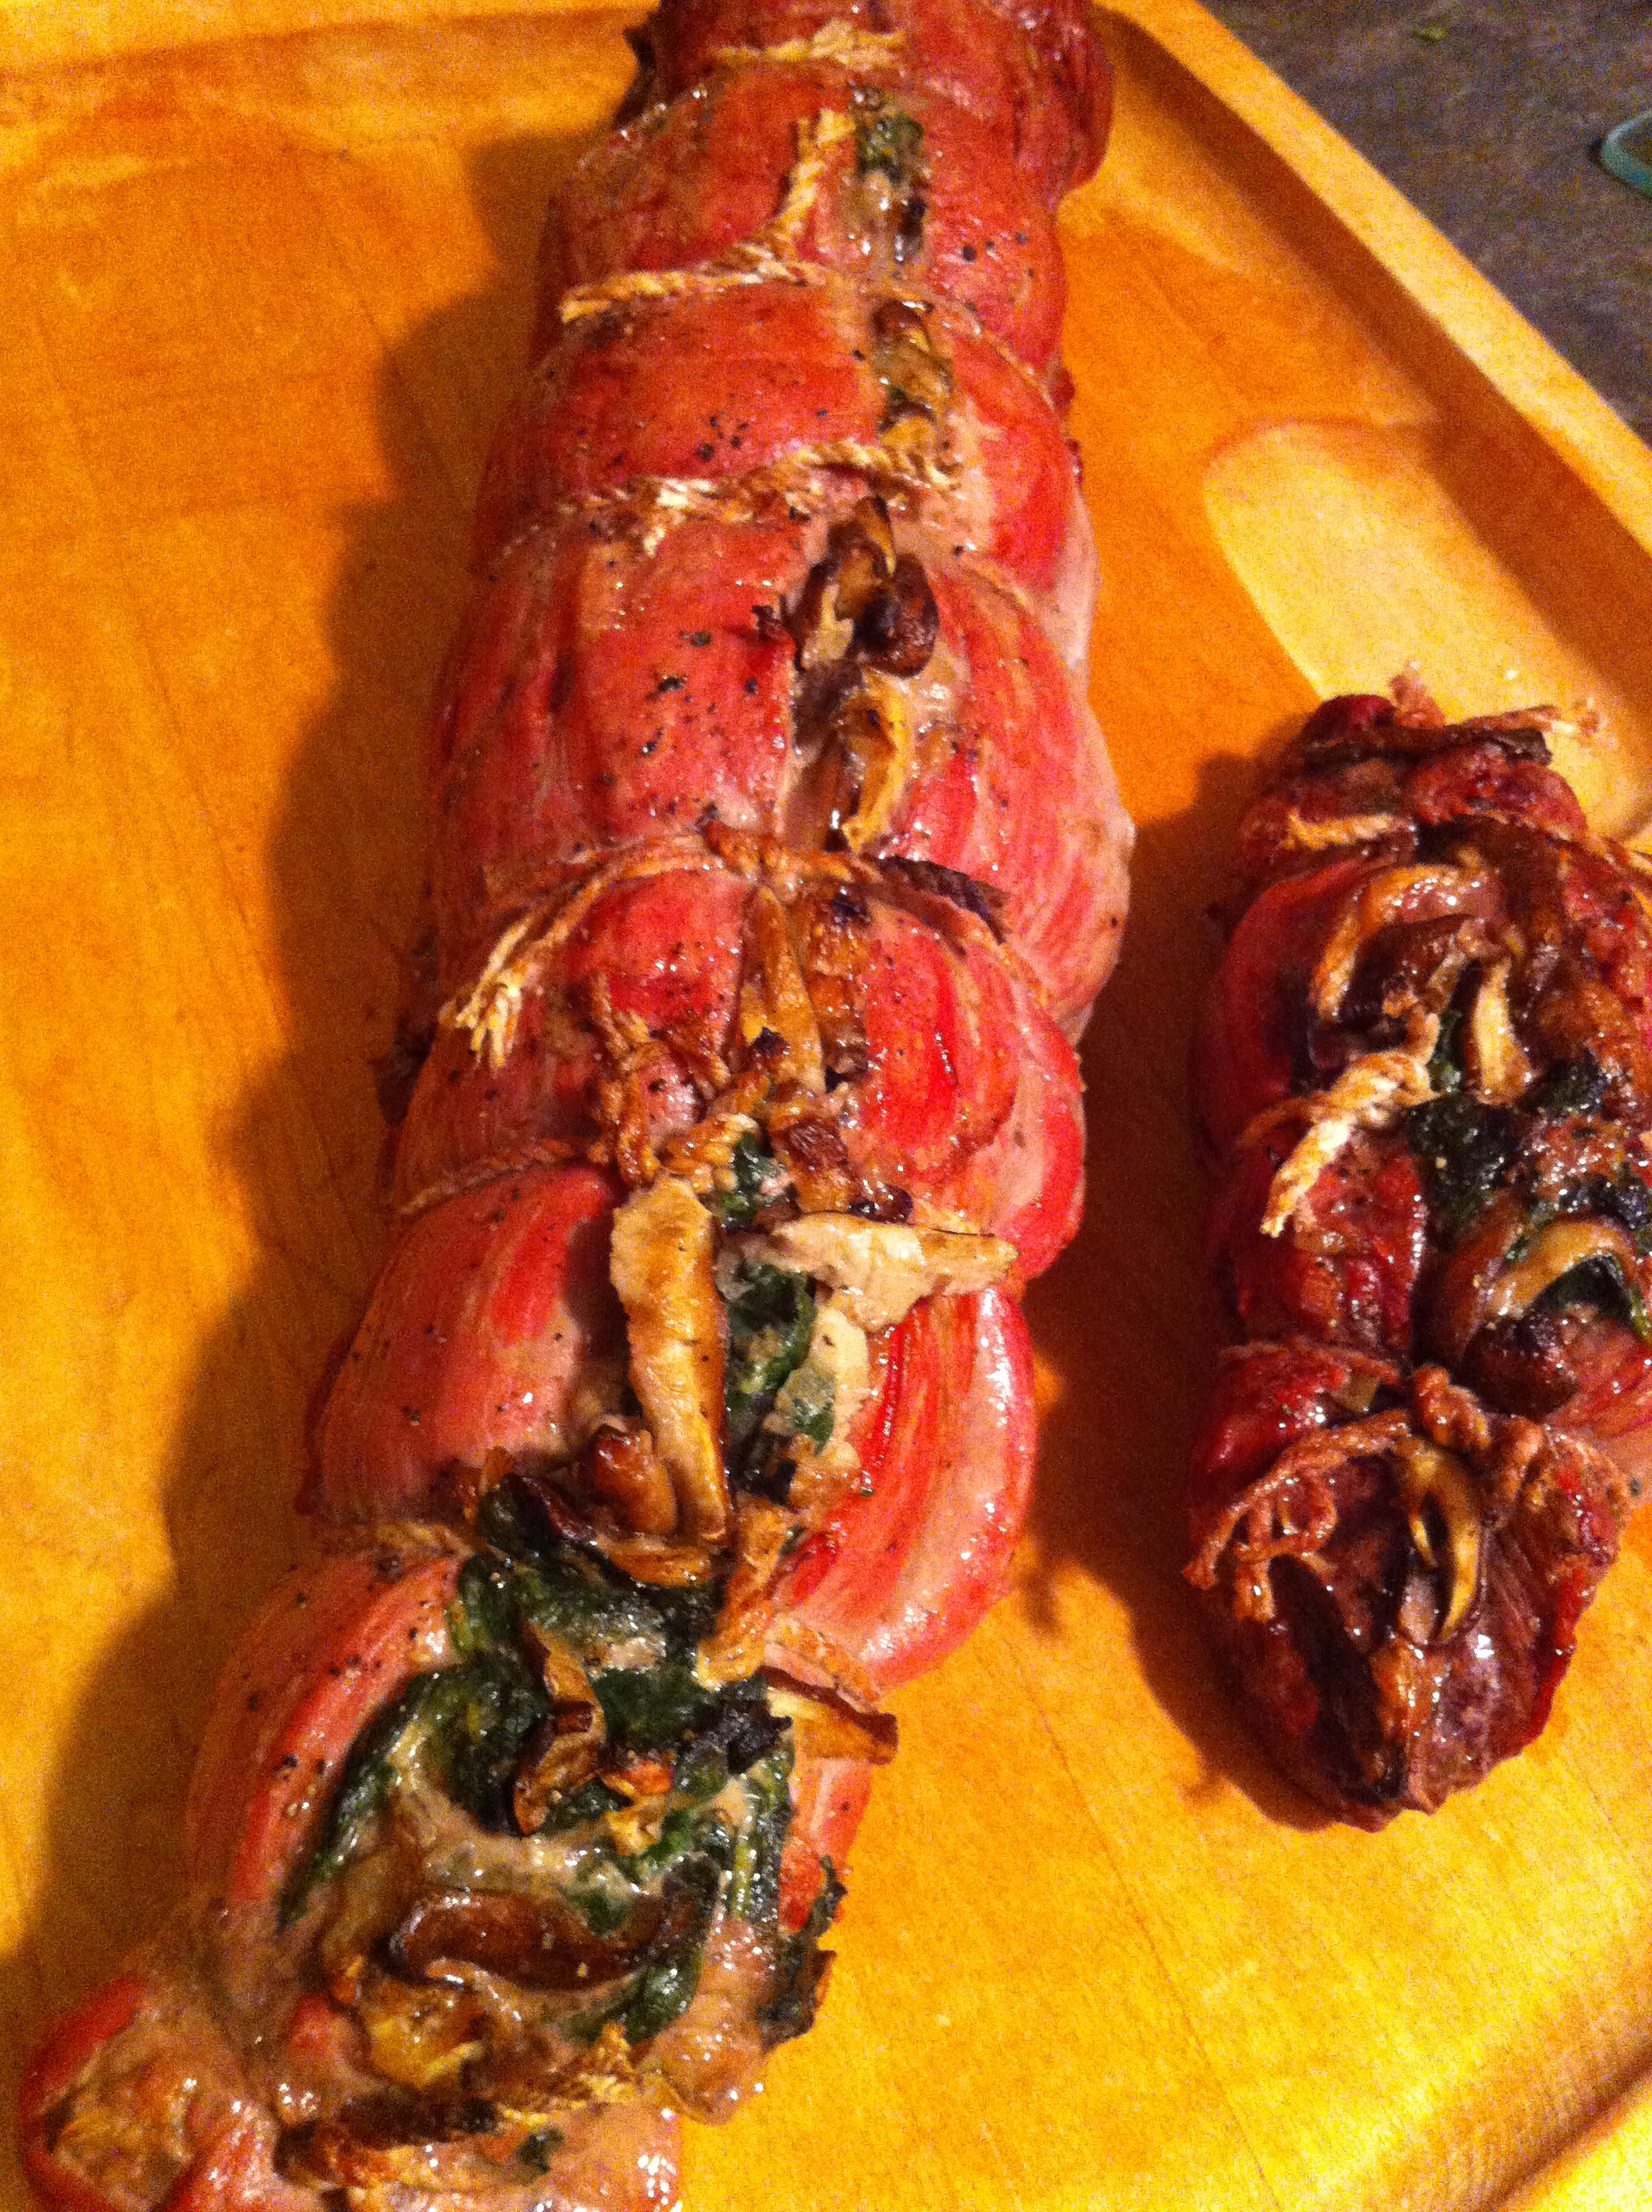
If you end up having a smaller piece of beef like we had, make sure you watch it closely so that you don’t over cook it- it will be finished earlier than the larger tenderloin. Whats not to love? I promise you’ll enjoy!!

Mushroom-Spinach Stuffed Beef Tenderloin (click for printer friendly version)

Ingredients:

  • 1 Tablespoon butter
  • 3 cups sliced shiitake or button mushroom caps (about 6 oz.)
  • ½ cup shallots
  • 2 Tablespoons brandy
  • 1 tsp olive oil
  • 8 cups torn spinach or  1 bag baby spinach
  • 1 clove garlic, minced
  • 1 tsp slat, divided
  • ¾ tsp black pepper
  • 1 (4-pound) Trimmed beef tenderloin
  • 1 tsp olive oil
  • cooking spray

Directions:

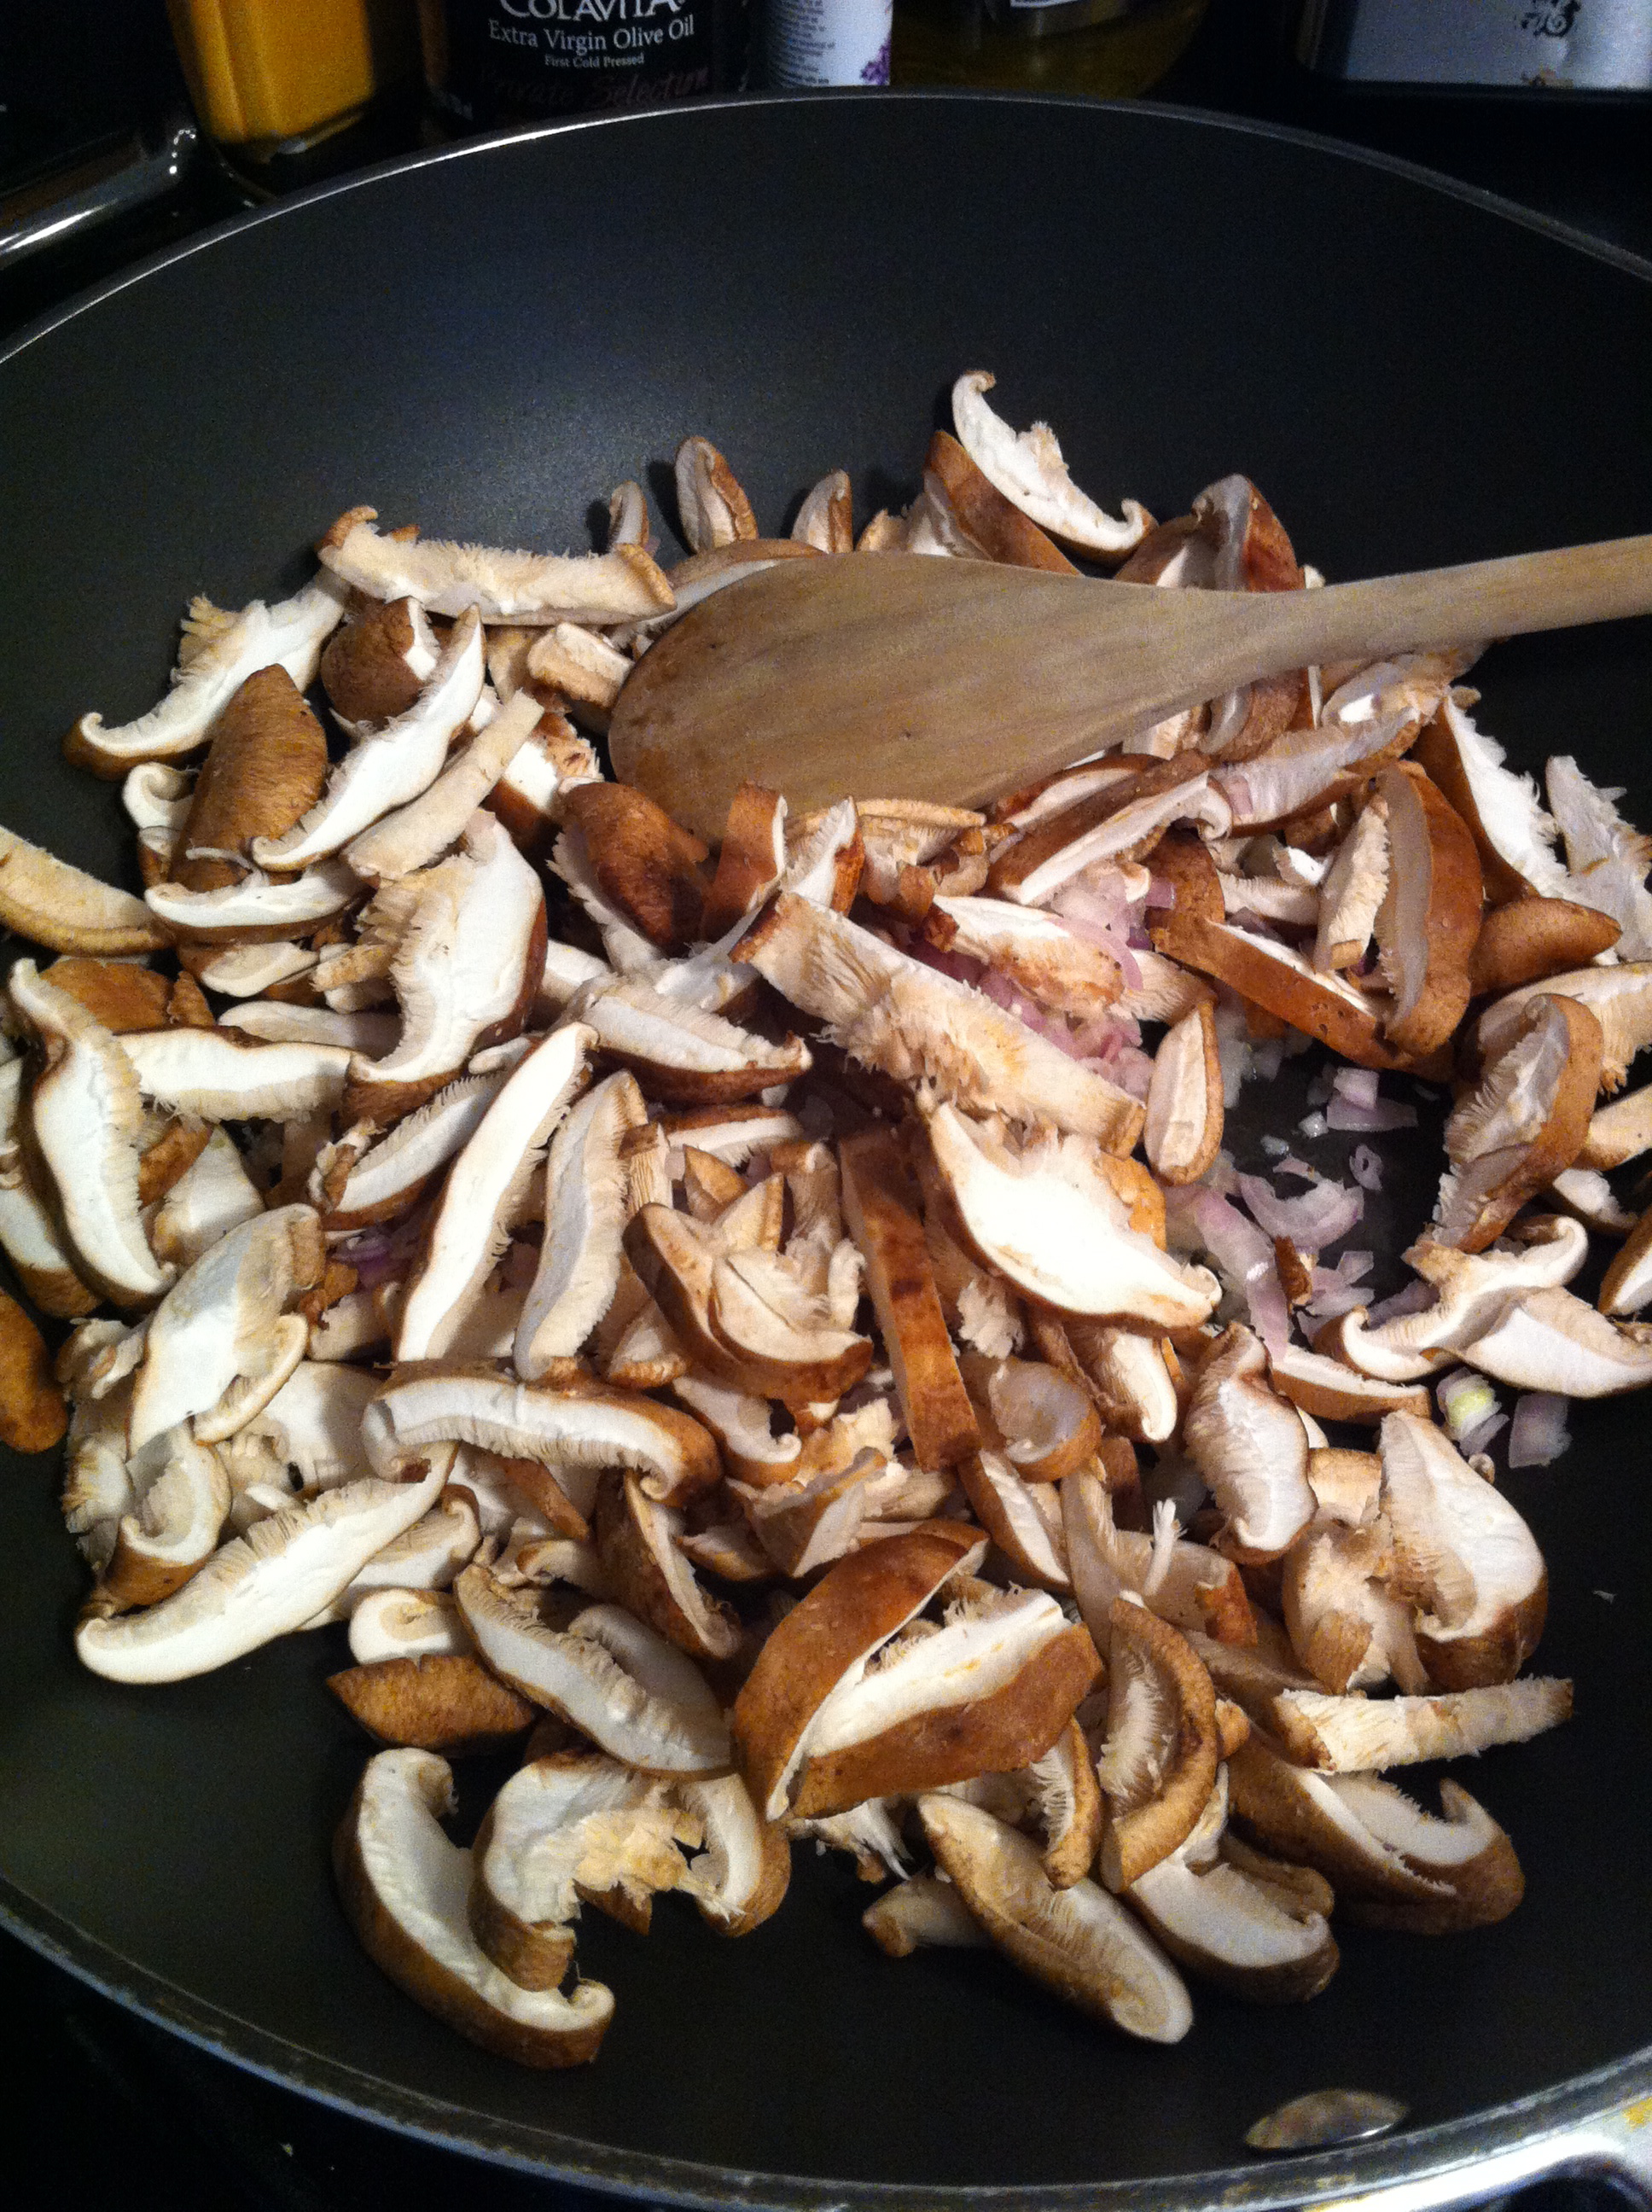
  1. Melt butter in a large nonstick skillet over med-high heat.  Add the mushrooms and shallots, sauté for 4 mins.  Add brandy, cook for 30 seconds or until liquid evaporates.  Spoon mixture into a large bowl, set aside.
  2. Heat 1 tsp oil in pan over medium heat. Add spinach and garlic, sauté 30 seconds or until spinach wilts.  Place spinach mixture in a colander, pressing with the back of a spoon until barely moist.  Add spinach mixture, ¼ tsp salt, and ¼ tsp pepper to mushroom mixture, stir well.
  3. Trim fat from tenderloin. To butterfly tenderloin slice lengthwise, cutting to, but not through, the other side.  Open halves, laying the tenderloin flat.  Place heavy duty plastic wrap over tenderloin, flatten to an even thickness using a meat mallet or rolling pin. Sprinkle ¼ tsp salt and ¼ tsp pepper over tenderloin. Spread spinach mixture down center of tenderloin to within ½ inch of sides, fold over 3 or 4 inches of small end.  Toll up tenderloin jelly roll fashion, starting with the short side.  Secure a 2 inch intervals with heavy string.  Brush olive oil over tenderloin, sprinkle with salt and pepper.  Place in broiler pan coated with cooking spray, cover and chill.
  4. To serve, preheat oven to 500 degrees
  5. Bake at 500 for 35 minutes or until the thermometer registers 145 (medium-rare) or 160 (med). You don’t want to over cook this cut of beef. Since it tapers at the ends those pieces will be more well done.  Place tenderloin on a large serving platter, let stand for 10 minutes before slicing.  Serve warm or chilled.

Serves 8 or more depending on size of tenderloin.  35 minutes is usually fine even if thermometer does not register 145 degrees.